In the past, if you received a ZIP file on your PC, you would have had to rely on a third-party tool to open it. One of the popular third-party tools was WinZip. But, if you own a Windows 10 or 11 PC, you can easily zip and unzip a ZIP file. Here’s how to do so without any third-party apps:
Unzip a File Using File Explorer
The Windows File Explorer offers a convenient way to access files and locations on your PC. Through File Explorer, you can also open a ZIP file. Here’s how to do so: Step 1: Click the Start button and type File Explorer to search for the app.
Step 2: From the results, click on the File Explorer app to open it.
Step 3: Navigate to the ZIP file using the locations directory on the left side of File Explorer.
Step 4: Right-click on the ZIP File to launch a menu.
Step 5: From the options, click on Open with Windows Explorer.
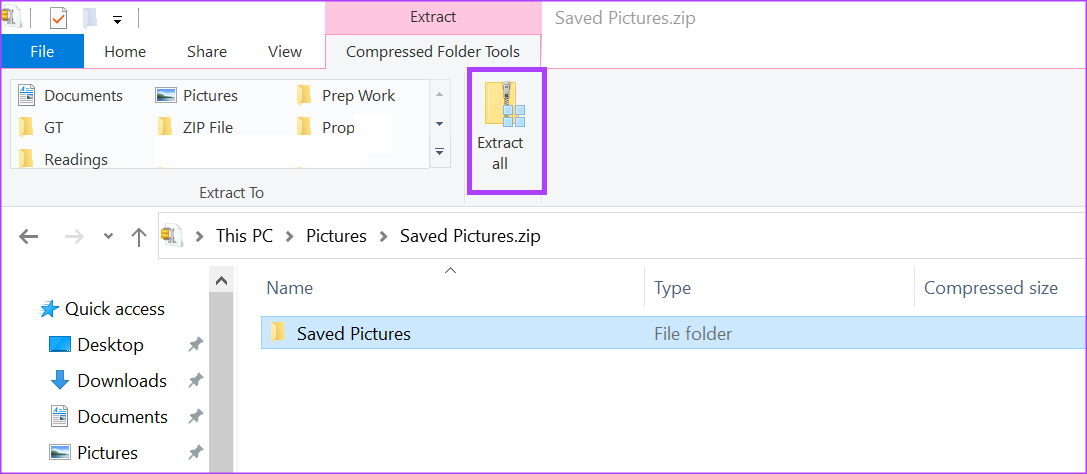
Step 6: At the top of the File Explorer Ribbon, click on Extract All to launch a window.
Step 7: From the window, select a destination for the unzipped files by clicking Browse.
Step 8: Click on Extract after selecting your file destination.
Your files should now be easily accessible in a new folder, in the location of your choice.
Unzip a File Using Command Prompt
You can take help of the Command Prompt to unzip a file on your PC. For that, input the right instructions into the command line and run it. Here’s how to do so: Step 1: Click on the Start button and type File Explorer to search for the app.
Step 2: From the results, click on the File Explorer app to open it.
Step 3: Navigate to the ZIP file using the locations directory on the left side of File Explorer.
Step 4: Click on the ZIP file, and click the address bar showing the directory of your file.
Step 5: Type cmd in the address bar and hit Enter to launch the Command Prompt.
Step 6: When the Command Prompt window appears, enter the following and hit Enter. The ‘filename’ needs to be the actual name of your ZIP folder. If your file name has spaces, enclose the name within quotations marks i.e. tar -xf “file name.ZIP” in the command. Step 7: Hit Enter on your keyboard to run the command. The unzipped files should now be in the same location as the zip file.
Unzip a File Using PowerShell
PowerShell works similarly to Command Prompt in the sense that you can input commands to initiate certain tasks. Here’s how to unzip a file on Windows 11 using PowerShell. Step 1: Click the Start button and type File Explorer to search for the app.
Step 2: From the results, click on the File Explorer app to open it.
Step 3: Navigate to the ZIP file using the locations directory on the left side of File Explorer.
Step 4: Click on the ZIP file, and on the Ribbon at the top of File Explorer, click Copy Path.
Step 5: Click on the Start button and type PowerShell to search for the app.
Step 6: From the results, click on Run as Administrator beside the PowerShell app to open it.
Step 7: In the PowerShell app, type the following: Step 8: Paste the path copied from File Explorer after the command. Hit Enter on your keyboard to run the command.
Extracting Text From Images on Windows 11
Apart from using in-built features and apps on Windows 11 to open ZIP files, you can also extract text from images. You can do this using an built-in app such as OneNote or an external app like Google Drive.


