But some users need help removing the deleted files from the Bin. If you are also facing the same, here are some solutions for when you cannot empty the Trash Bin on your Mac.
1. Check if Any Files Are in Use
The most common reason you cannot empty the Trash Bin on your Mac is that some deleted files are still open or in use. If you don’t wish to delete the file and wish to use it permanently, you can restore it on your Mac. But to empty the Trash Bin, you should stop using any deleted files.
2. Use Keyboard Shortcut to Empty Trash
If you still cannot permanently remove your files using the Trash Bin, you can try using a keyboard shortcut to delete your files. Select them and press Command + Option + Delete to delete them permanently.
3. Restart Your Mac
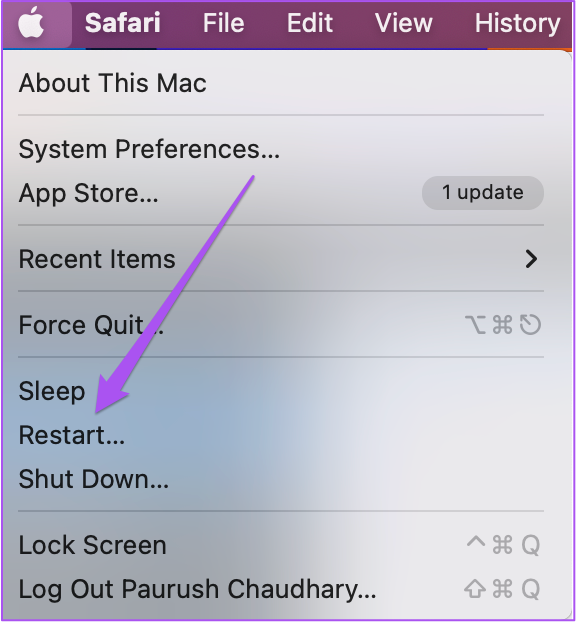
We recommend you to restart your Mac since the Trash Bin is a system app. Restarting your Mac will kill and cease all the stuck transfers or processes happening to the Trash Bin. Step 1: Click the Apple logo in the top-left corner.
Step 2: Select Restart.
Step 3: After your Mac reboots, open the Trash Bin to delete a few files.
4. Empty Trash Bin Using Right-Click
If you can’t open the Trash Bin on your Mac, you can perform a right-click using your mouse and empty all its contents. Here’s how to use the right-click to empty the Trash Bin. Step 1: Right-click on the Trash Bin icon in the bottom-right corner of the Dock.
Step 2: Click on Empty Bin from the popup.
Step 3: Click on Empty Bin again in the prompt on the screen to confirm your choice.
5. Check if Deleted Files Are Locked
After you delete files from Trash Bin, it’s extremely difficult to recover them. So if you realize that one of those files contained some critical information, you’re out of luck. So to prevent accidentally deleting important files, macOS gives you the option to lock your files in the Trash Bin to prevent them from getting removed permanently. If you have any locked files in the Trash Bin, here’s how to unlock them and try emptying the trash. Step 1: Open the Trash Bin on your Mac.
Step 2: Right-click on the file that has the Lock icon.
Step 3: Click on Get Info from the list of options.
Step 4: Click the checkbox next to Locked to disable the feature.
Step 5: Close the window and click on Empty in the top-right corner to check if the problem is solved.
6. Empty Trash Bin Using the Terminal
This solution is best suitable for folks who have an experience and are comfortable using the Terminal app on the Mac. Here’s how you can use Terminal on your Mac to empty the Trash Bin. Step 1: Press Command + Spacebar to open Spotlight Search, type Terminal, and press Return.
Step 2: Type the following command in the Terminal window and press the Spacebar. Do note that you don’t have to press Return or any other key after that.
Step 3: While keeping the Terminal window open, click the Trash Bin icon on the Dock.
Step 4: Select all the files in the Trash Bin that you want to remove. Step 5: Drag and drop those files in the Terminal window. Step 6: After all your file paths are visible, press Return.
Step 7: Enter the passcode of your Mac and press Return. It won’t appear on the screen but that’s not a problem.
Terminal will successfully delete all your files from the Trash Bin. You can check the same by opening the Trash Bin again.
7. Check for macOS Update
Since we are dealing with a system app, you can try updating the version of macOS to remove any bugs or glitches that are causing this issue with file deletion. Step 1: Press Command + Spacebar to open Spotlight Search, type Check For Software Updates, and press Return.
Step 2: If an update is available, download and install it. Step 3: After your Mac installs the update, try emptying the Trash Bin again.
Remove What’s Not Needed
These solutions will help you remove unnecessary files from the Bin and save space on your Mac. You can also read our post on how to use iCloud to save storage space on Mac.


