While you may not notice the increase in CPU usage when you’re casually browsing, the increased CPU usage can prevent other important applications from running smoothly. Don’t worry. We’ve compiled the necessary fixes to combat Edge’s high CPU usage on Windows 11.
1. Close Unused Tabs
One of the first things you can do is to close all the unused tabs in Edge, especially if you have the habit of keeping multiple tabs open. While multiple tabs may sound convenient, they consume a significant amount of system resources, such as CPU and memory. That’s true when those tabs have video or audio streaming services sites open.
2. Update Microsoft Edge
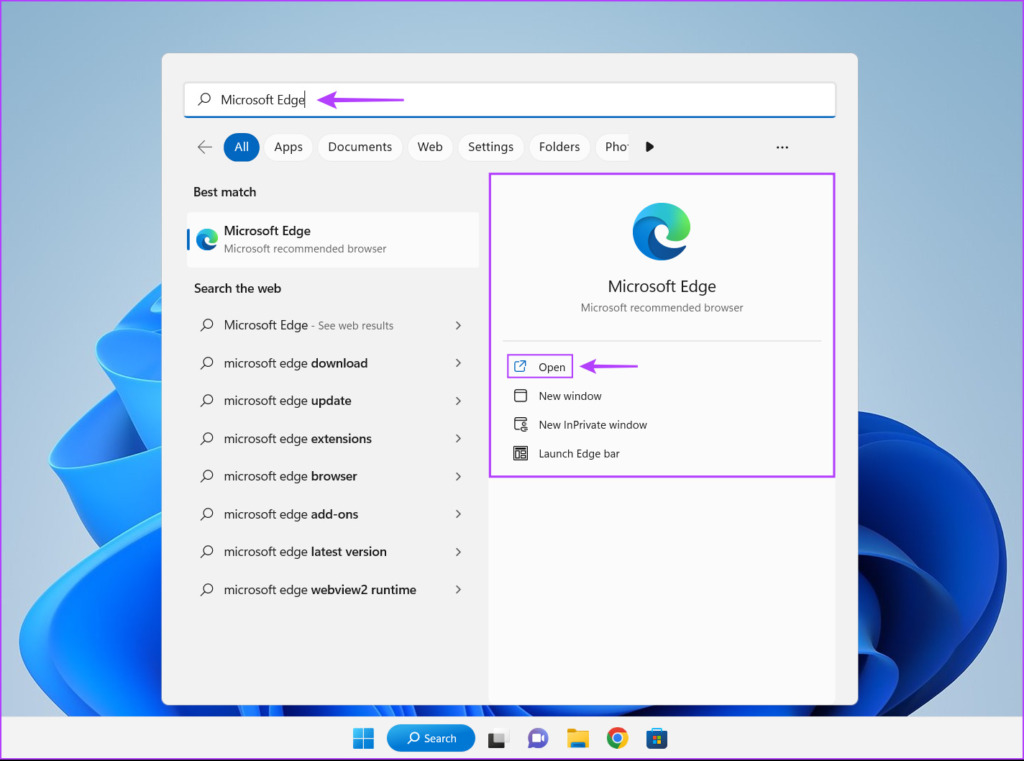
There’s a chance a bug in Microsoft Edge causing it to utilize more CPU than usual. In such cases, you’ll need to check if there’s any new update available for Microsoft Edge. Here’s how to check for updates In Microsoft Edge: Step 1: Press the Windows + S keys and type Microsoft Edge. From the result for Microsoft Edge, click on Open. Step 2: Click on the horizontal three-dot icon in the upper right corner. Step 3: When a menu appears, scroll down and click on Settings. Step 4: Click on the last About Microsoft Edge section and let it search for the latest update. Alternatively, you can type edge://settings/help in the address bar, and press Enter.
3. Clear Browser Cookies and Cache
Outdated cookies, cache, and other website data can also be the reason why Microsoft Edge utilizes more CPU than usual on your Windows 11 computer. We recommend clearing cookies and cache in Microsoft Edge before relaunching it to fix your issues. Here’s how you can do that: Step 1: Press the Windows + S keys and type Microsoft Edge. Then, from the result for Microsoft Edge, click on Open. Step 2: Type edge://settings/privacy in the address bar and press Enter. Step 3: Scroll down to the Clear browsing data section and click on ‘Choose what to clear.’ Step 4: Click on the Time range drop-down and select All time. After that, select the checkbox beside ‘Cookies and other site data’ and ‘Cached images and files.’ Then, click on Clear now.
4. Disable Unnecessary Extensions in Microsoft Edge
Extensions can help improve your browsing experience by adding additional functionality to Microsoft Edge. However, too many extensions running at once can also to high CPU usage. In case you have installed multiple extensions in Microsoft Edge, you will need to disable the ones that are left unused by following the steps listed below: Step 1: Press the Windows + S keys and type Microsoft Edge. Then, from the result for Microsoft Edge, click on Open. Step 2: Click on the Extensions (puzzle piece) icon in the top-right corner. In case you don’t see the Extensions (puzzle piece) icon, you can type edge://extensions in the address bar, and press Enter. Then, follow along from Step 4. Step 3: When the Extensions menu appears, click on Manage extensions. Step 4: On the page that opens, disable the browser extensions you’re not using by clicking on their respective toggles.
5. Enable Efficiency Mode
Unlike other web browsers, Microsoft Edge offers a built-in efficiency mode that can help reduce the overall CPU and memory utilization if you want to reduce your computer’s power consumption. Here’s how to enable the same on your Windows computer: Step 1: Press the Windows + S keys and type Microsoft Edge. Then, from the result for Microsoft Edge, click on Open. Step 2: Click on the horizontal three-dot menu in the top-right corner. Step 3: From the menu that appears, click on Performance. Step 4: Click on the Efficiency mode drop-down and select Always.
6. Disable Startup Boost in Edge
Startup Boost in Microsoft Edge preloads a few elements in the browser to give you a faster startup experience of the browser. However, disabling it can help reduce the consumption CPU resources. Here’s how you can disable it on your computer: Step 1: Press the Windows + S keys and type Microsoft Edge. Then, from the result for Microsoft Edge, click on Open. Step 2: Type edge://settings/system in the address bar and press Enter. Step 3: Turn off the toggle for Startup Boost.
7. Disable Microsoft Defender SmartScreen
If none of the previous solutions helped fix Microsoft Edge’s high CPU usage, the last thing you can do is disable Microsoft Defender SmartScreen in Microsoft Edge. Though the Microsoft Defender SmartScreen in Microsoft Edge is a very useful security feature, it requires your computer to constantly monitor each and every site you visit or the files you download, which can increase the overall CPU usage. Note: Disabling Microsoft Defender SmartScreen makes your computer vulnerable to threats and malware. So you will need to be careful about the sites you visit and the content you download from the internet. Here’s how you can disable Microsoft Defender SmartScreen in Microsoft Edge on your computer: Step 1: Press the Windows + S keys and type Microsoft Edge. Then, from the result for Microsoft Edge, click on Open. Step 2: Type edge://settings/privacy in the address bar and press Enter. Step 3: Scroll down to the Security section and disable the toggle for Microsoft Defender SmartScreen.
Stop Microsoft Edge From Hogging up the CPU
Following the abovementioned solutions, you can easily prevent Microsoft Edge from hogging up your computer’s CPU. This will ensure that your computer can keep running other important applications even when you have Microsoft Edge running in the background. However, if you continue having troubles, it might be a good time to replace Microsoft Edge with other Chromium-based web browsers for Windows.


![]()


