While making changes to Registry is quite simple, things can sometimes go horribly wrong. The slightest mistake can render the entire database inaccessible. Or worse, your computer might even fail to boot. This post will discuss the steps involved in backing and restoring Registry on Windows 11. So, let’s start.
How to Backup Registry Files on Windows 11
There are a couple of ways you take a backup of the Registry. You can either create a backup from the Registry Editor or use System Restore to achieve the same.
1. Use Registry Editor
To back up registry files via the Registry Editor, follow the steps below. Step 1: Open Windows Search, type in registry editor and click on Run as administrator to open Registry Editor with administrative privileges.
Step 2: Click on the File menu at the top and select Export.
Step 3: Type in a suitable name for the file and pick a location. Under Export range, select All and hit Save.
Wait for a few seconds and the backup file will be created on your PC.
2. Use System Restore
While the above method is quite straightforward, you can also use System Restore on Windows to backup your registry files. This can be useful when Windows fails to boot correctly and you want to restore your registry files via the Advanced Startup environment. Step 1: Open the Start menu, type in create a restore point, and press Enter.
Step 2: Under System Protection, select your system drive. Then click on Configure.
Step 3: In the following window, select the ‘Turn on system protection’ option under Restore Settings. Hit Apply followed by OK.
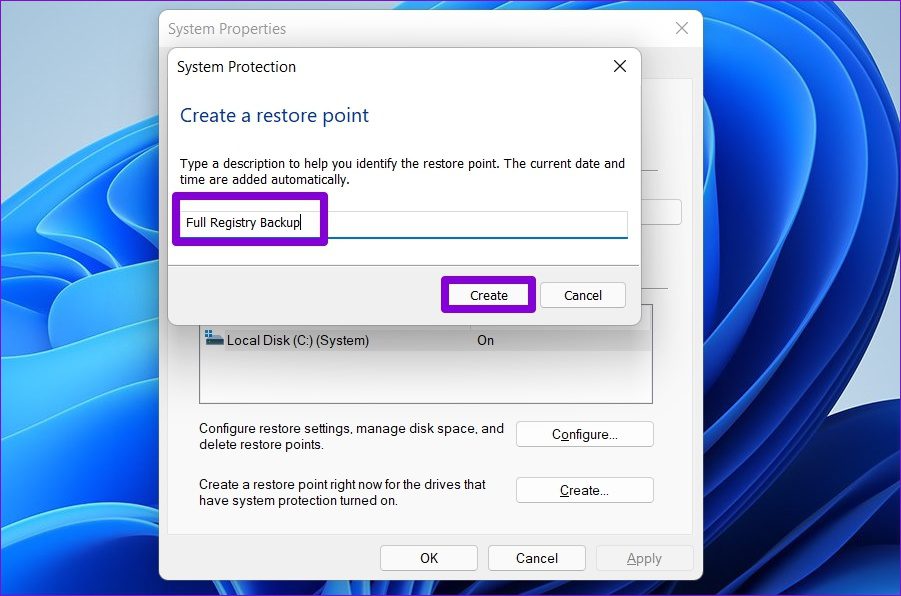
Step 4: Next, click on Create.
Step 5: Enter a suitable name for the restore point and hit Create again.
Windows will take a few moments to create a system restore point and it will backup all your registry files in the process.
How to Restore Registry on Windows 11
Restoring your registry files on Windows 11 is just as easy if something goes wrong. Depending on how did you take a backup of the Registry files, you can use the Registry Editor or System Restore to restore registry files.
1. Use Registry Editor
To restore Registry files using Registry Editor, follow the steps below. Step 1: Click on the Search icon on the Taskbar, type in registry editor, and click on Run as administrator. Step 2: Expand the File menu and select Import from the list.
Step 3: Locate and select your backup file. Then click on Open.
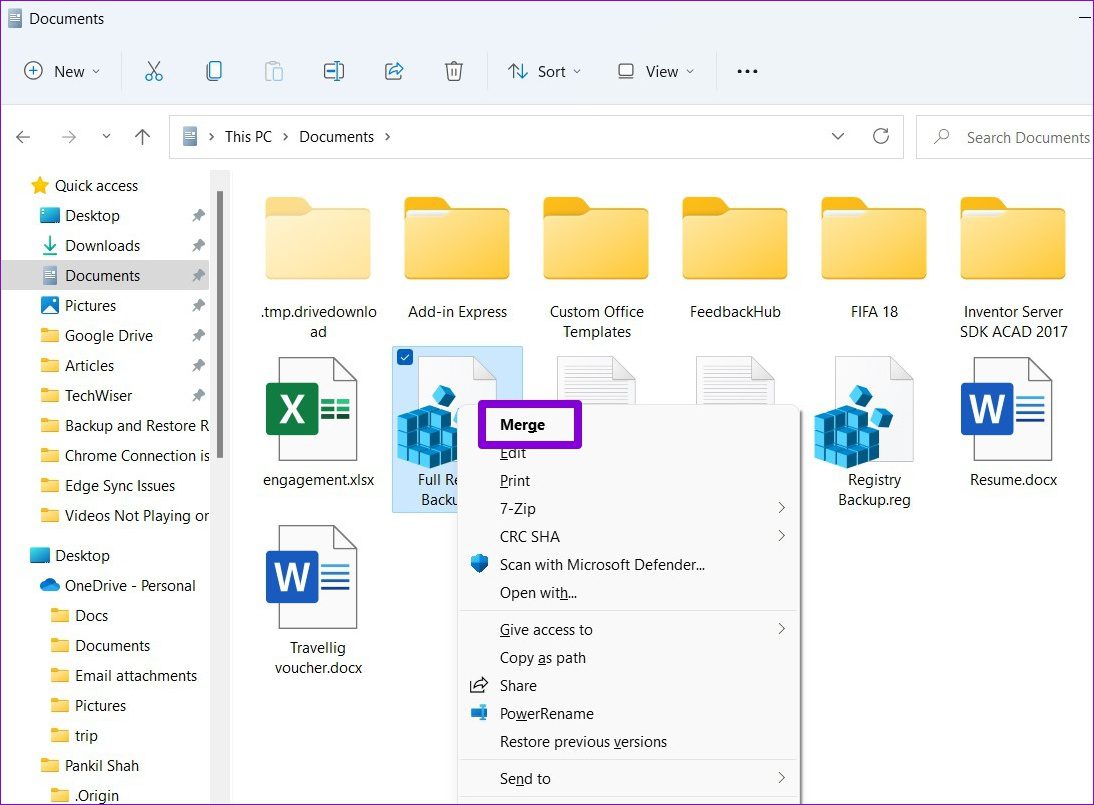
Wait for your registry files to be restored. Alternatively, you can also restore the registry file by right-clicking on it and selecting Merge.
2. Use System Restore
Step 1: Press Windows key + S to open Windows Search. Type in create a restore point, and select the first result that appears. Step 2: Under System Protection, click on System Restore.
Step 3: You’ll be given two options. Select ‘Choose a different restore point’ and hit Next.
Step 4: Select the restore point that you created earlier. Then hit Next. Step 5: Review your restore point and click on Finish to start the restoration process.
Bonus: How to Backup and Restore Individual Registry Keys on Windows 11
If you’re making changes to only a select few parts of the registry, which is more often the case, then you can consider backing up that specific section of Registry instead of creating a complete backup. It’s quite simple to do so. Here’s how. Step 1: Press Windows key + R to open the Run dialog. Type in regedit in the box and press Ctrl + Shift + Enter to open it with Administrator rights.
Step 2: Use the left pane to navigate to the key you wish to backup. Right-click on it and select Export.
Step 4: Enter a suitable name for the backup file and hit Save. That’s about it. Your registry key will be backed up. You can restore your backup at any point, in case things go wrong. Just double-click on the backup file and click on Yes when asked to confirm.
Better Safe Than Sorry
Having a backup to fall back to is always great. But even then, you should only make changes to your Registry once you’ve exhausted all other options. You can pick either of the methods you’re comfortable with and keep Registry safe.


