You’ll need to keep in mind is that the connecting device should support Audio Sharing. Thankfully, most modern Apple devices support this feature. All iPhones after iPhone 8 and iPad Pro first-generation support are compatible for the record. So if you are looking to share audio over two audio devices, here’s how to connect two AirPods to a single iPhone, iPad, or MacBook. Let’s get started, shall we?
How to Connect Two AirPods to an iPhone or iPad
It’s understood that you’ve already connected the first pair of AirPods or AirPods Pro (see best AirPods Pro features) to your iPhone or iPad. Step 1: Unlock your iPhone and stay on the home screen. Step 2: Now, open the case of your AirPods or AirPods Pro and hold it near your iPhone for some time.
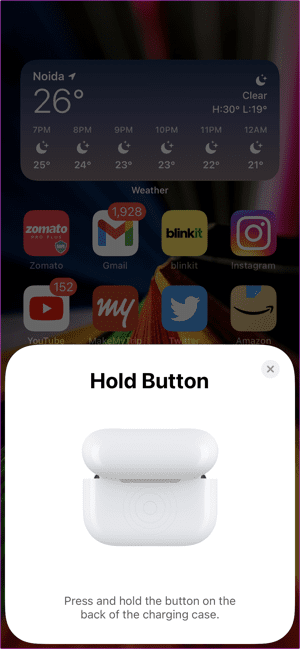
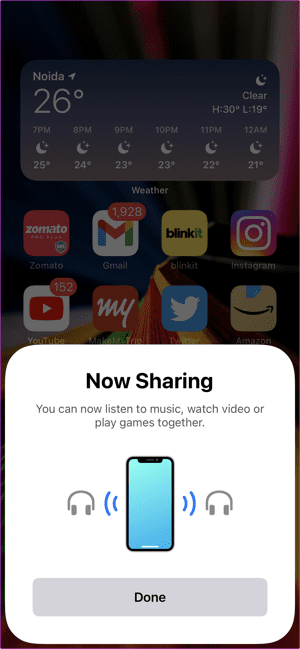
You should see the animation to connect the AirPods. You need to press the Temporarily Share Audio button, as you may have guessed. Once done, press and hold the button on the back of the charging case to complete the process.
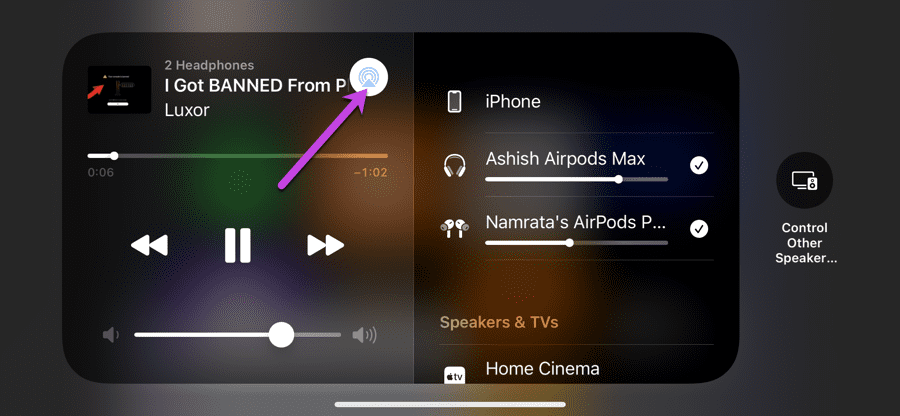
Step 3: Now, open the Bluetooth settings on your iPhone, and you should be able to see both the AirPods connected to your phone. The good thing about this process is that iOS gives you individual control over the volumes. Step 4: To control the volume individually, play a video, and pull down the Control Center. Next, hit the AirPlay icon and see the individual volume control.
How to Connect Two AirPods to a Single MacBook
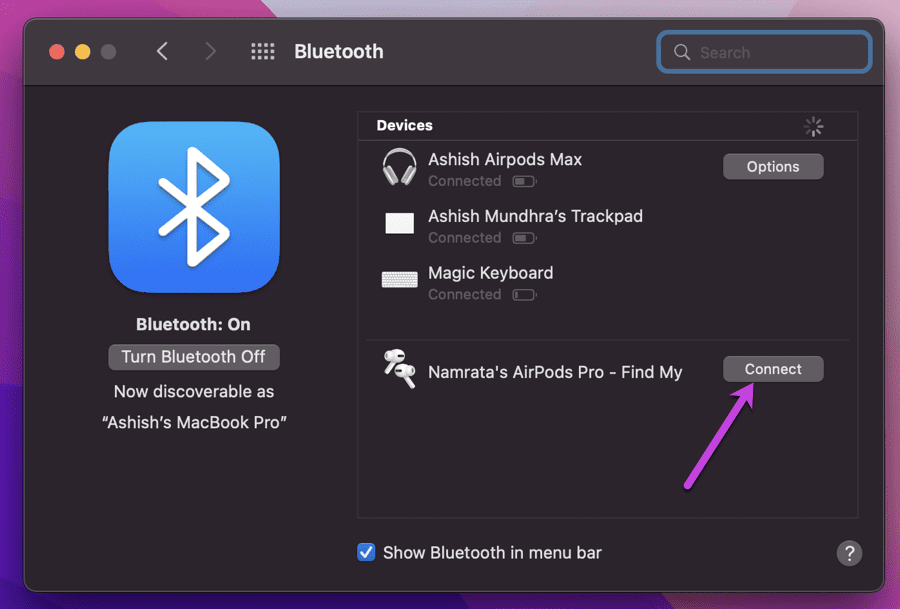
Interestingly, you can also play audio through different AirPods on your MacBook Air or MacBook Pro. Unfortunately, unlike the above, it’s not a simple 1-2-3 process and requires a bit of tinkering in the system settings. Nevertheless, it’s doable. So, the next time you want to share your Mac’s audio through two AirPods or AirPods Pro, the following is what you should do. We assume you’ve paired the first pair of AirPods to the Mac. Step 1: Reset the second pair of AirPods to connect to the Mac. To do so, press and hold the Back button on your earphones till you see the LED light flash white. Step 2: Open the Control Center on your Mac and navigate to the Bluetooth Settings. Hit the Bluetooth Preferences option, and you should see the other pair of AirPods on the menu.
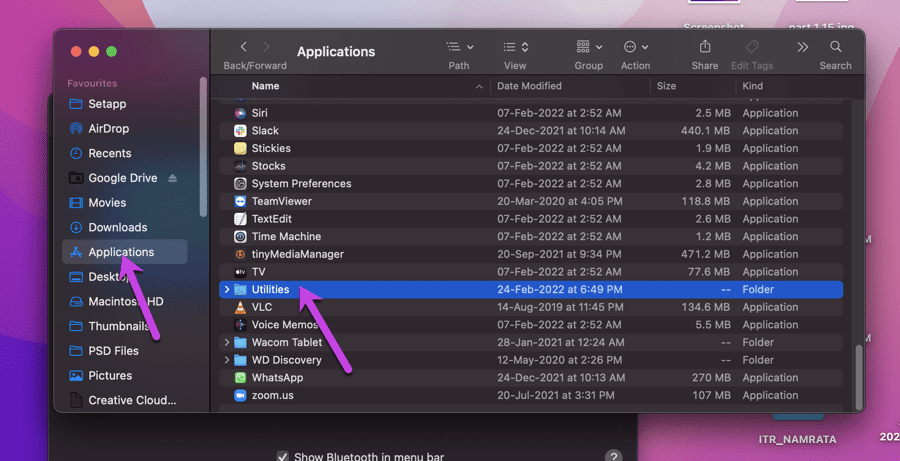
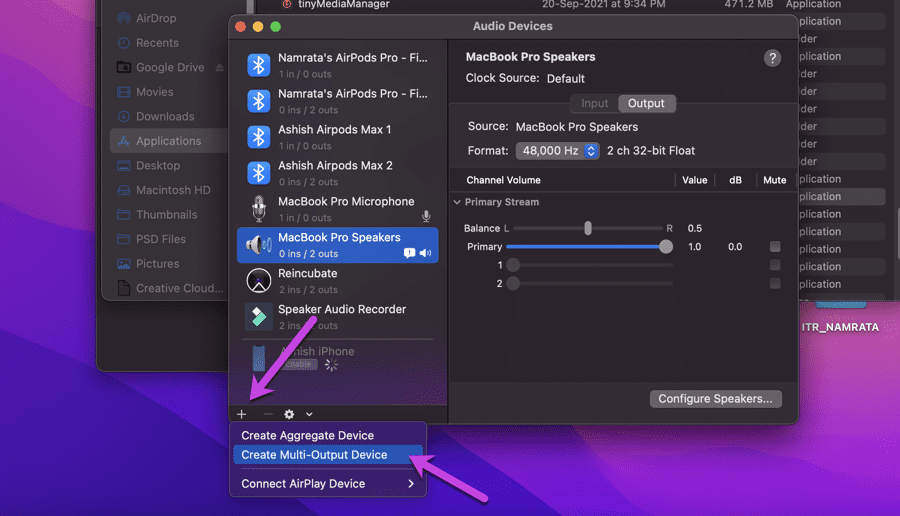
Hit the Connect button. Now, that’s half of the bridge crossed. Step 3: Open Finder and select Applications from the left panel. Next, scroll down until you see Utilities and double-click on the Audio MIDI Setup option.
This will open a small window. Now, click on the little Plus-icon below and select Create Multi-Output Device from the list.
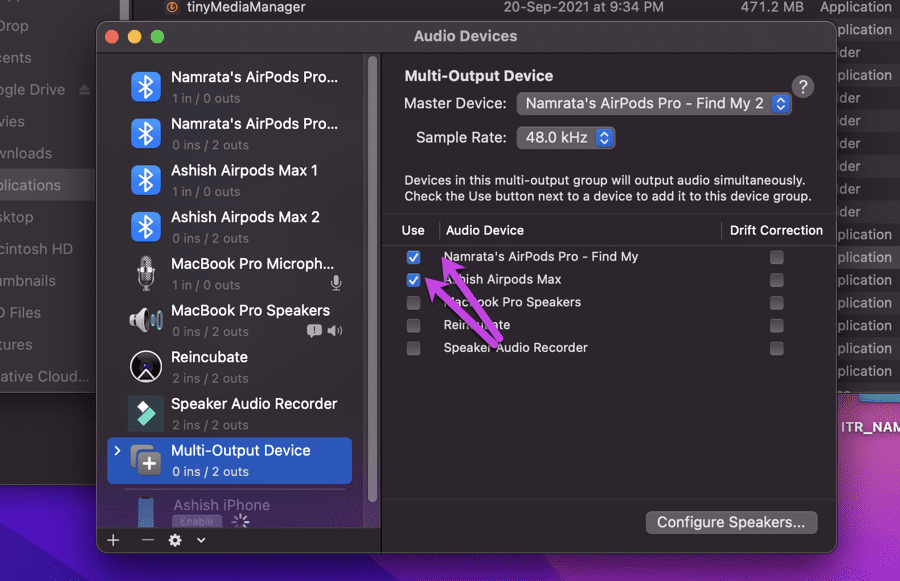
Step 4: Next, uncheck the default MacBook speakers. Instead, select the two AirPods and close the window.
Step 5: Once done, hit the Apple icon on the upper left corner and select System Preferences from the menu.
The odds are that the window will open to the Bluetooth Settings. If yes, click on the Back button and head over to Sound. If not, click on the Sound option.
Now, all you need to do is click on the Multi-Output Device. That’s it! Now, play a video or audio file and enjoy the audio shared between the connected AirPods. Yes, you can thank me later. Unlike the above process, you can’t control the volume individually since the system delivers the same audio to two different devices. Whenever you need to disconnect, open Bluetooth preferences and tap on the ones you want to disconnect. Do note that if you are using headphones like the AirPods Max, you may need to often tap on the Connect button since they disconnect whenever you remove them from your ear.
Stay Connected
The Apple ecosystem comes with plenty of benefits, and connecting two AirPods to a single iPhone, iPad, or MacBook is one of the many advantages. Interestingly, this feature is supported not only on the Apple AirPods but also on other audio accessories like the AirPods Max, Powerbeats Pro, and some Beats Solo wireless earphones.
