It’s helpful when you add a Hard Disk Drive or Solid State Drive as storage expansion to complement the storage running Windows 11. That said, creating partitions on your hard drive is tricky. To help you through that, we’ll explain everything you need to know about creating or modifying hard drive partitions on your Windows 11 PC.
How to Create Hard Drive Partitions on Windows 11
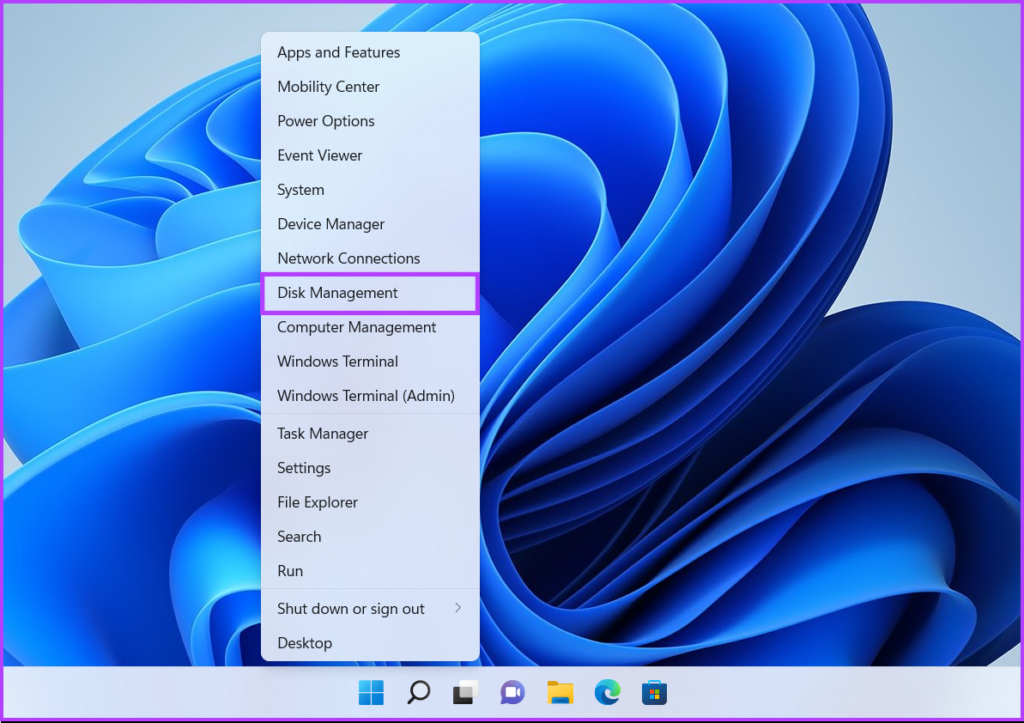
Windows offers the Disk Management utility to undertake any storage-related tasks on your Windows PC. It’s a solid go-to option when you have to format a storage drive or create a new partition. Here are the steps to create a disk partition using the Disk Management utility on your Windows 11 PC: Step 1: Press the Windows + X keys to access the Power User Menu and click on Disk Management. Step 2: Right-click on the disk where you want to crate a partition for. Then, click on Shrink volume. Step 3: Type in the amount of space to shrink in MB to determine the partition size. You’ll need to be mindful about the number you enter. Next, click on Shrink. Step 4: Right-click on the newly created Unallocated partition (one with the grey lines) and select ‘New Simple Volume.’ Step 5: When a New Simple Volume Wizard window appears on the screen, click Next. Step 6: If you plan on creating additional partitions, specify the partition size you want to create. Then click on Next. Step 7: Click on the ‘Assign the following drive letter’ drop-down list to select a drive letter for your partition. Then click on Next. Step 8: Select an applicable File system (by default, choose NTFS) and type a name in the box next to the Volume label option. Then click on Next. After that, a File Explorer window will open to show you the newly created drive partitions. In our case, they were New Volume (D:) and New Volume (E:). Repeat the process to create more partitions.
How to Merge Hard Drive Partitions on Windows 11
While this is very convenient, the partitions at times remain unutilized or under utilized. In such cases, you may need to merge your existing hard drive partitions to create a larger space to store more files in a single partition. Before proceeding any further, take a backup of your essential files. Merging disk partitions with the Disk Management utility will erase all the data present on the existing partition that you want to merge with the other partition. Here’s how you can easily merge hard drive partitions on your Windows 11 PC: Step 1: Press the Windows + X keys to access the Power User Menu and click on Disk Management. Step 2: Right-click on the secondary partition (New Volume D: in our case) and select Delete Volume. Step 3: If you have taken a backup of the data present on the chosen partition, click on Yes. Meanwhile, if you haven’t taken a backup of the files present on the secondary partition, click on No, and repeat steps 1, 2, and 3 after creating a backup. When you choose Yes to delete the partition, the utility will remove the partition and label it as Unallocated with a black bar above it. Step 4: After deleting that partition, right-click on the primary partition that you want to extend and click on Extend Volume. Step 5: When the Extend Volume Wizard appears on the screen, click Next. Step 6: if you want to merge the whole partition, click directedly on Next. However, if you want to merge only a part of it, enter a specific size in the ‘Select the amount of space in MB’ text box before clicking Next. Step 7: Click on Finish. After you click finish, the Disk Management utility will merge the Unallocated partition with the existing partition.
Make Managing Files Easier on Windows 11
That’s pretty much it. Now that you know how to create and modify hard drive partitions on your Windows 11 PC, you may start making changes on your computer. This simplifies file management and keeps your files safe if you need to reinstall Windows on your computer.


