The first row of the iOS Share Sheet shows you recently used contacts to allow you to share files with them quickly. This row is not editable, and it automatically changes based on your messaging and call history. The contacts you have recently contacted show up as a quick share shortcut, and there’s no way to change this behavior. This post will demonstrate how to edit Share Sheet on iPhone only to show relevant options. While the iOS Share Sheet is accessible from several apps, we are using Safari in this post.
Add Apps to Favorites
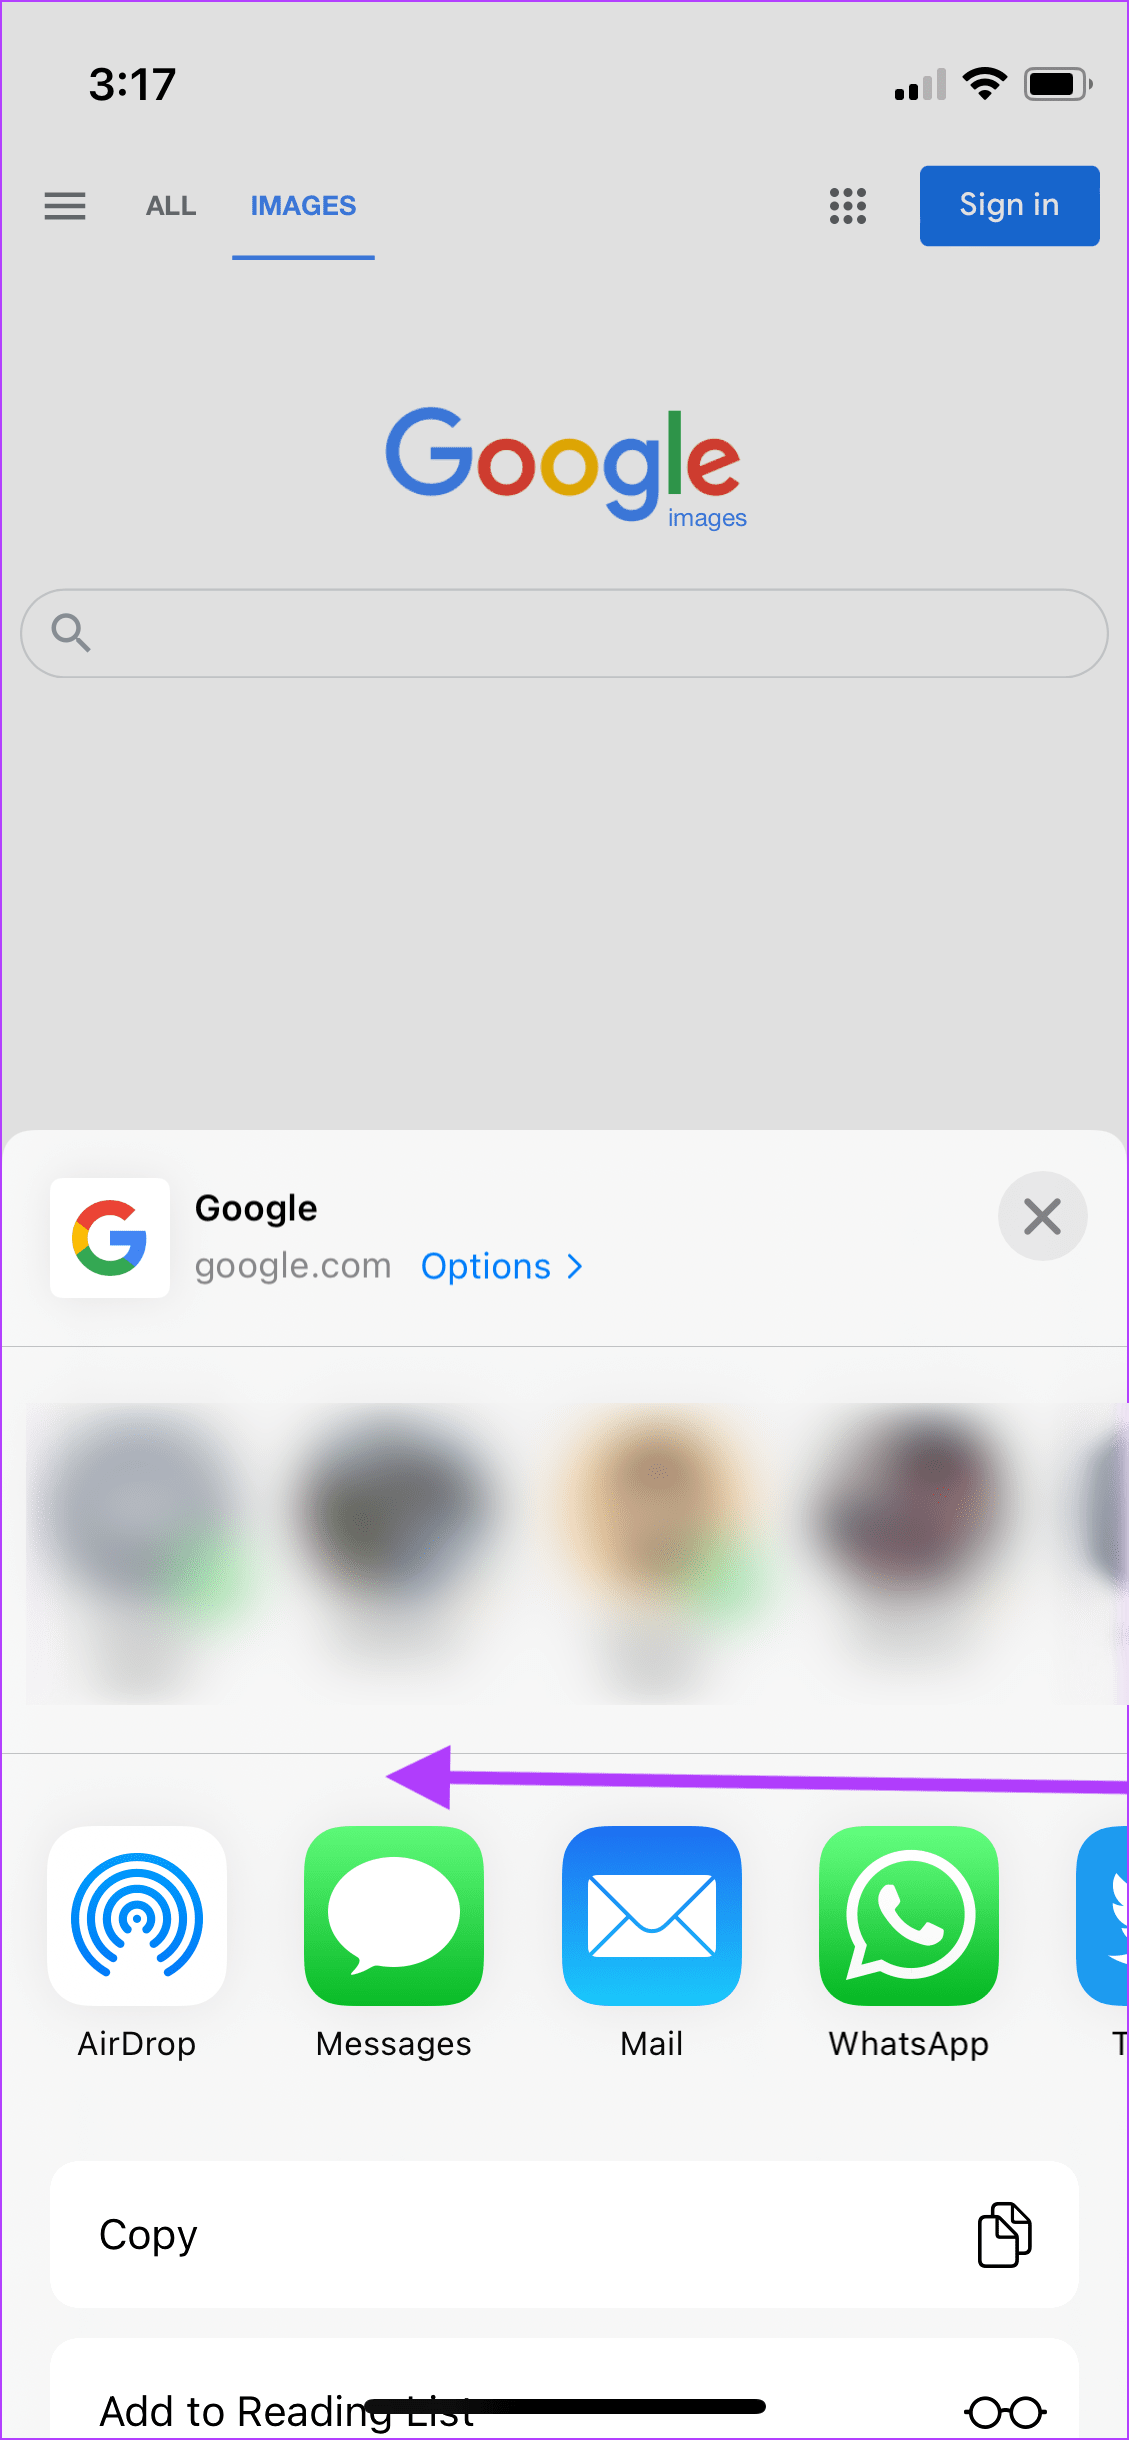
Below the recent contact list, you will see the list of apps that you can use to share files from your iPhone. The first three apps on the list, namely AirDrop, Messages, and Mail are always there, while the rest rotate depending on your recent usage. iOS allows you to change this behavior by adding apps to your favorite list. The apps that you add to favorites always appear first in the Share Sheet. They’ll continue to appear there unless removed. Step 1: Launch any app that supports Share Sheet functionality like Photos, Safari, etc.
Step 2: If you are also using Safari, open any website and tap on the Share button in the middle at the bottom of the screen.
Step 3: Swipe right to left on the Apps row till you reach the end.
Step 4: Tap on the More option.
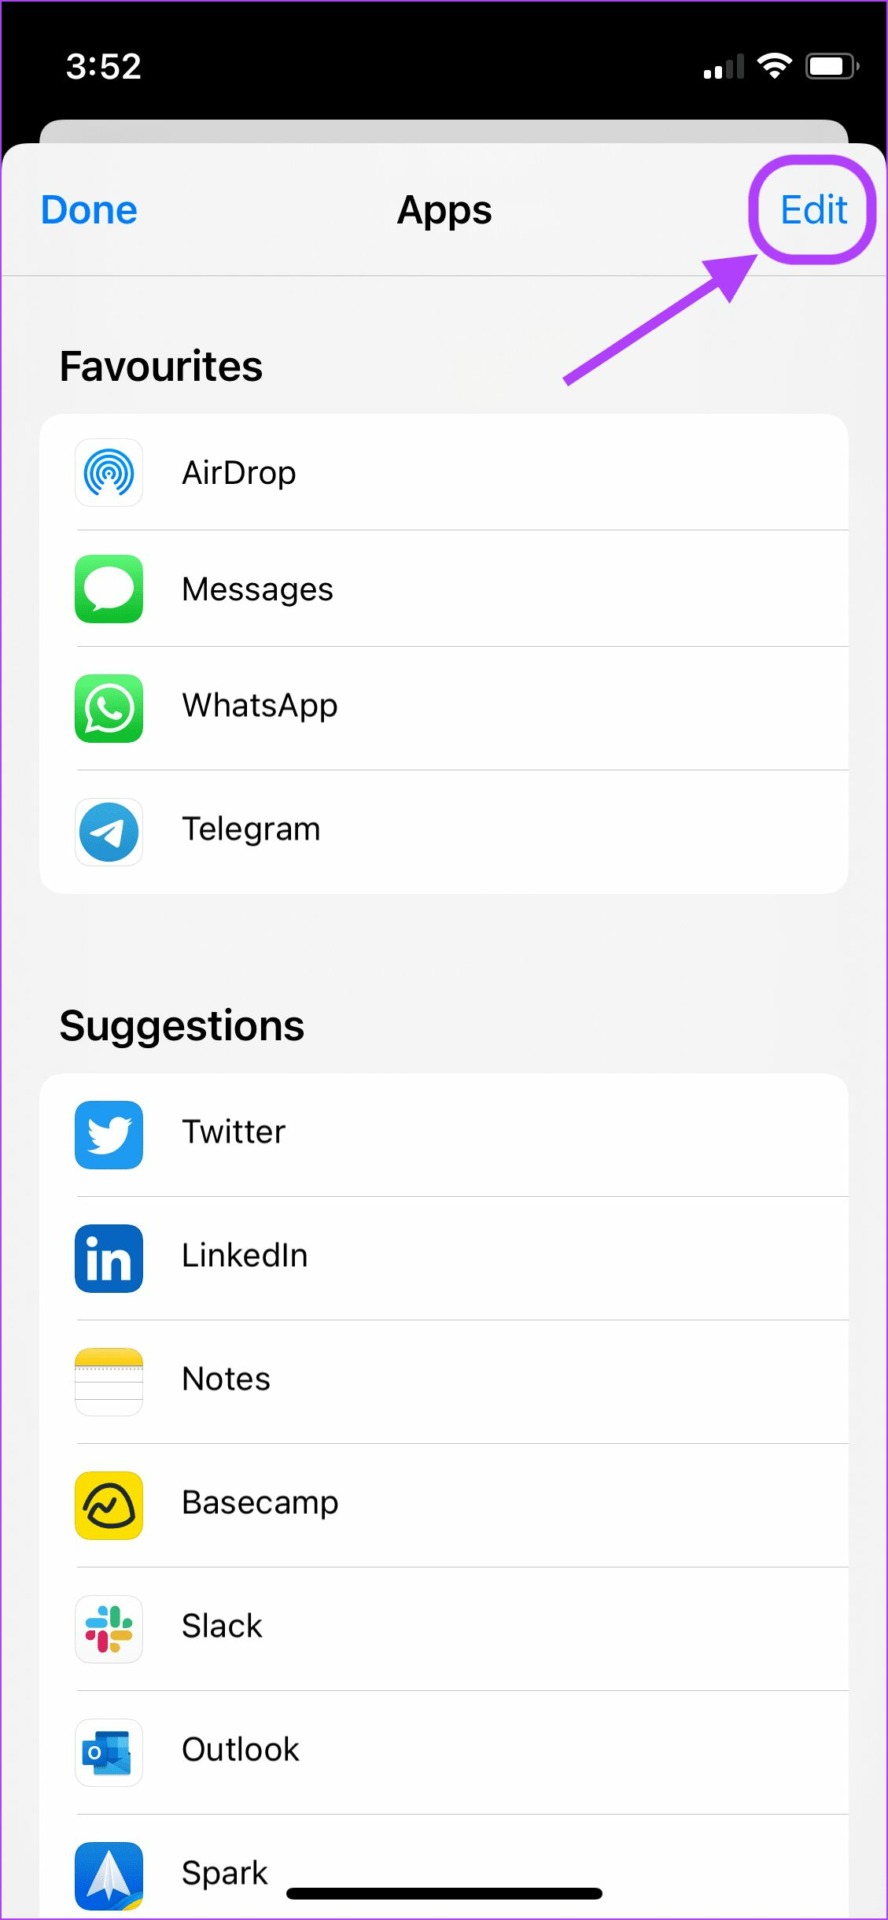
Step 5: Tap on the Edit button at the top-right.
Step 6: Tap on the plus button next to the apps you want to add as favorites.
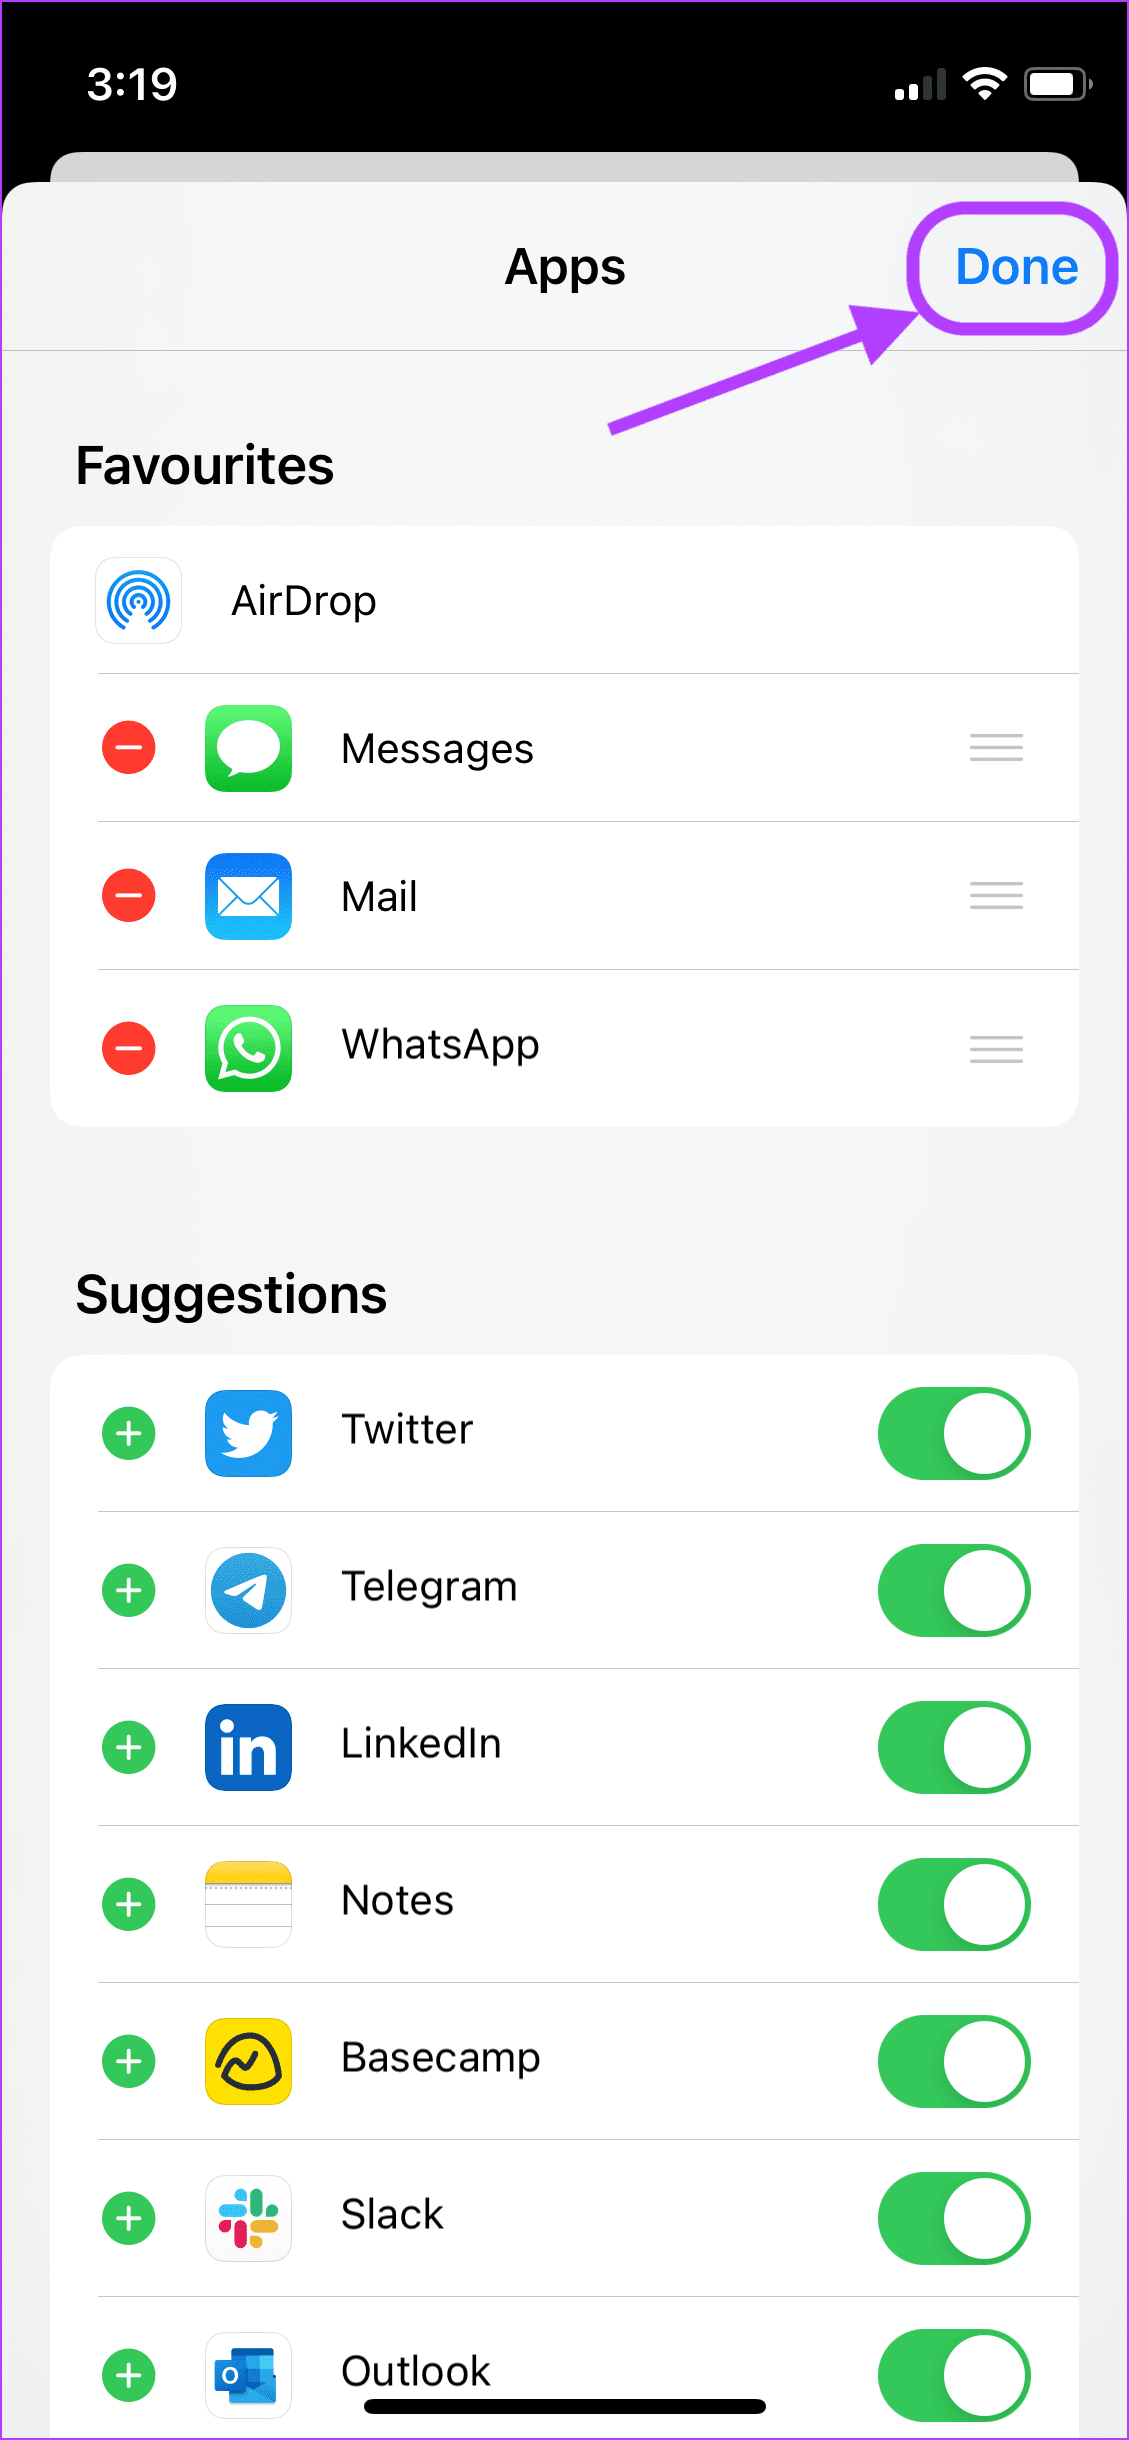
Step 7: After you have added the apps to Favorites, tap on the Done button in the top-right.
Remove Apps from Favorites
AirDrop, Messages, and Mail appear by default as Favorites in a Share Sheet. While you cannot remove AirDrop from the list, you can remove or rearrange the rest two apps, and replace them with the apps you want. For example, if you don’t use the Mail as the default email app on your iPhone, you can replace it with any email app of your choice. Step 1: Launch Safari (or Photos) app on your iPhone and open a website.
Step 2: Tap on the Share button at the bottom of the screen.
Step 3: Swipe right to left on the Apps row till you reach the end.
Step 4: Tap on the More option.
Step 5: Tap on the Edit button at the top-right.
Step 6: Tap on the minus (-) button next to the apps in the Favorite section.
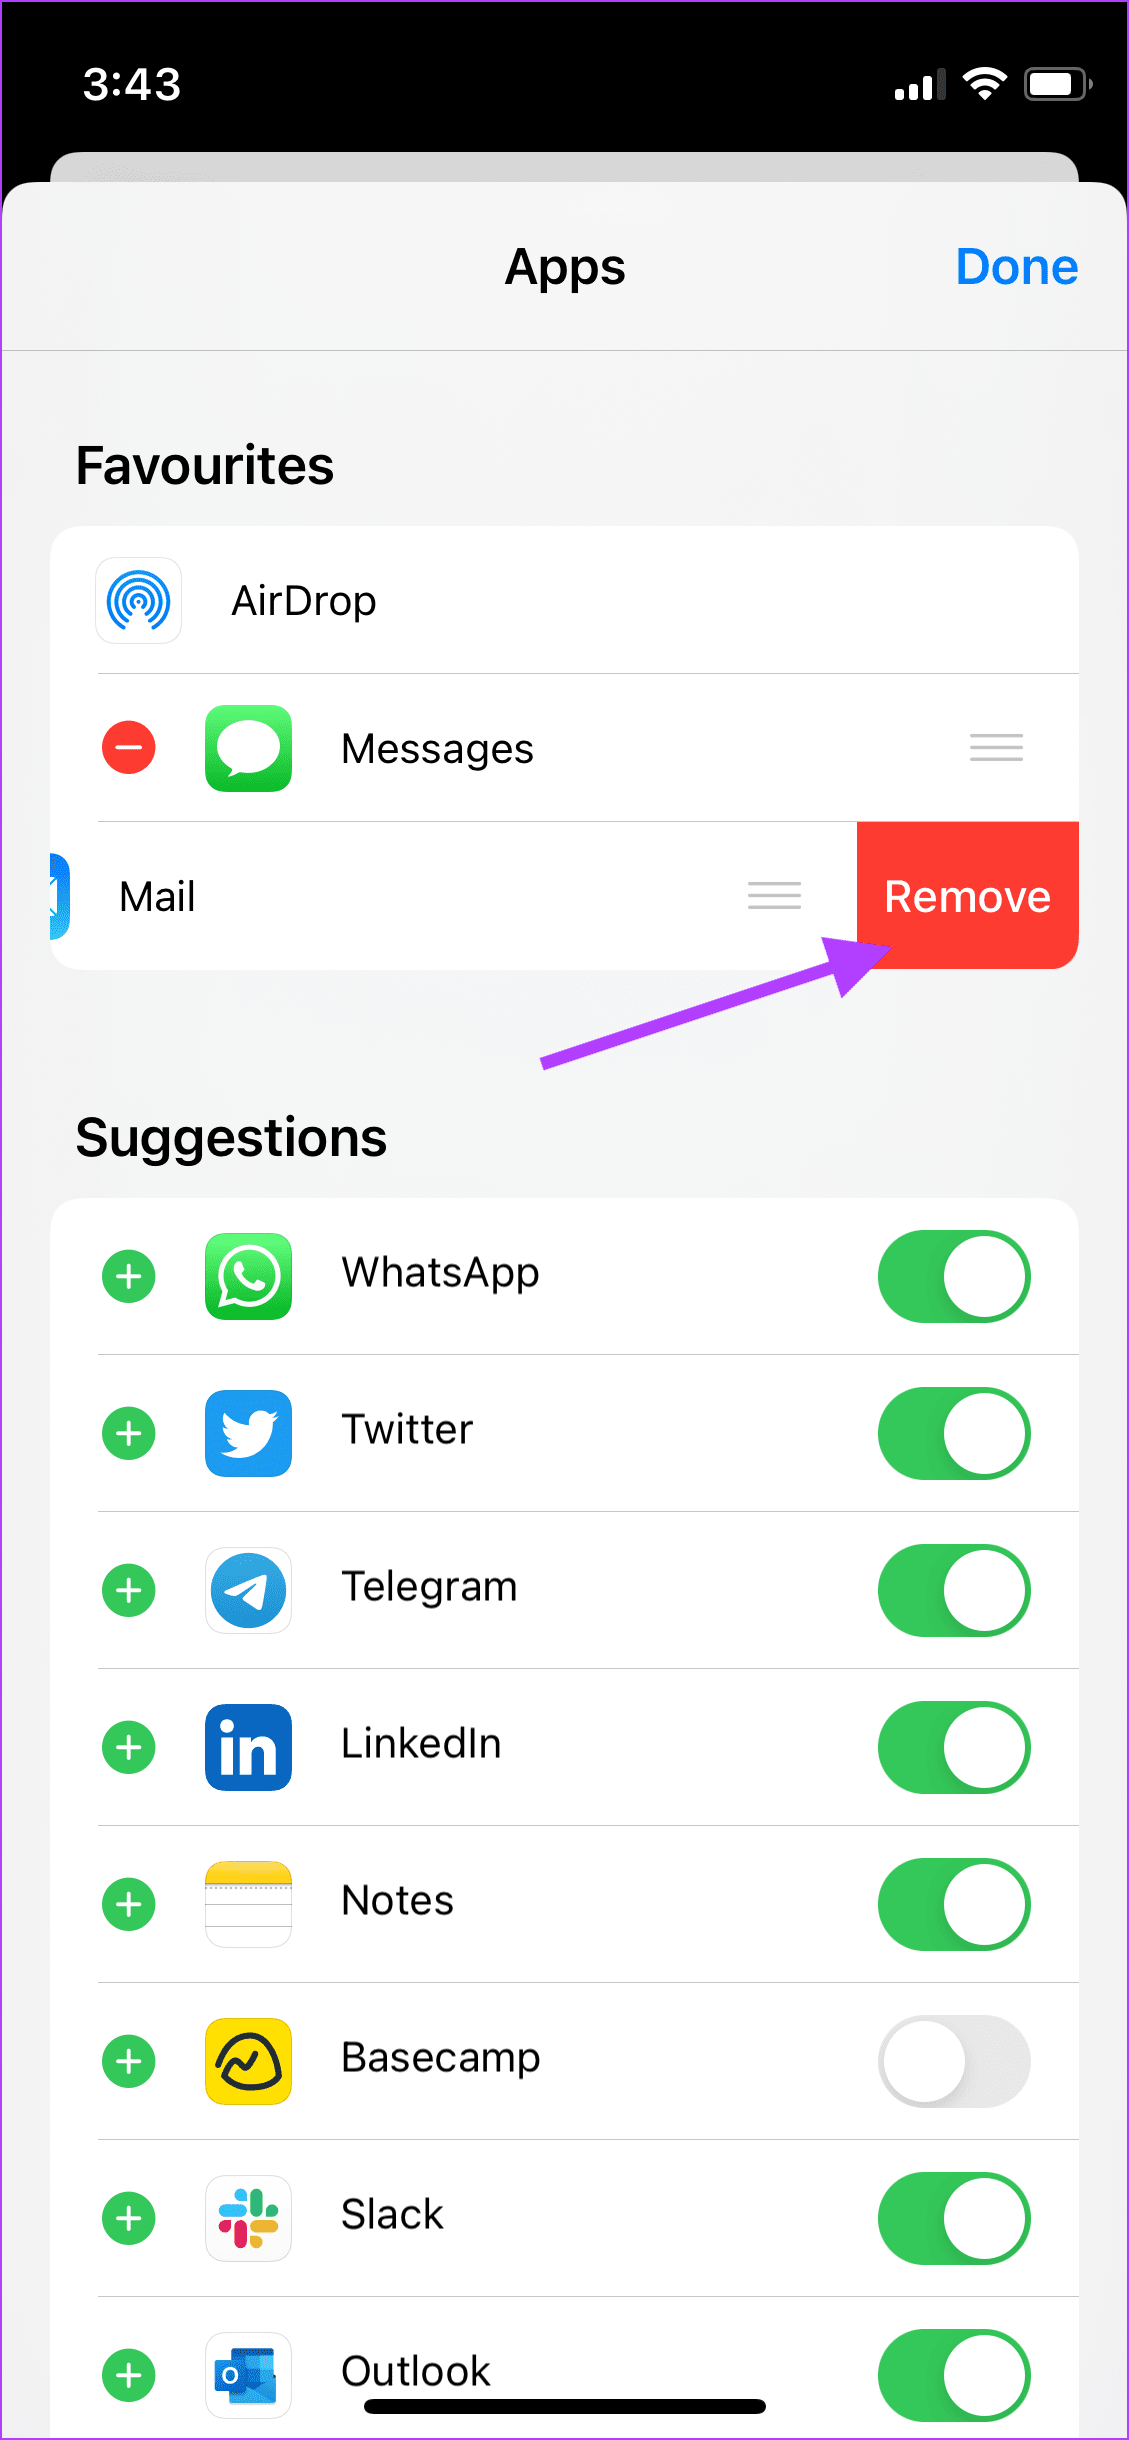
Step 7: Tap on Remove to remove the app from the Favorites section.
Step 8: If you want to change the apps’ order, tap and hold on the three-line handlebar and drag to rearrange the apps as you like.
Step 9: Tap on the Done button at the top-right to save the changes.
Enable or Disable the Apps from Share Sheet
The Share Sheet also shows you a selection of other apps that rearrange themselves based on your usage pattern. You can disable these apps, so they don’t show in the share sheet. Step 1: Launch the Safari app on your iPhone and open a website.
Step 2: Tap on the Share button at the bottom of the screen.
Step 3: Swipe right to left on the Apps row till you reach the end.
Step 4: Tap on the More option.
Step 5: Tap on the Edit button at the top-right.
Step 6: Disable the toggle next to the apps you don’t want to show up in the Share Sheet. Tap on Done on the top-right to save changes.
Step 8: If you want to add those apps back to the Share Sheet list, follow the same steps and enable the toggle next to their name and tap on Done on the top-right to save changes.
Edit Share Sheet Actions
Apart from apps, Share Sheet also shows you several context-aware actions. Note that some actions might change depending on the app you are using to invoke the Share Sheet. For example, when you use the Share Sheet to share a photo, you will see an action to set it as your wallpaper, which won’t be the case when you use the Share Sheet on Safari. So, you will have to repeat this process for each type of app. While time-consuming, this is not much of an issue as the steps will be similar, and only the actions you see will be different. Step 1: Launch the Safari app on your iPhone and open a website.
Step 2: Tap on the Share button at the bottom of the screen.
Step 3: Scroll up until you see the Edit Actions button and tap on it.
Step 4: Tap on the plus button next to the action that you want to see in the favorites section.
Step 5: Tap on the minus (-) button and then on Remove to remove an action from Favorites.
Step 6: Under the Other Actions section, disable the extra actions provided by third-party apps that you don’t want to see.
Step 7: If you want to bring back the action, follow the same steps and enable the toggle next to its name.
Step 8: Tap on Done when you have made all the changes.
Edit Share Sheet on Your iPhone to Make It Clutter-Free
If you used the above steps, your Share Sheet will now only be showing the apps and the actions you need. It reduces clutter and makes it faster for you to reach relevant options. That’s all for this guide. If you encounter any issues in following this guide, let us know in the comments below, and we will help you out.


![]()


![]()


![]()


![]()


