Apple’s macOS allows you to reduce PDF size from the default Preview app. Unfortunately, there is no such native option on iOS. You must download and use third-party apps from the App Store to get the job done. Let me start the list with Adobe Acrobat.
1. Adobe Acrobat
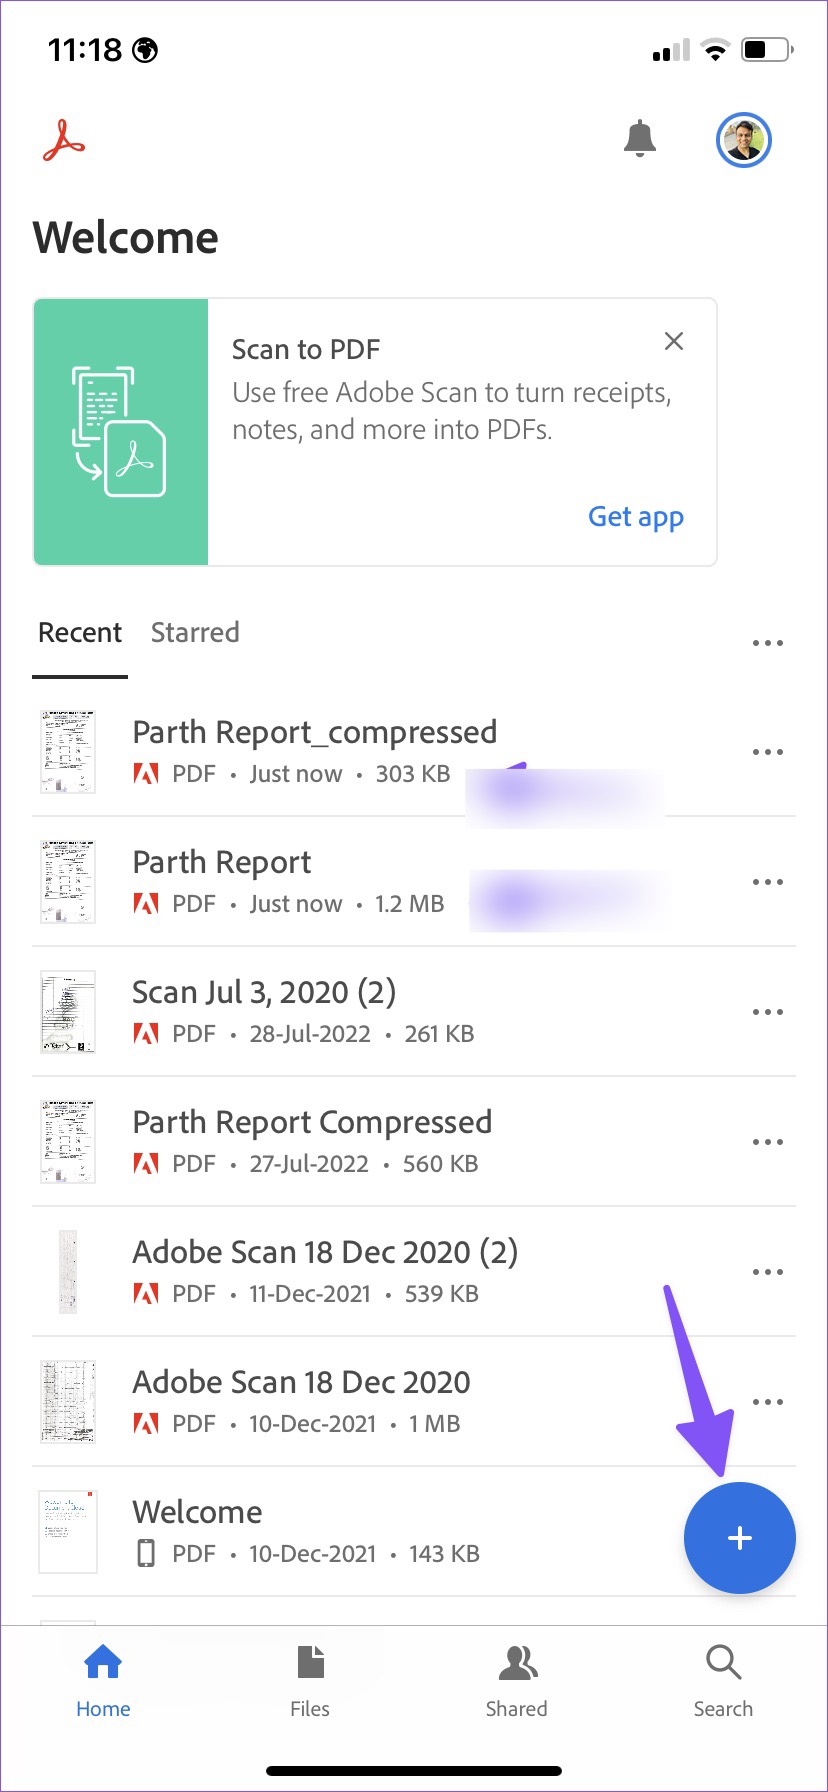
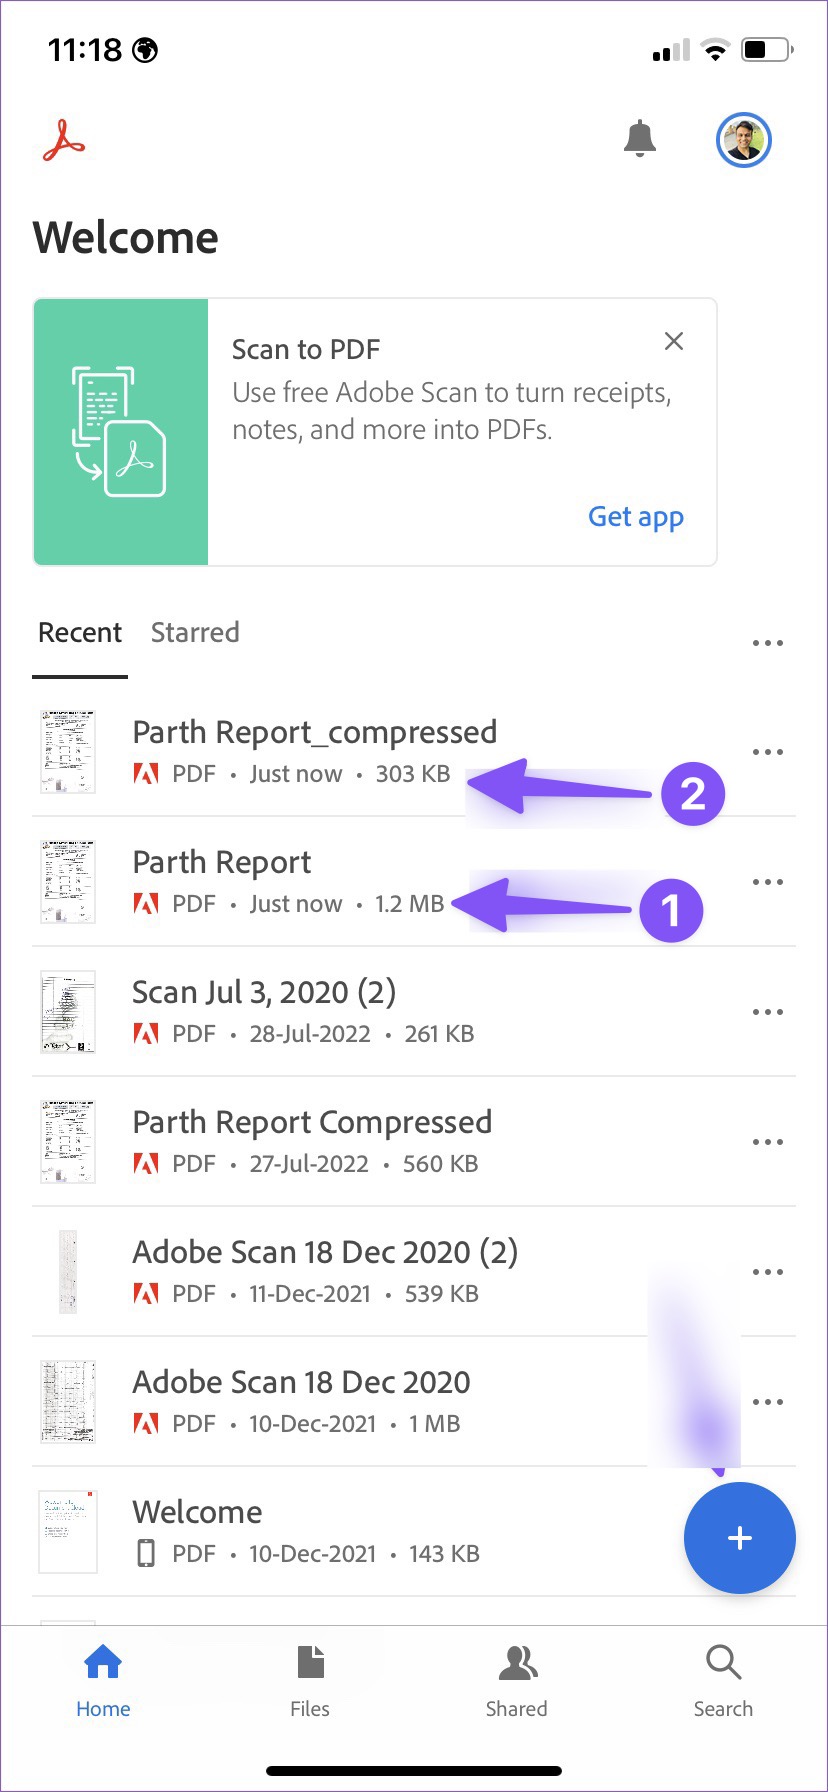
If you subscribe to the Adobe Creative Cloud plan, you get the same powerful Adobe PDF editor on mobile platforms. You can easily edit, sign, and export the PDF file in a compressed size using Adobe Acrobat. Let’s check it out. Step 1: Download Adobe Acrobat from the Apple App Store. Download Adobe Acrobat for iPhone Step 2: Open the app and sign in with your Adobe account details. Step 3: Tap + icon in the bottom right corner and select Edit PDF. Step 4: Import PDF from the device storage, Adobe cloud storage, OneDrive, Google Drive, or Dropbox. Step 5: Tap the edit button in the bottom right corner to add a comment, fill & sign, or organize pages. After making the changes, hit the three-dot menu in the top right corner. Step 6: Select Compress PDF. Step 7: You can check your current PDF file size and set the compression level from the following menu. Step 8: It’s set to medium compression; you can select high compression if you want the smallest size at the expense of quality. Select low compression if you don’t want to affect the overall quality. If your PDF file has several important images, you can use low compression to avoid quality loss. You can go with high compression if the PDF file is text-heavy. Select the relevant option and hit ‘Compress’ in the top right corner. The compressing process will start, while you check the original file and compressed one from the Adobe home. We imported a 1.2 MB PDF file in Adobe Acrobat, and it compressed it to 303 KB without noticeable quality loss. You can now share your compressed PDF file. Tap the three-dot menu beside a PDF file, select send a copy, and use the iOS share menu to send the file.
2. Small PDF
Small PDF is one of the best Adobe Acrobat alternatives on iPhone. You can annotate, edit, or compress PDF files using Small PDF. Go through the steps below. Step 1: Install Small PDF from the App Store. Download Small PDF for iPhone Step 2: Open the Small PDF and sign up with a Google or Apple account. Step 3: Hit the + icon and add a PDF file from the Files app. Step 4: Small PDF will save the file to company servers and open it on your phone. Step 5: You can manage PDF pages, add text, use a highlighter, draw, or even sign the document. Step 6: Once you make changes, tap the three-dot menu in the top right corner. Step 7: Select Compress. Step 8: You can select strong compression that reduces PDF size by around 75%. If that’s too much for you, select basic compression to decrease PDF size by 40%. Your compressed PDF file is ready to use and share.
3. PDF Compressor
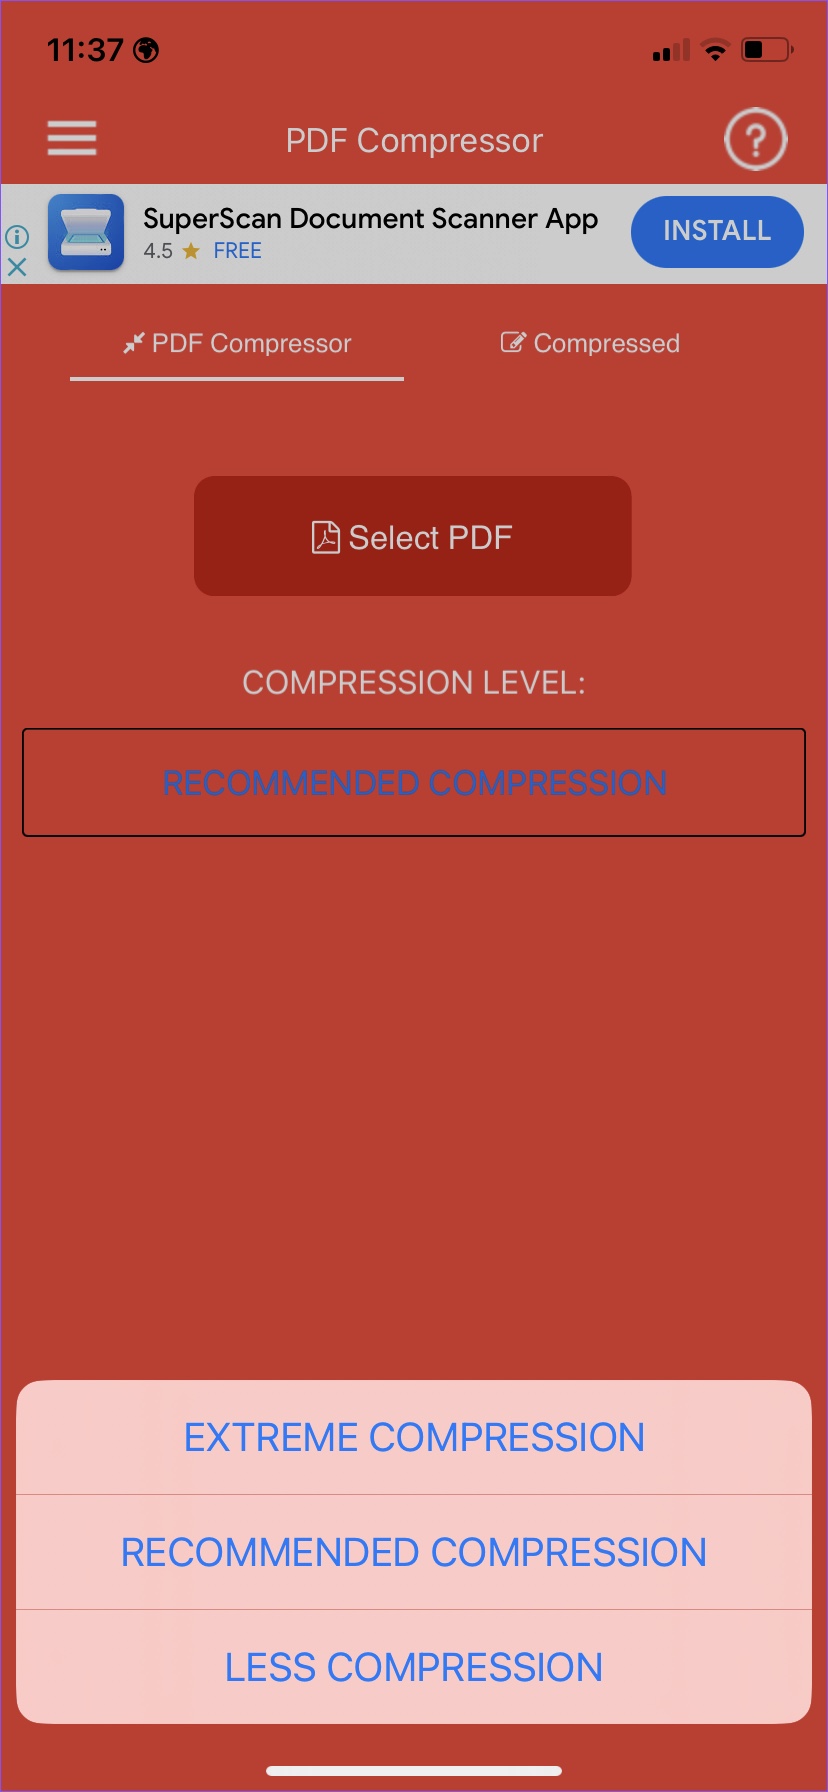
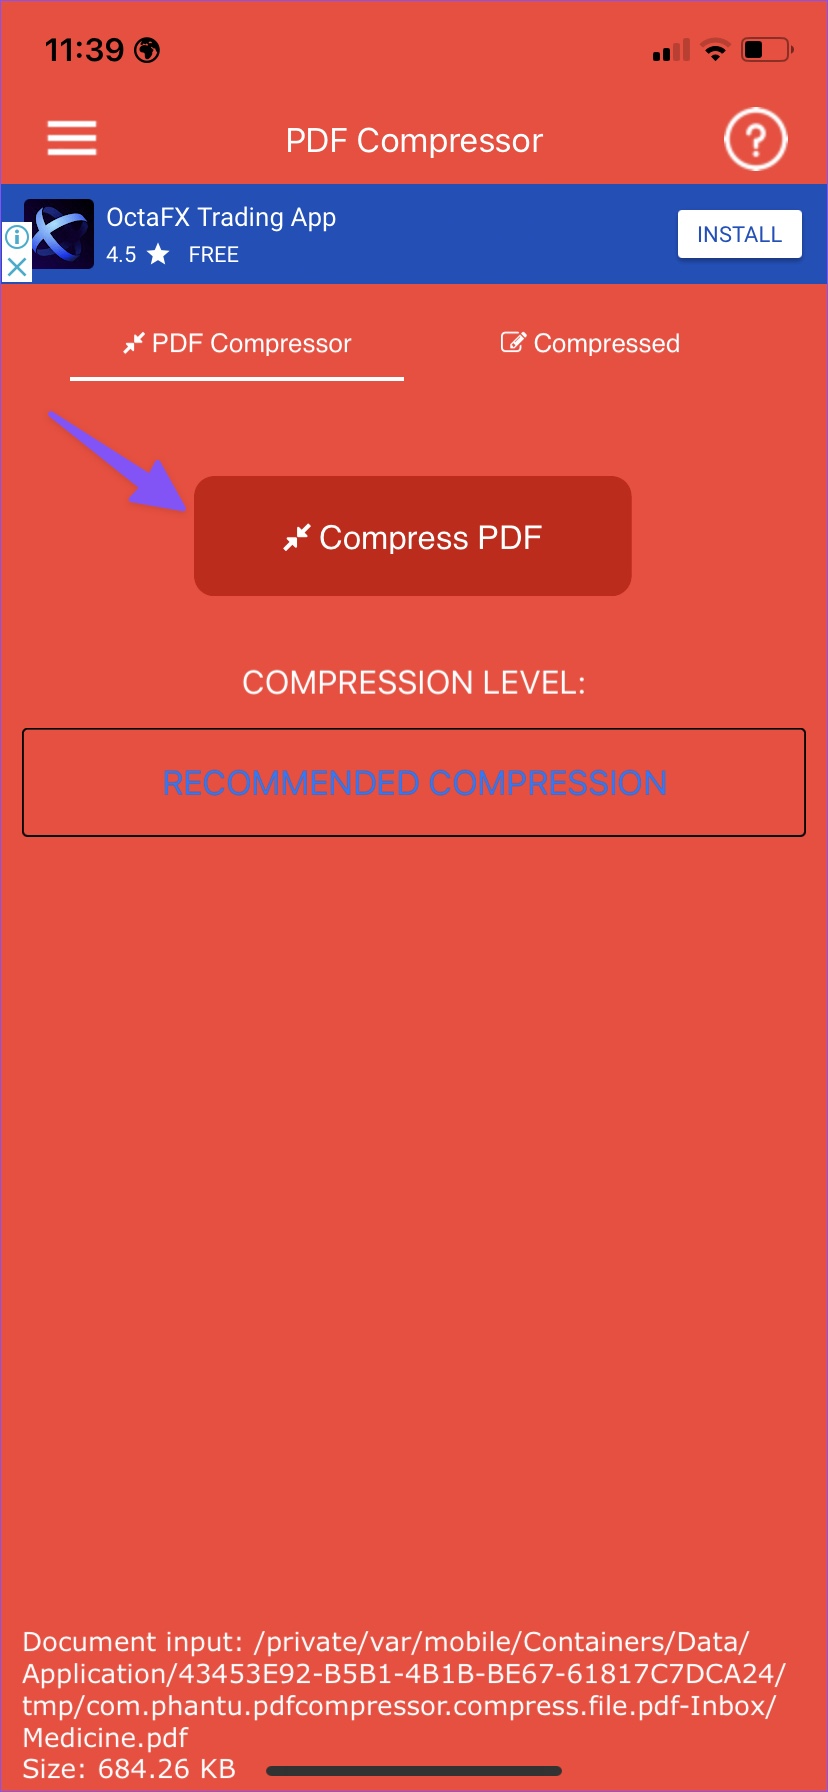
PDF Compressor is another handy tool to reduce PDF size on iPhone. After all, not everyone uses or prefers Adobe’s expensive Creative Cloud plan on the desktop. PDF Expert is equally capable and does the job without breaking a sweat. Step 1: Download PDF Compressor from the App Store. Download PDF Compressor for iPhone Step 2: Before you make changes, select compression level. You can choose from extreme, recommended, or less compression. They are equivalent to the high, medium, or low quality we discussed above. Step 3: Tap Select PDF and import a PDF file from the Files app. Step 4: Select the Compress PDF button, and the process will start. Step 5: You can check the compression size and percentage. Tap ‘Save compressed PDF,’ save the file and move to the Compressed menu. Step 6: Tap on the file to send it using the iOS share menu.
Compress PDFs on the Go
For most users, we would advise using the Small PDF. It’s free and gets the job done in no time. Creative Cloud subscribers must go with Adobe Acrobat as it’s the best PDF editor on iPhone. If you only want to compress one or two PDF files, use PDF Compressor on your iPhone.
