There are several ways to compress a video file on iPhone. First, we will show you how to check video file size in the default Photos app and move to the best ways to compress it for seamless sharing.
Check Video Size on iPhone
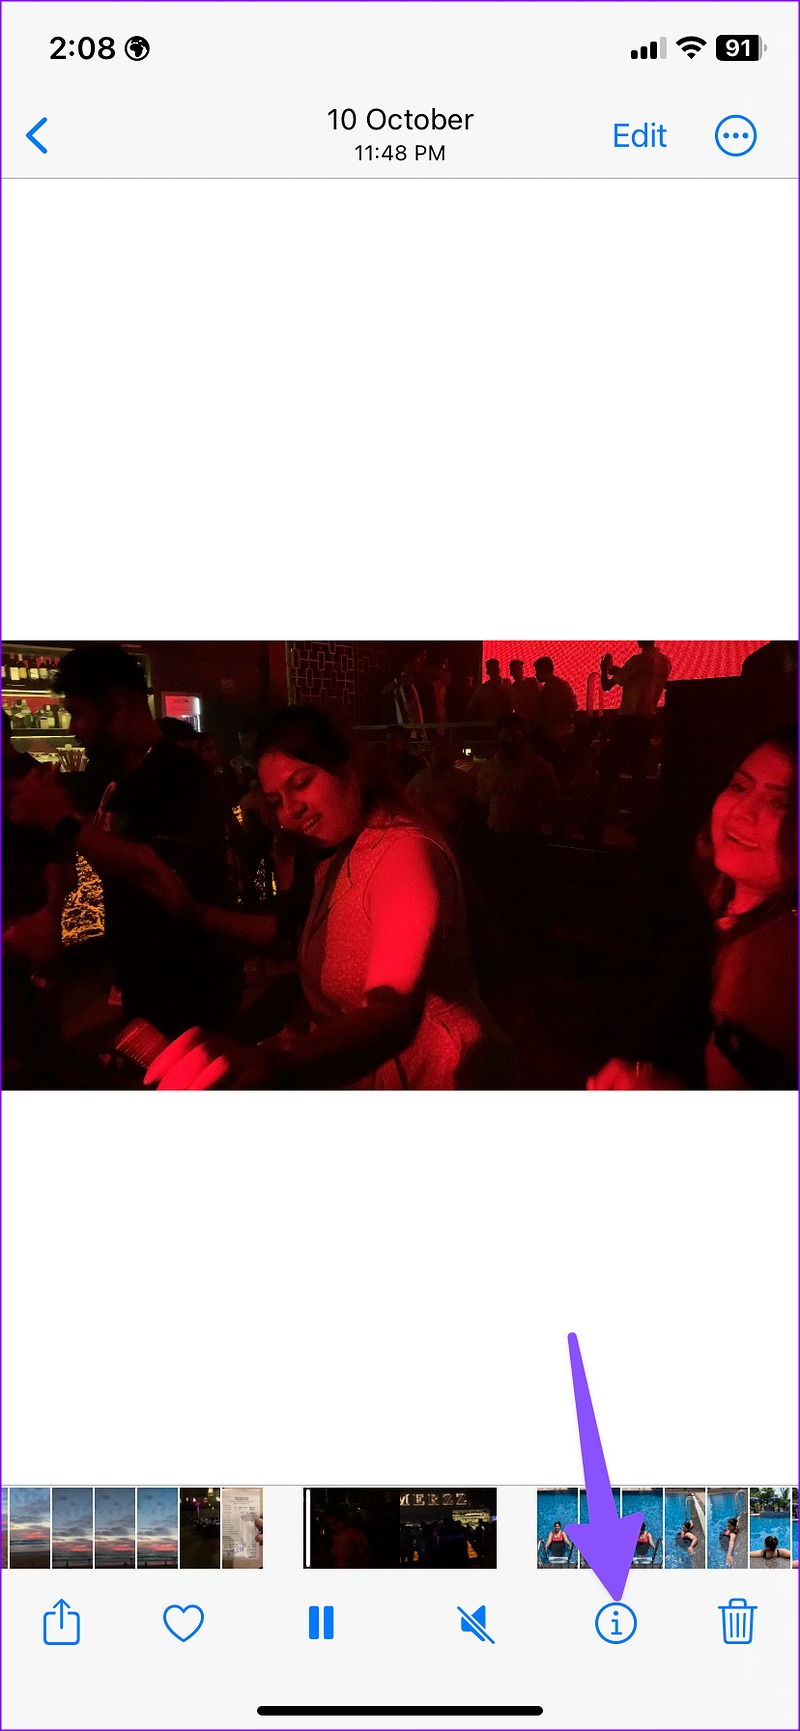
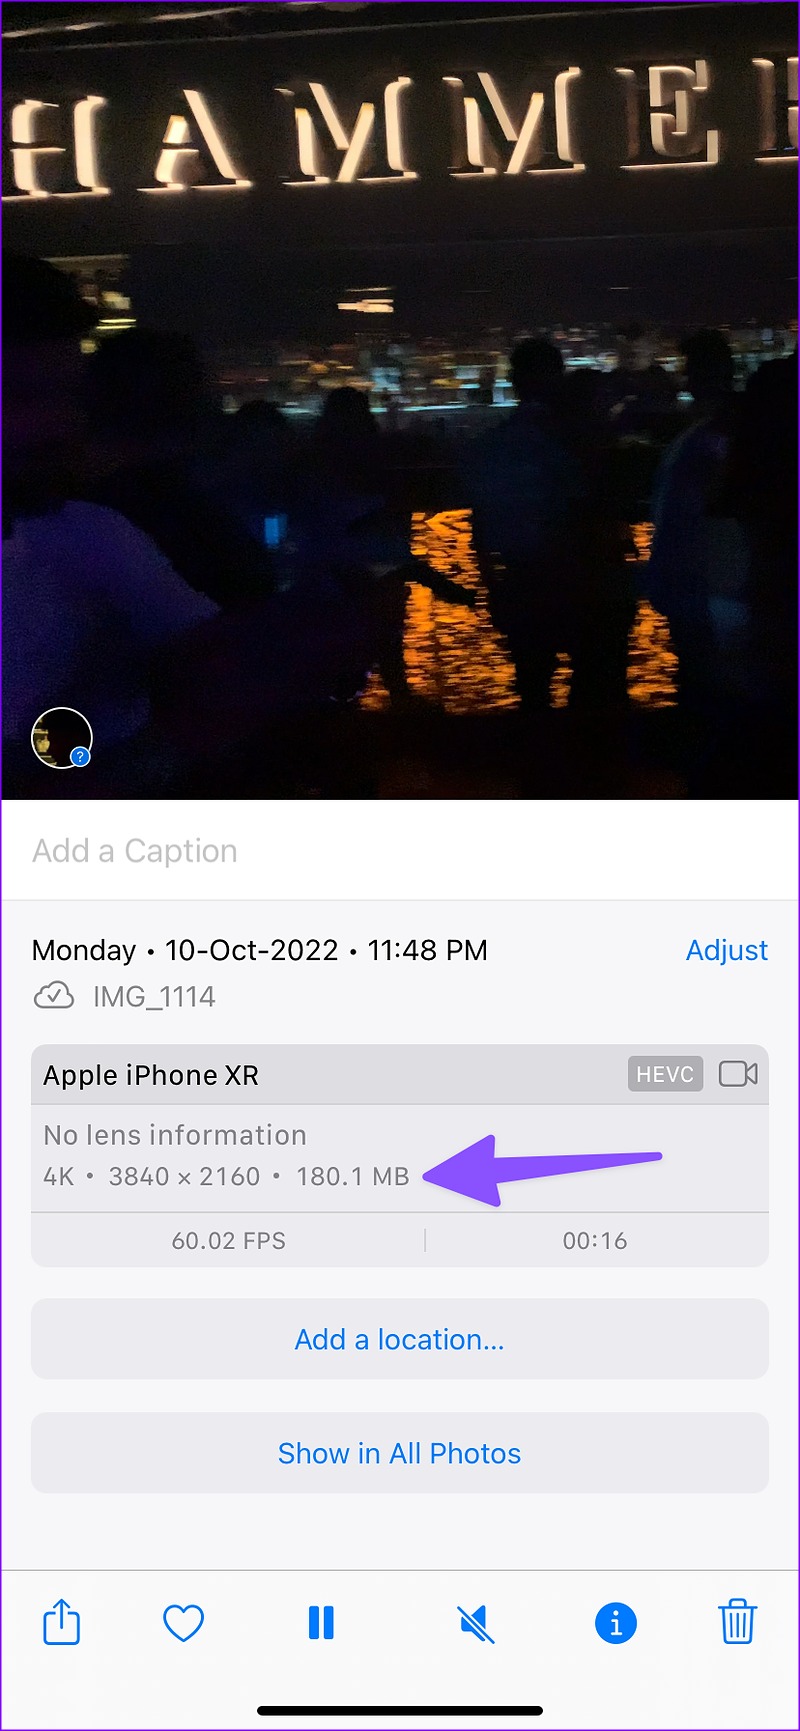
With iOS 15, you can now check photo and video sizes from the Photos app. Here’s what you need to do. Step 1: Open the Photos app on your iPhone. Step 2: Select any video. Tap the info (i) button at the bottom to check the video size. Step 3: You can see a 75MB video file in the screenshot below. Let’s compress it on iPhone using the tricks below.
1. Compress Videos Using Third-Party Apps
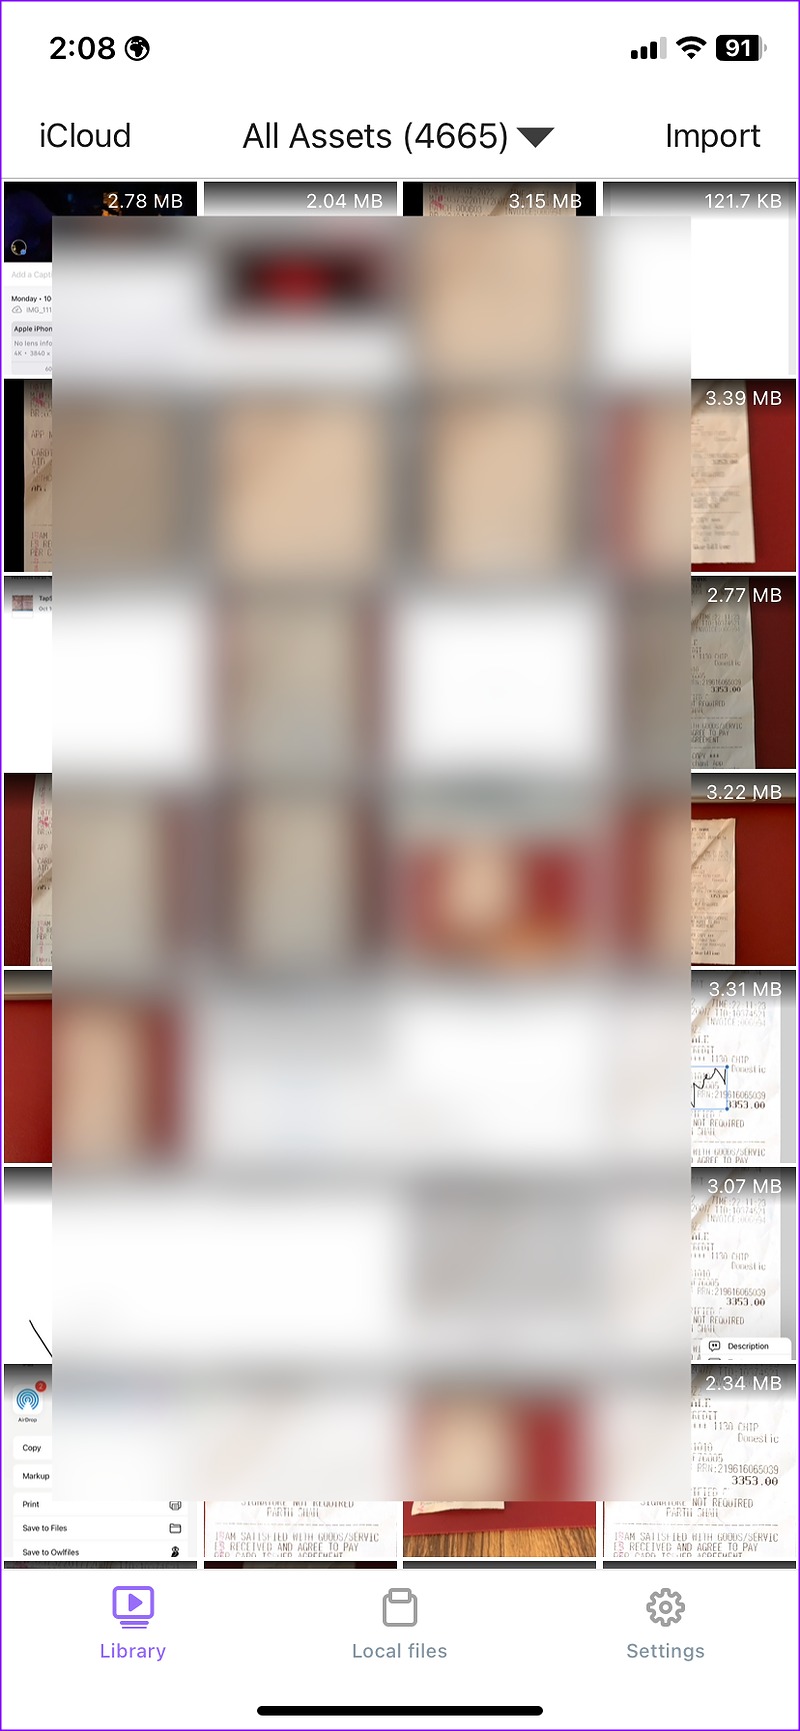
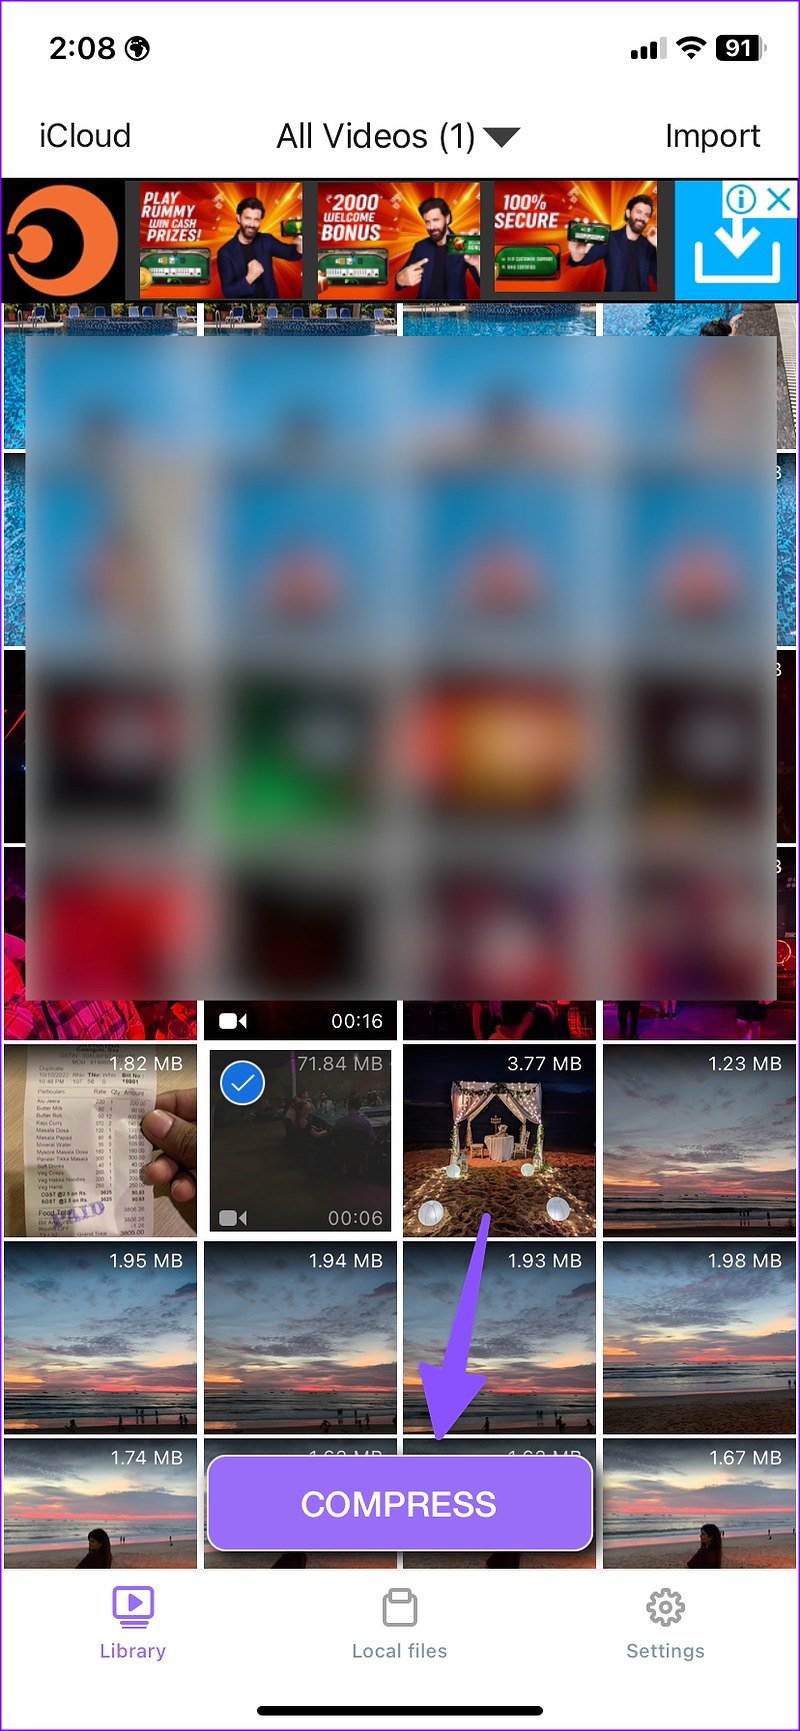
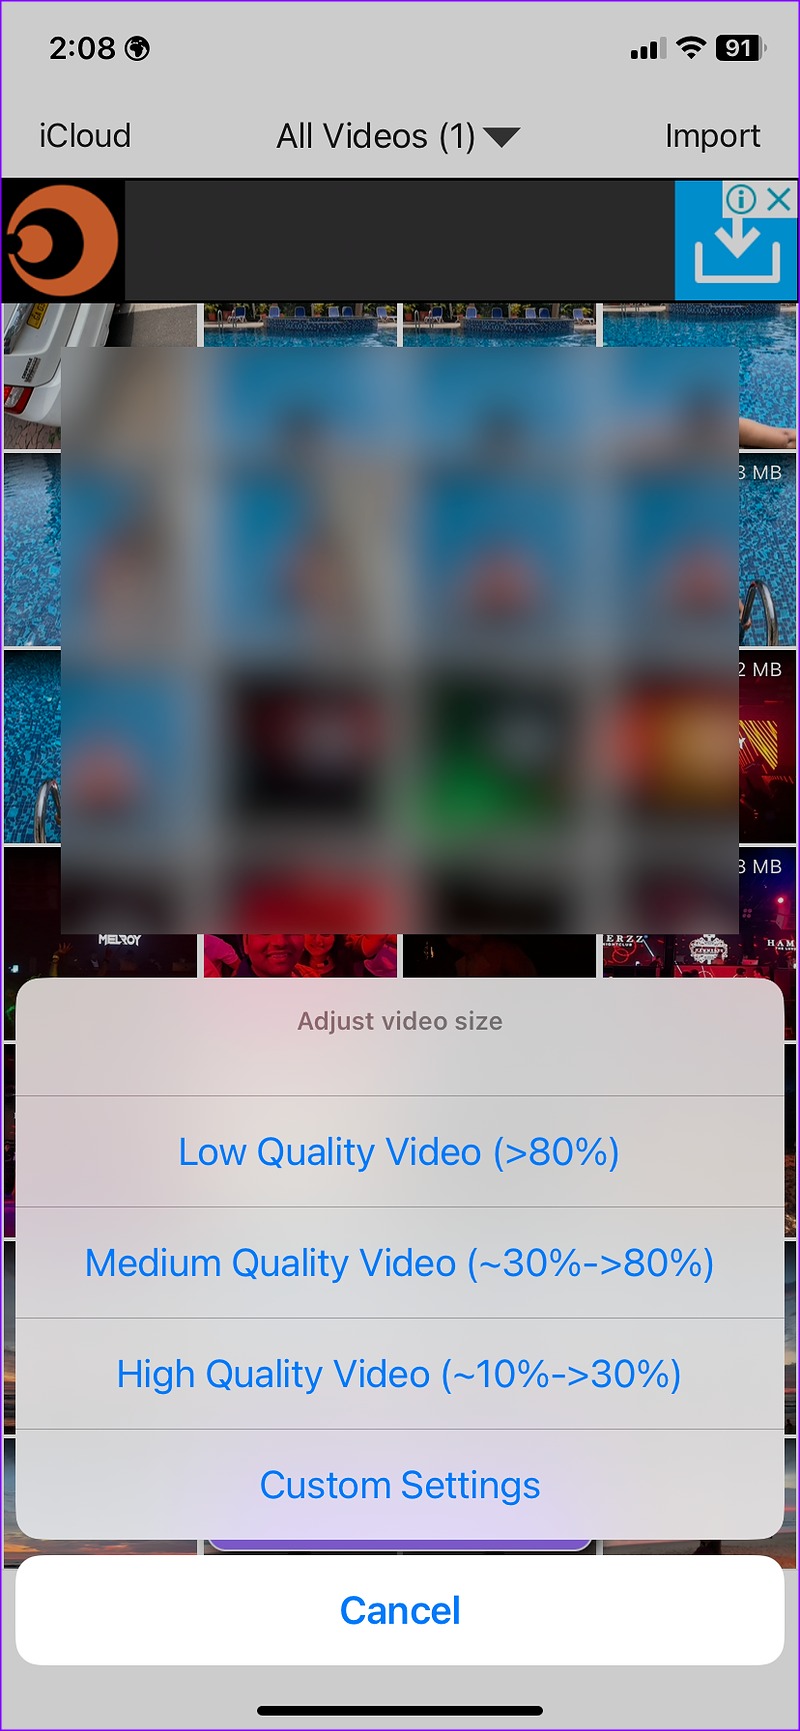
If you don’t want to use Google Photos to compress a single video file, use a dedicated third-party video compressor app from the App Store. While there are several video compressor apps in the App Store, we found an app called ‘Video Compressor’ quite astute and it worked as advertised. Step 1: Get the ‘Video Compressor’ app from the App Store. Download Video Compressor on iPhone Step 2: Open the Video Compressor app and allow access to all photos on iPhone. Step 3: Check all your photos and videos with file size. Select a video you want to compress. We selected a video file with 71MB size. Step 4: Tap ‘Compress’ at the bottom. You have three options to choose from. Low Quality Video: The option reduces video size by more than 80%. For example, selecting a 100MB video file will bring down the video size to around 20MB. Medium Quality Video: Compresses the video size from 30% to 80%. High Quality Video: Reduces video size by only 10% to 30%. You can select custom settings and type a specific percentage to reduce video size too. Step 5: Select a relevant option. We selected the ‘High Quality Video’ option. The app compressed a 71MB video to 30MB in a few seconds. Open the video, and you can add music, audio, text, stickers, and play with other effects. Tap Exporter and save the compressed video file on your iPhone.
2. Reduce a Video File Using Google Photos
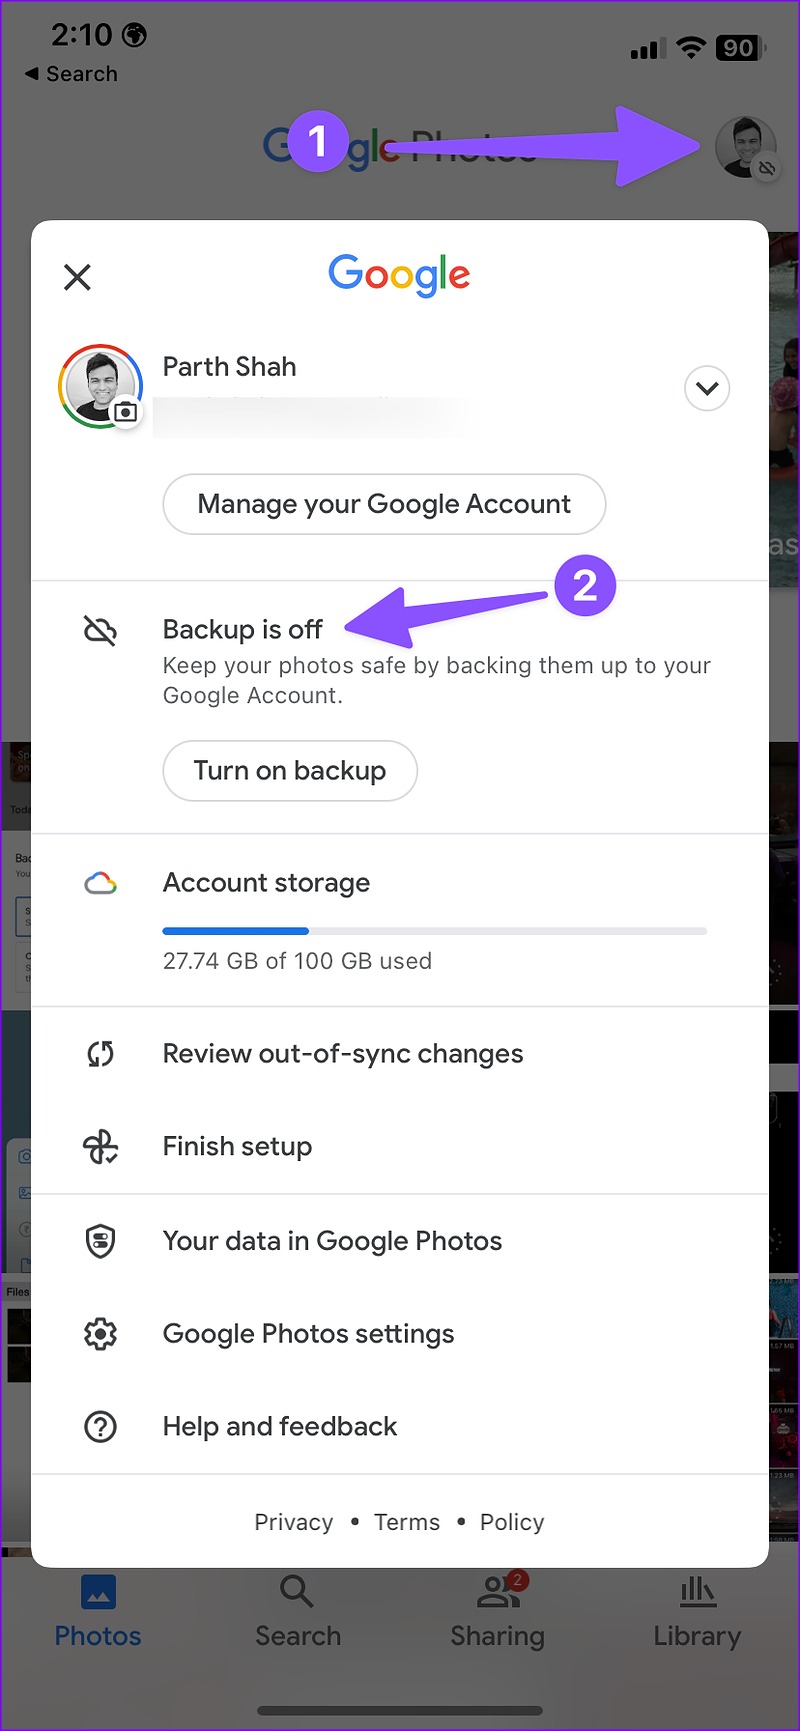
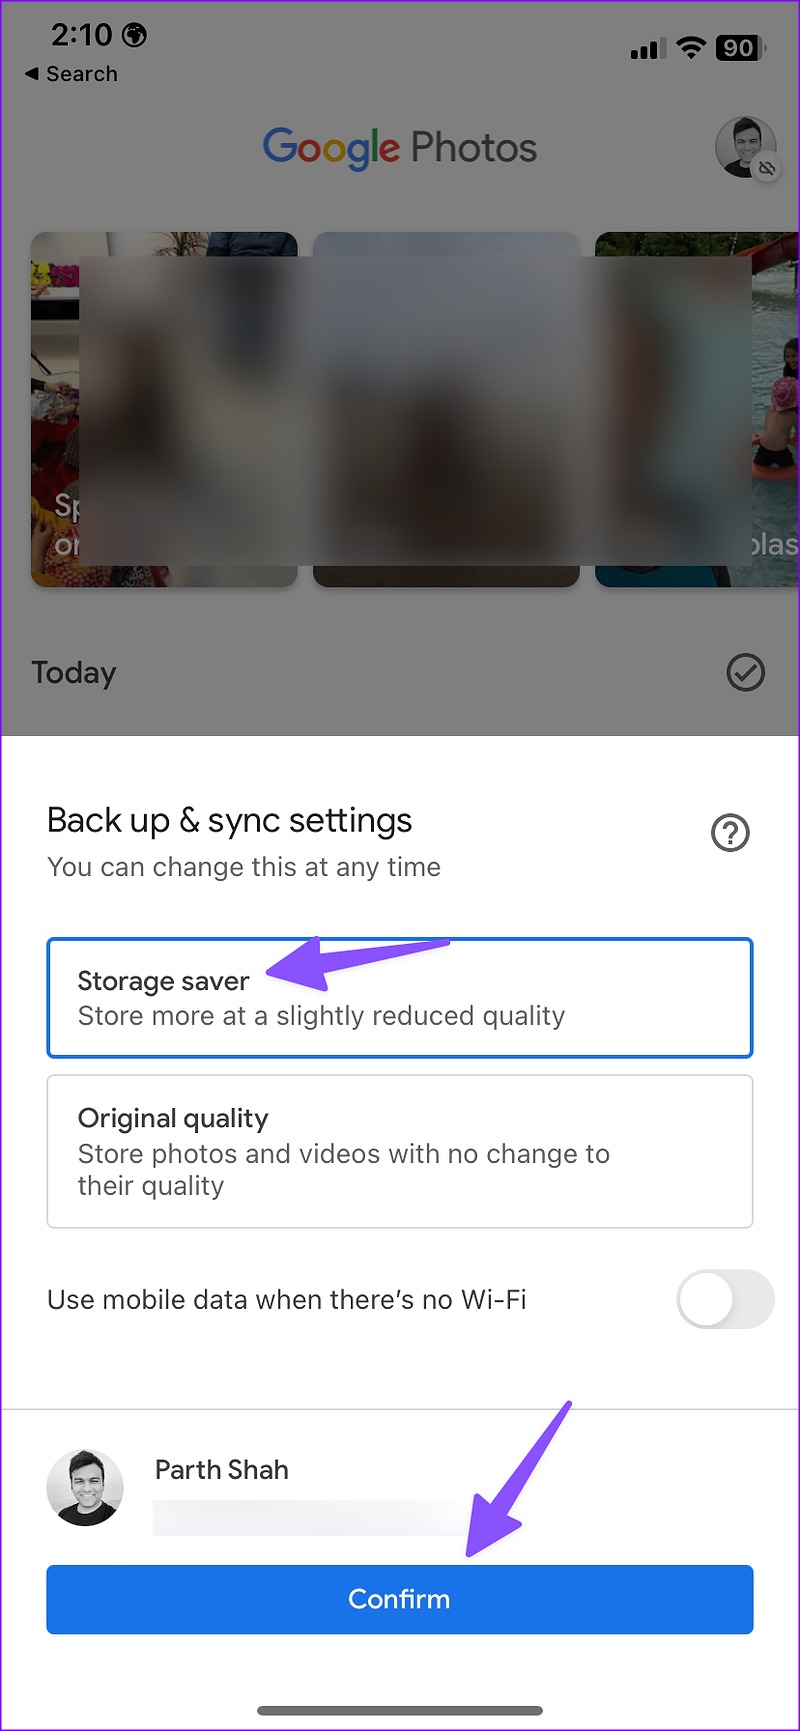
If you use Google Photos to upload photos and videos, you can easily tweak the upload quality setting and save a compressed video online. Follow the steps below. Step 1: Download Google Photos from the App Store. Download Google Photos on iPhone Step 2: Open Google Photos and log in with your Google account. Step 3: Tap on your profile picture in the top right corner and select the ‘Backup is off’ option. Step 4: It will open the Back up & sync settings menu. Tap ‘Storage saver’ and hit ‘Confirm.’ Google Photos will start the media upload process over Wi-Fi (or mobile data, if you have enabled the permission). Step 5: After the upload process is complete, you can access the compressed video file from all your devices (via Google Photos). In our testing, we compressed a 75MB video file to 3.8MB using Google Photos. Your reduced video file is ready for sharing on social media.
3. Reduce Video Size in WhatsApp
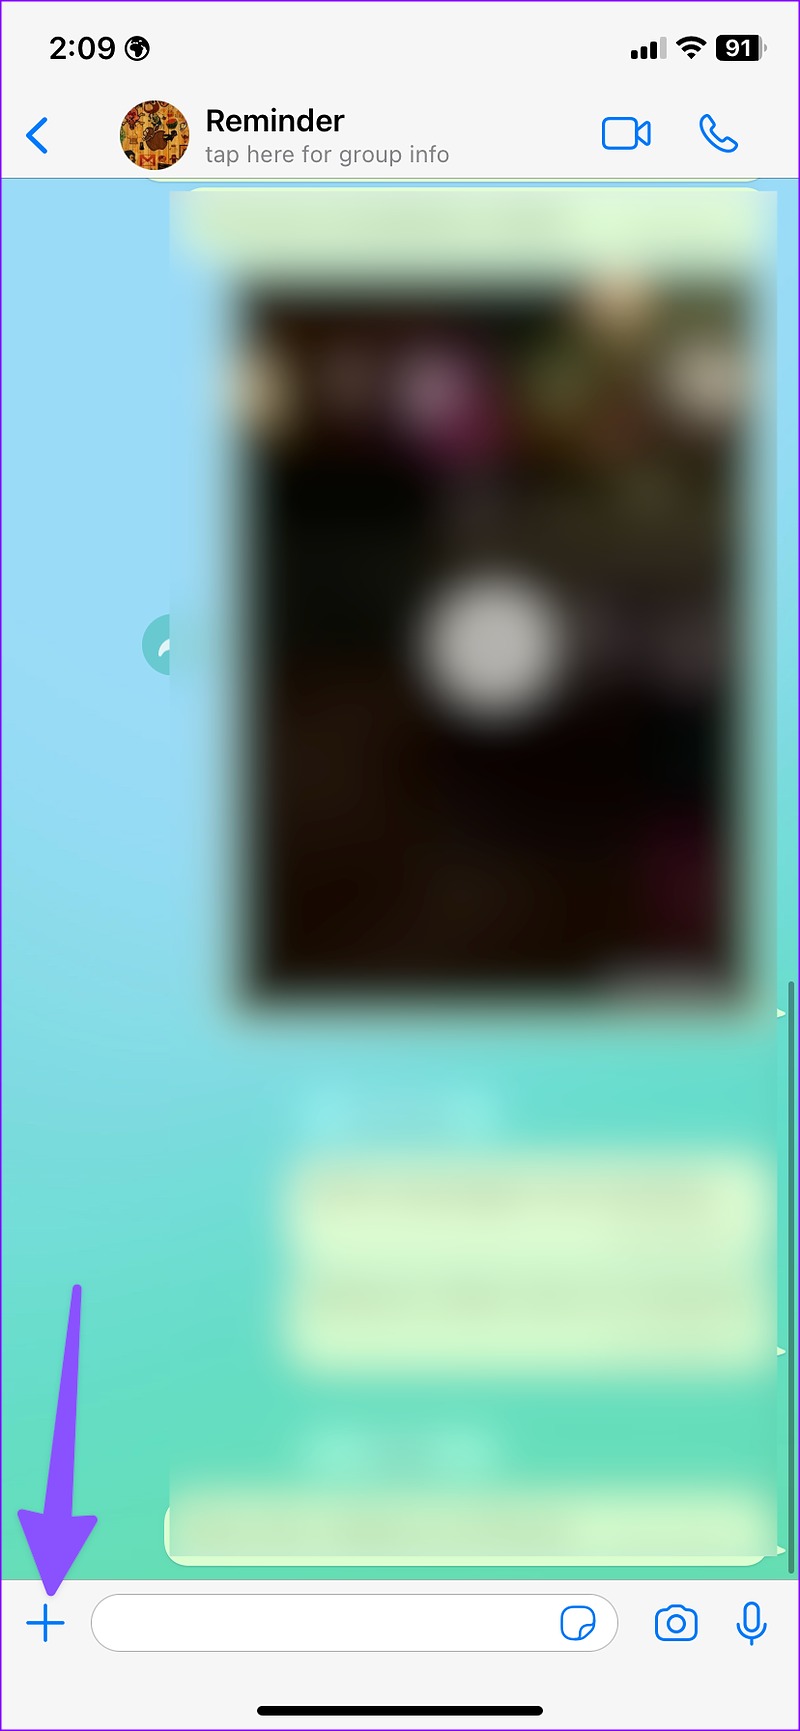
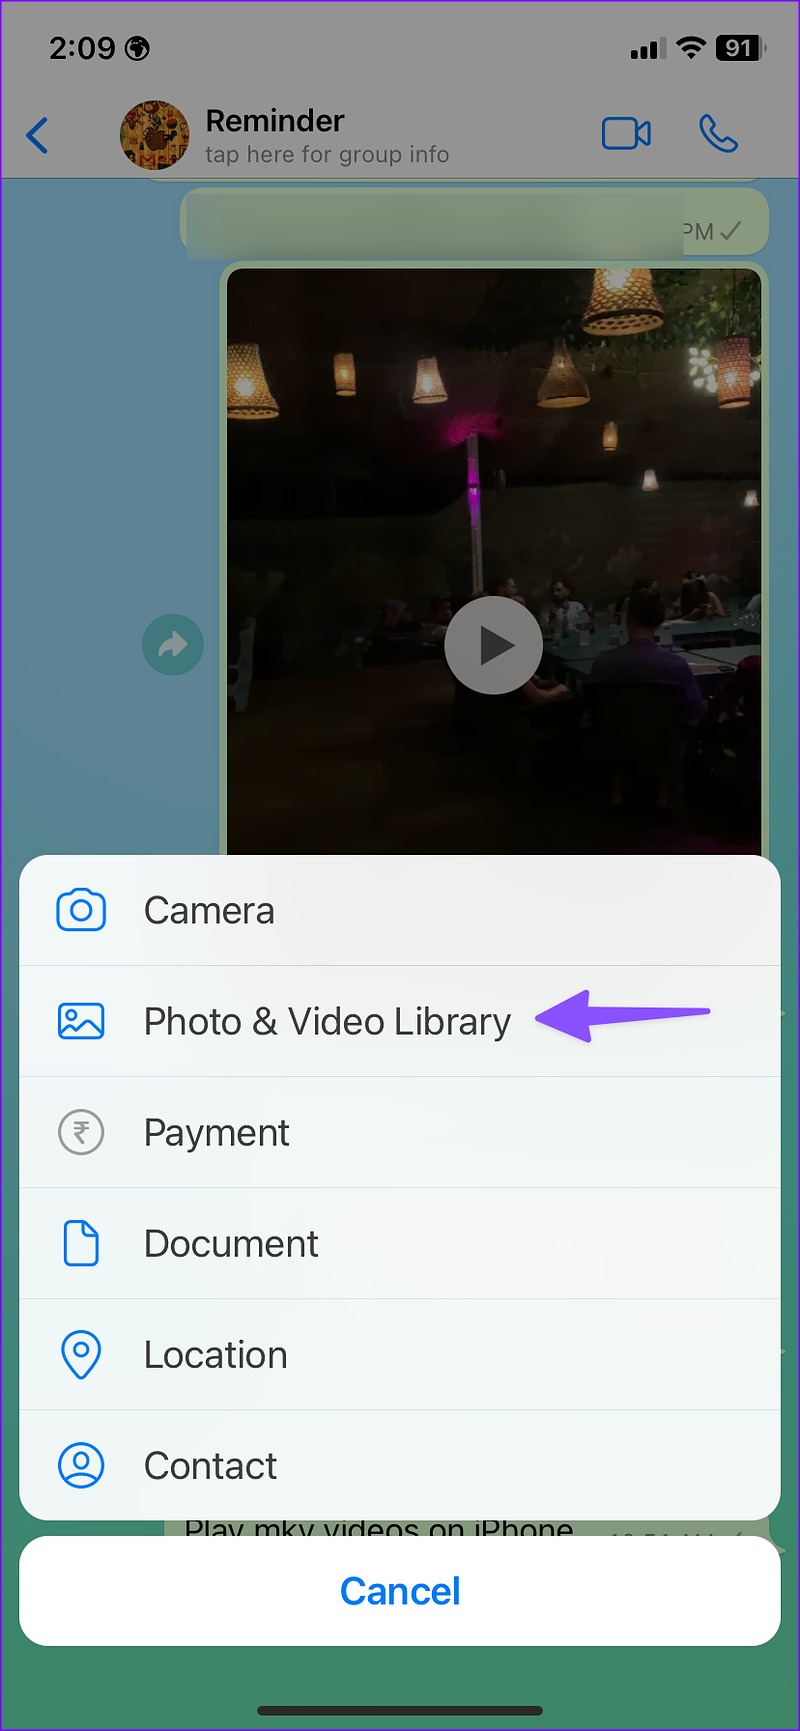
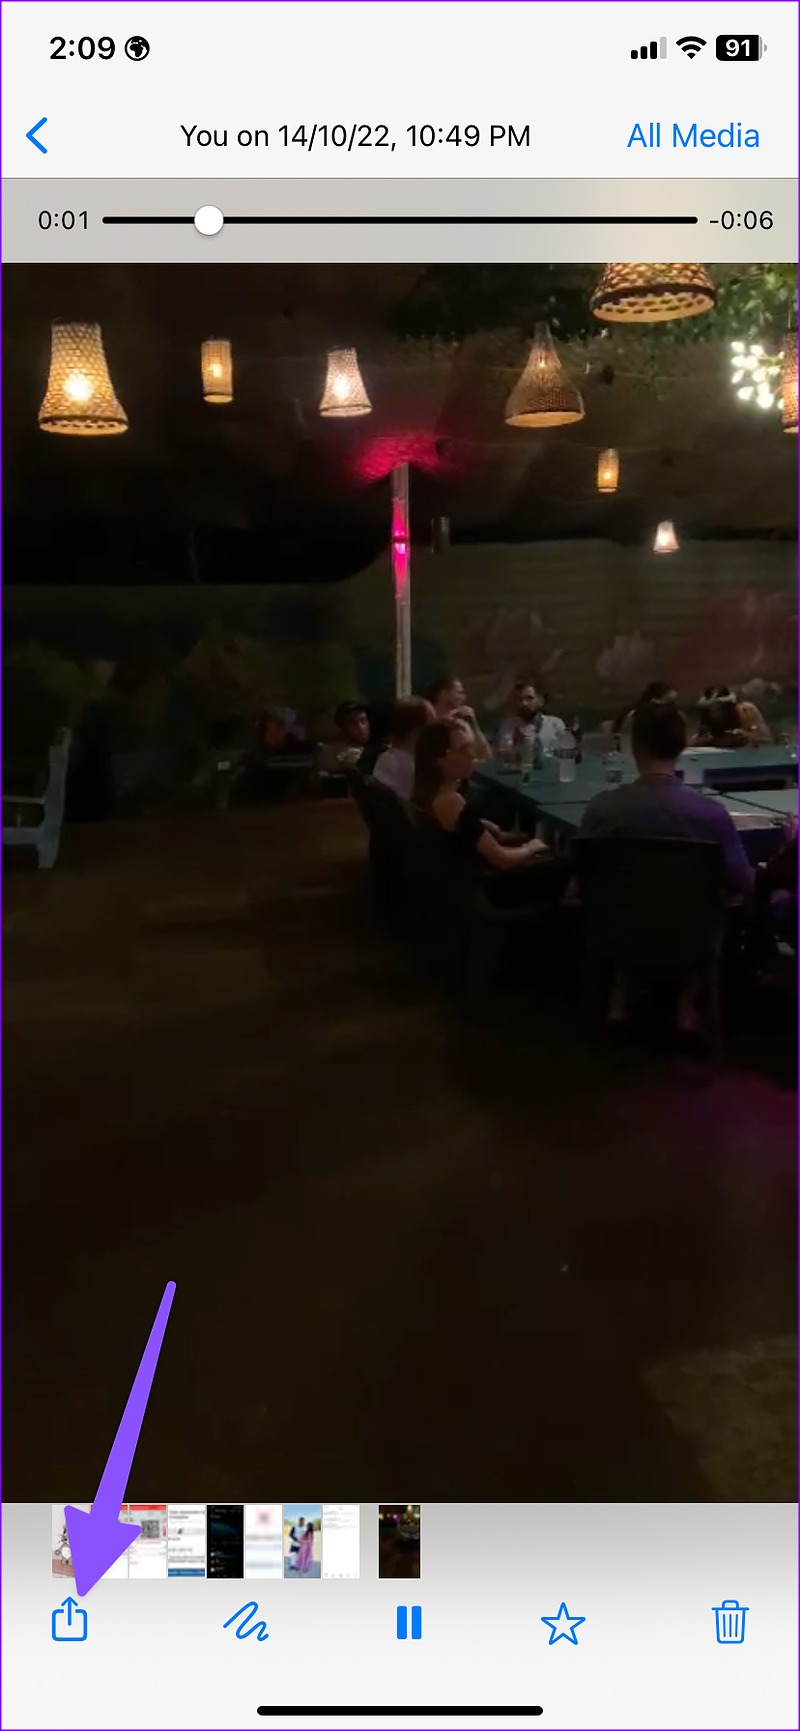
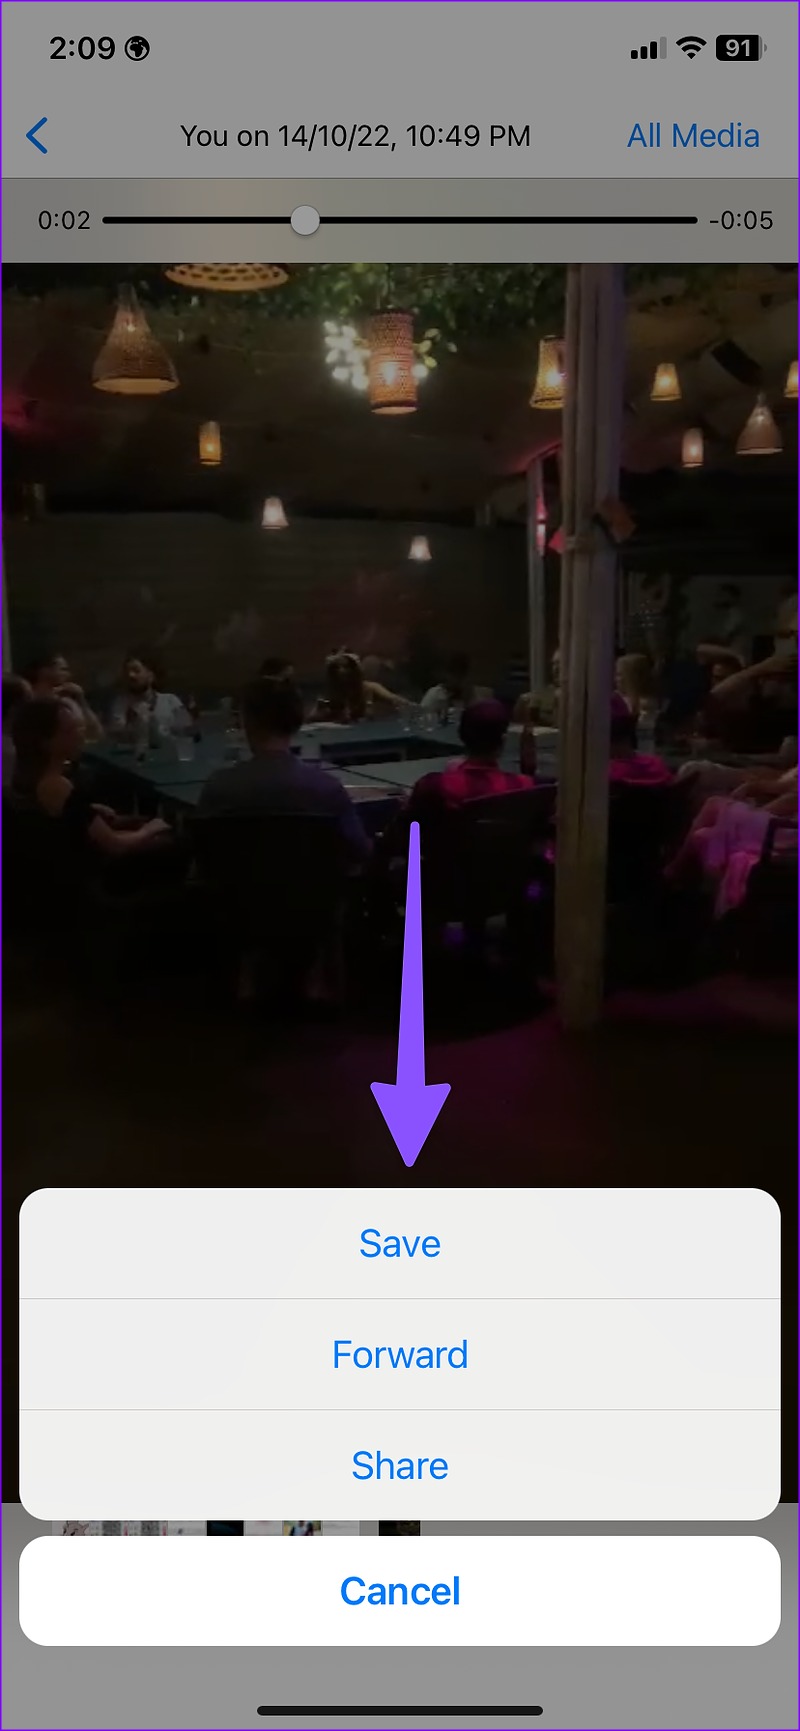
When you share a large video on WhatsApp, the service compresses it before sharing it with the recipient. You can create a WhatsApp group with yourself and share videos in the same group to reduce video size. Step 1: Open WhatsApp on your iPhone. Step 2: Select your personal group. Step 3: Tap the + icon in the bottom-left corner. Step 4: Select Photos & Video Library. Step 5: Tap the video you want to compress. Hit the send button. Step 6: Open the video in WhatsApp conversation. Tap the share button. Step 7: Tap Save to download the compressed video on your iPhone. Open the Photos app and check the video size (refer to the steps above). In our testing, WhatsApp reduced a 70MB video to 1.5MB. That also shows the heavy compression WhatsApp applies while transferring videos. It’s highly effective and does the job without downloading a third-party app from the App Store.
Compress Large Videos on iPhone
Compressing a large video will degrade the overall quality. If you don’t want to reduce a video, read our dedicated post to learn the best ways to send large videos on your iPhone. Which trick did you use from the list above?
