While you can take screenshots of a workbook, it’s not a ideal solution and the quality of the images may not be up to the mark. In this post, we’ll show you four simple ways to save images from an Excel workbook.
1. Save Individual Images Manually
The most straightforward way to extract images from an Excel workbook is to save them manually. This is the quickest method if you only need to save one or two images. Here’s how you can go about it. Step 1: Open the relevant Microsoft Excel workbook. Step 2: Right-click on the image you want to get and select Save as Picture.
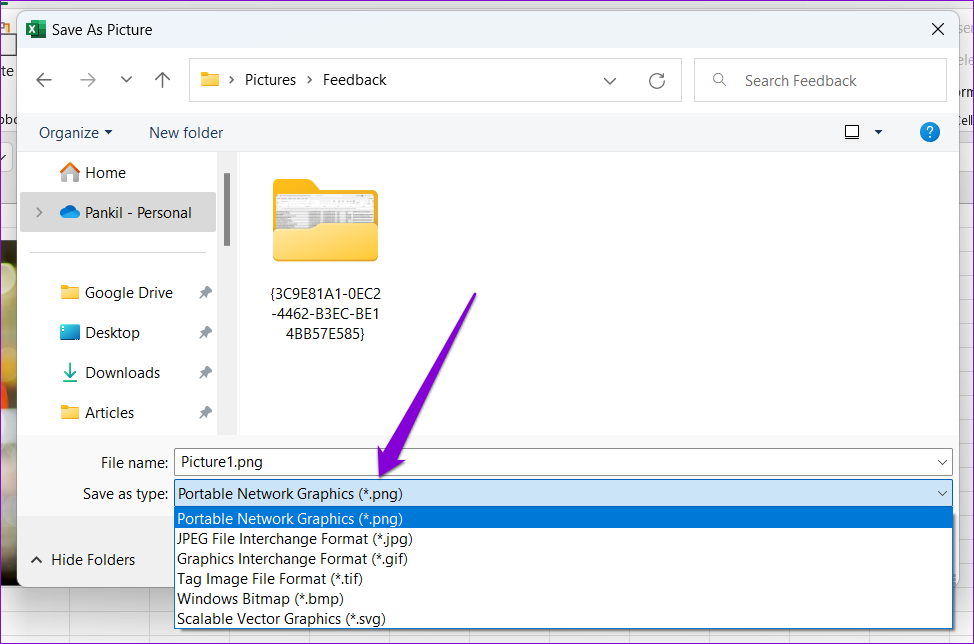
Step 3: In the ‘Save As Picture’ window, navigate to the folder where you want to save the image. Enter a suitable name for the image and select your preferred file format.
Step 4: Lastly, click Save.
You can repeat the above steps to save more images. This method also allows you to save an Excel chart as an image.
2. Copy the Image and Paste It Elsewhere
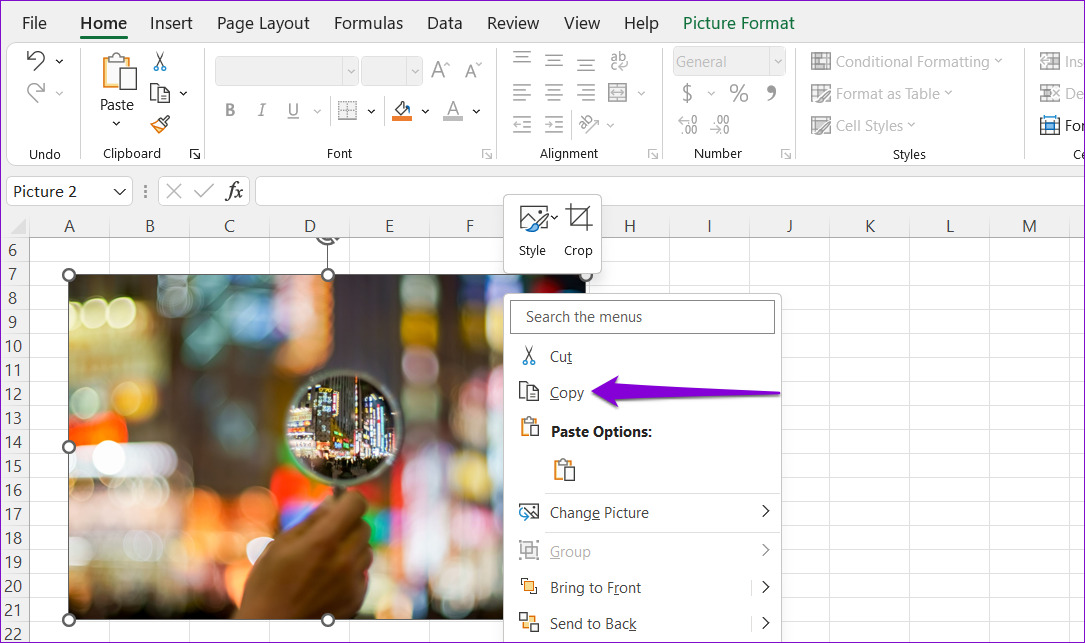
You can also copy an image from your Excel workbook and paste it into another program. To do so, simply right-click on an image in your Excel workbook and select Copy.
Next, switch to the app where you want to insert the image and paste it. This method will allow you to export images directly from your Excel file to Word, Gmail, WhatsApp, and so on.
3. Save Your Excel File as a Web Page
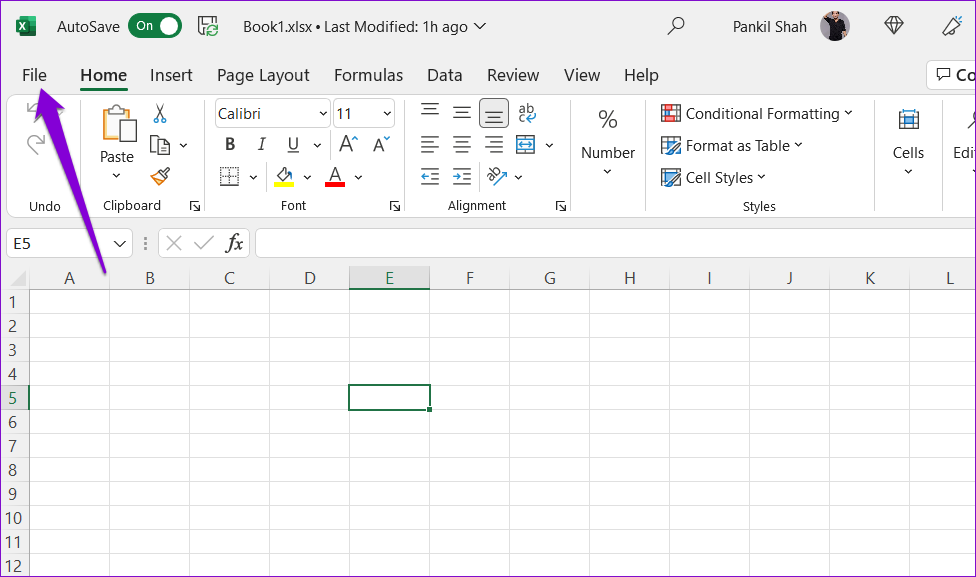
Although the above two methods are fairly straightforward, they aren’t the most efficient if you want to extract multiple images from an Excel file. So, if you’re looking to save all the images from your Excel file at once, you can do so by saving it as a web page. Here’s how to do it. Step 1: Open the relevant Excel workbook. Step 2: Click the File menu in the top-left corner.
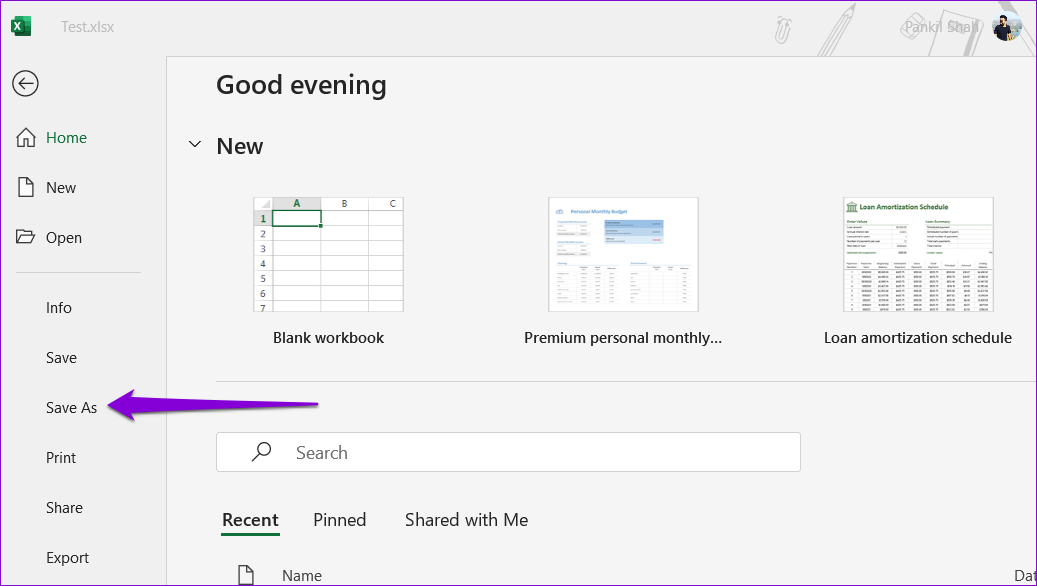
Step 3: Select Save As from the left sidebar.
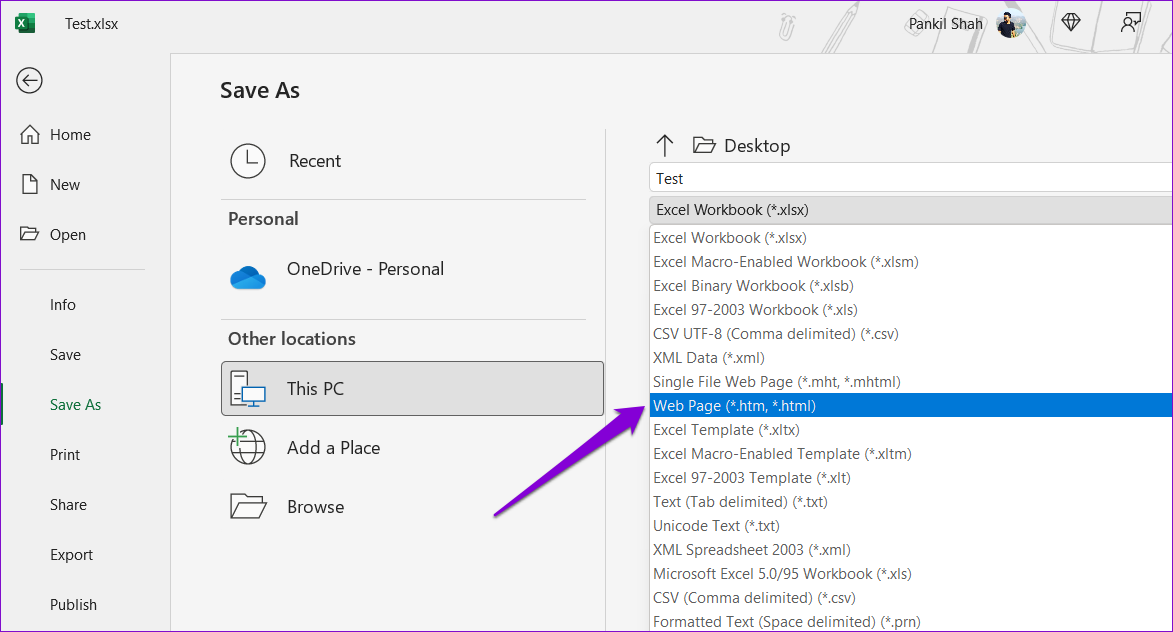
Step 4: Select a location where you want to save your file and enter a suitable name for it. Then, use the drop-down menu to select Web Page from the list.
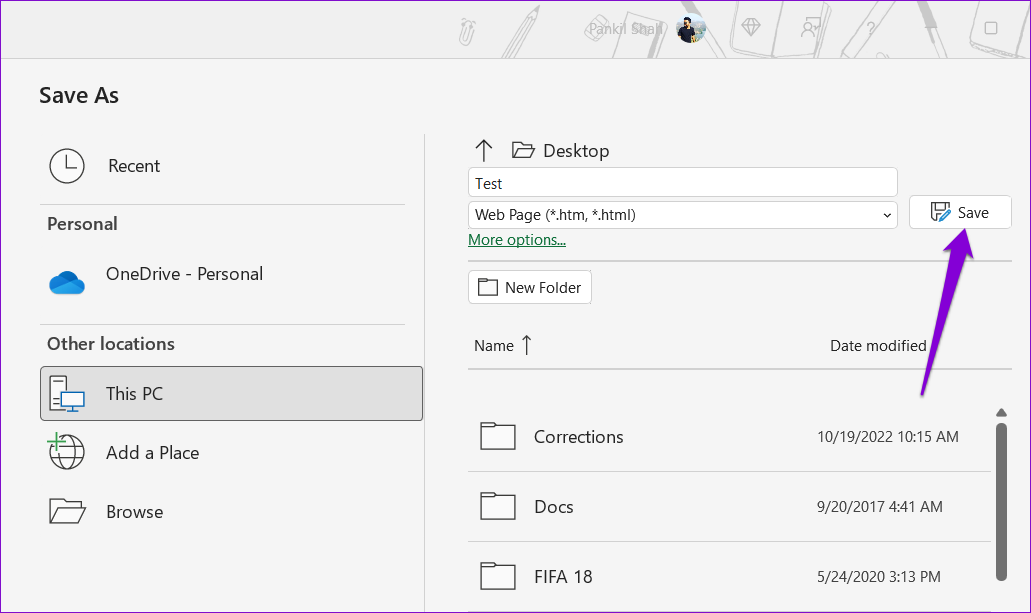
Step 5: Click on Save.
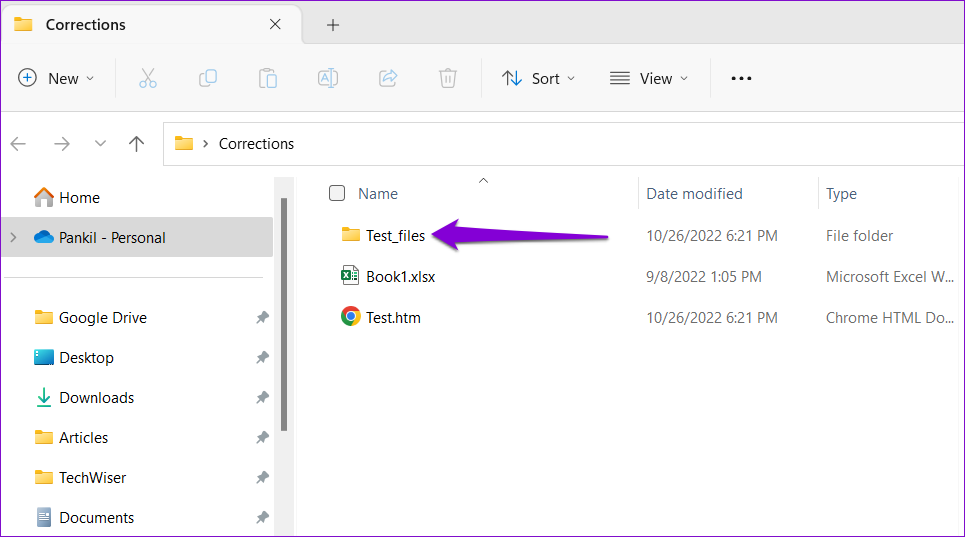
Step 6: Navigate to the folder where you saved your Excel file as a web page and you’ll see a folder with the same name as your Excel file.
Step 7: Open the folder to view all the images from your Excel workbook.
4. Add ZIP Extension and Extract the File
Another method for saving all the images from an Excel workbook is to convert it to a ZIP file and then extract it. Here’s how you can go about it. Step 1: On your PC, locate the Excel file containing the images. Step 2: Right-click on the file and click the Rename icon.
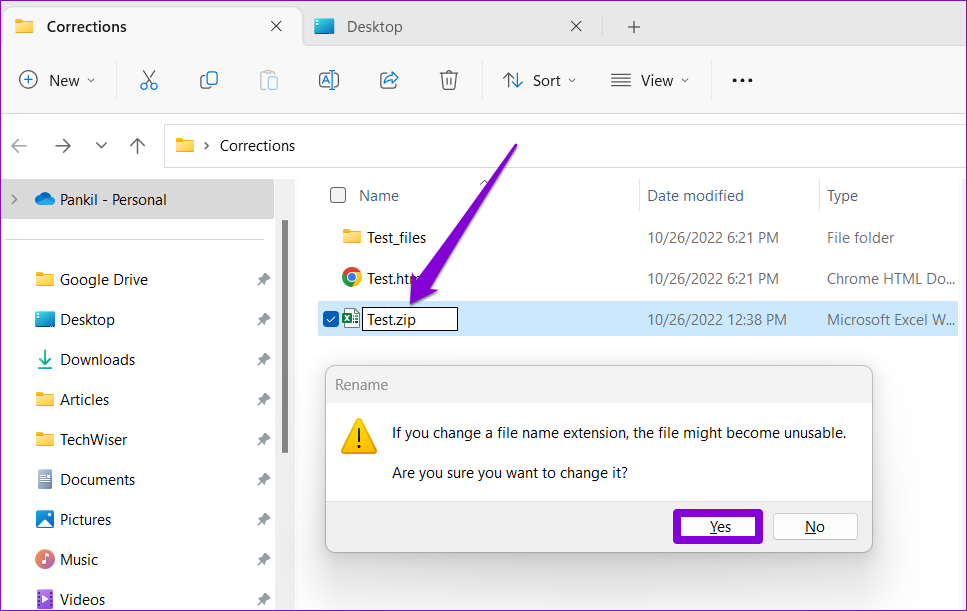
Step 3: Change the file extension from .XLSX to .ZIP and select Yes when a prompt appears.
Step 4: Right-click on the renamed file and select Extract All.
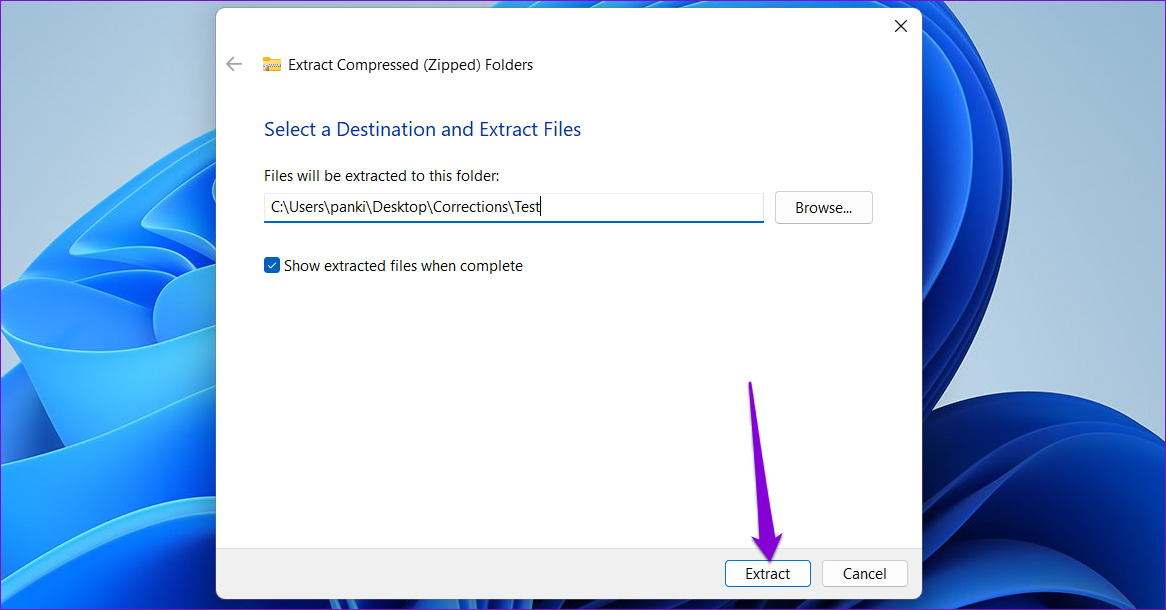
Step 5: Use the Browse button to select a location where you want to extract the file and click on Extract.
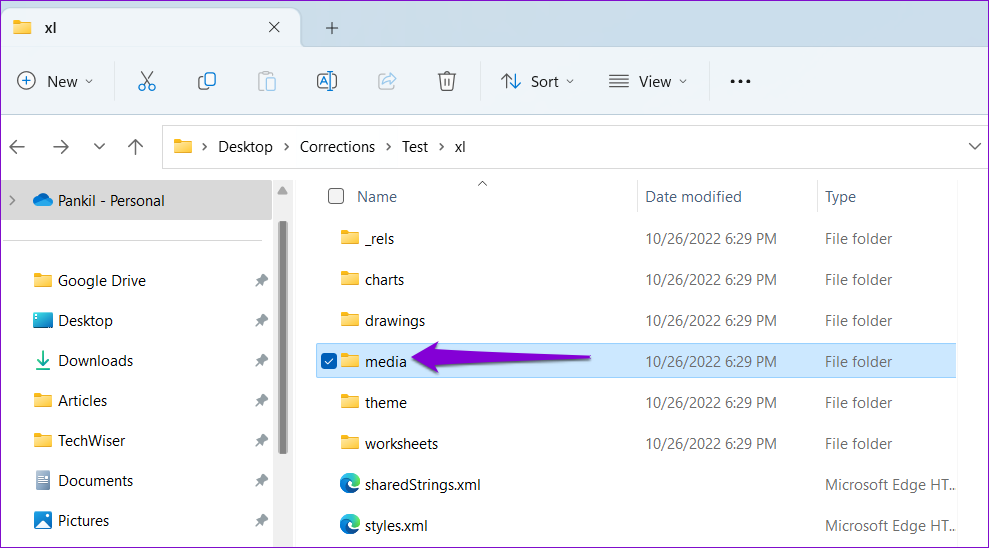
Step 6: Navigate to the folder where you extracted the file and double-click the ‘xl’ folder within it.
Step 7: Open the folder named media and you’ll find all the images that were there in the Excel workbook.
Bonus: How to Save an Excel Table as an Image
Aside from images, you can also save an Excel table as an image. For that, you’ll need to copy your Excel table and paste it as a static picture. It’s quite easy. Here are the steps you can follow. Step 1: In your Excel workbook, select all the table cells. Right-click on any of the cells within that table and select Copy.
Step 2: Select an empty cell in your workbook where you want to paste the table as an image. Right-click on the cell, go to Paste Special, and click on the Picture option from ‘Other Paste Options.’
Excel will insert your table as an image. After that, you can save it using any of the methods above.
Export Your Excel Charts and Images
Extracting images and charts from an Excel workbook is fairly simple. You can choose the best method based on the number of images you want to extract. Similarly, you can also save images from Microsoft Word or Google Docs documents.
