There could be several reasons behind the audio distortion issue on Windows 11, ranging from a malfunctioning audio device to corrupted drives. If you can’t seem to determine the exact cause, then working your way through the troubleshooting tips below will help.
1. Reconnect the Audio Device
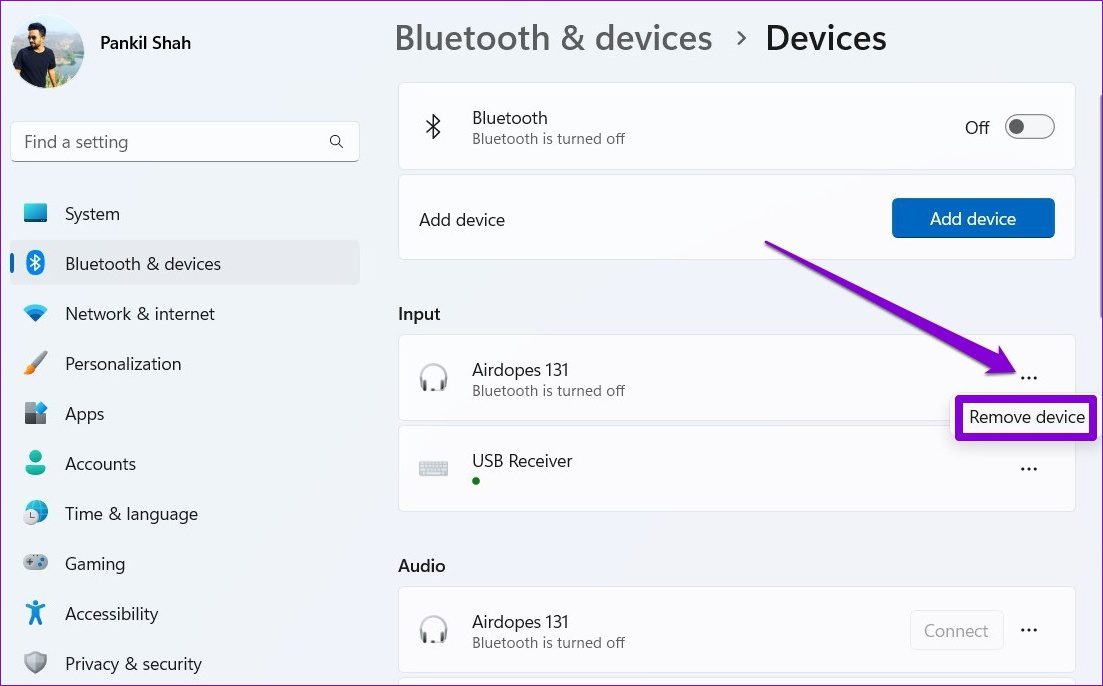
Your first course of action is to disconnect your audio device, clean their respective ports, and reconnect them. If you’re using wired headphones or speakers, ensure they’re plugged in correctly. Don’t forget to inspect the audio port for dust while you’re at it. Besides this, you should also consider testing your headphones or speakers with another PC to rule out any hardware issues. However, if you’re using Bluetooth headphones or speakers, follow the steps below to disconnect and reconnect them. Step 1: Press Windows key + A to open the Quick Settings panel. Right-click on the Bluetooth icon and select Go to Settings.
Step 2: Use the three-dot menu icon to disconnect your Bluetooth headphone or speaker.
Try reconnecting your device and play a video or an audio file to check if this resolves the distortion issue.
2. Run Audio Troubleshooter
Windows 11 packs troubleshooters for nearly everything to fix the problems without tinkering around. So you’ll need to run the Audio troubleshooter to inspect your PC for any audio playback issues and try to resolve them. Step 1: Open the Start menu, type in troubleshoot settings, and click on the first result that appears.
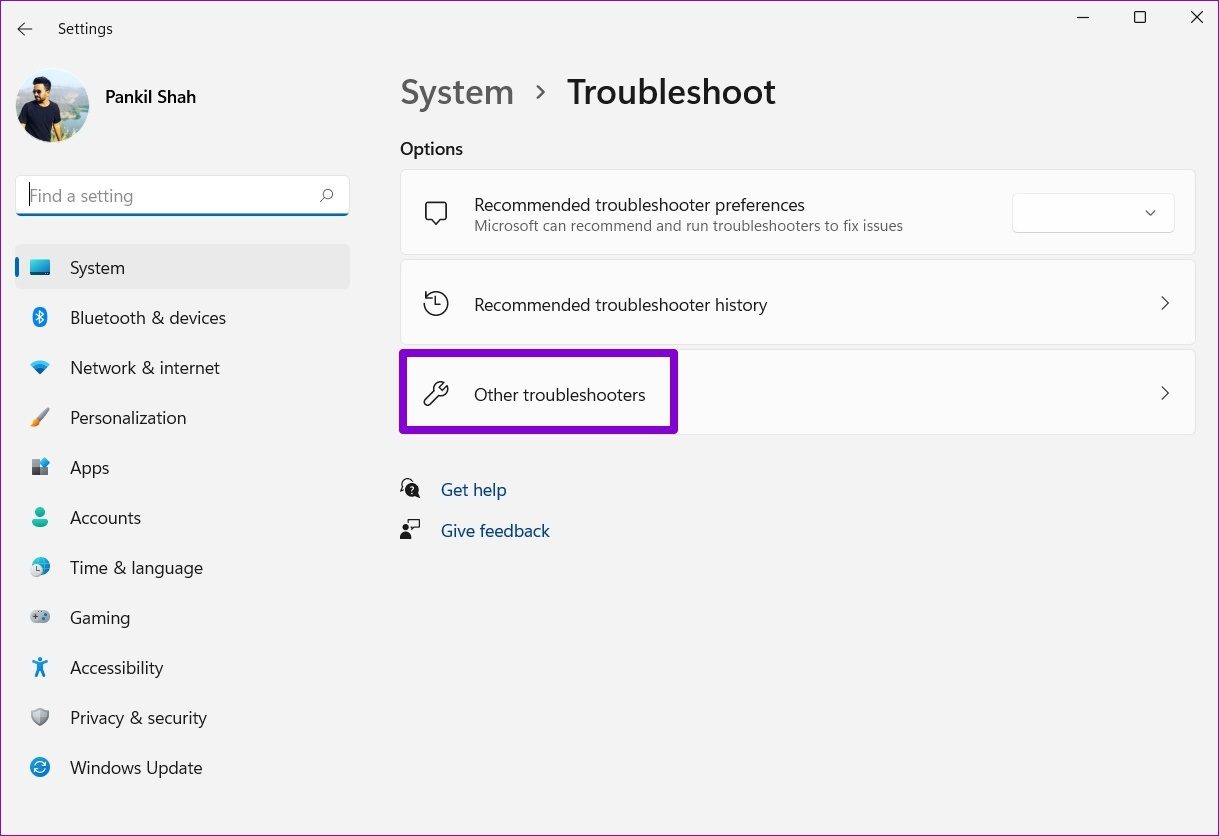
Step 2: Go to Other troubleshooters.
Step 3: Click on the Run button next to Playing audio and then follow the on-screen instructions to complete the troubleshooting process.
3. Update or Reinstall Audio drivers
Your PC’s audio drivers allow Windows to communicate with various audio devices. But if those drivers are outdated, then such audio distortion issues may arise while streaming. To fix this, you’ll need to update the audio drivers on your PC. Step 1: Click on the Search icon on the Taskbar, type in device manager, and press Enter.
Step 2: Double-click on ‘Sound, video and game controllers’ to expand it. Right-click on the audio device, and select Update driver from the list.
From there, follow the on-screen prompts to update the drivers. If the issue persists even after this, you should uninstall the troublesome audio driver and restart your PC.
After the PC restarts, Windows will scan for hardware changes and install the missing drivers automatically.
4. Restart Audio Services
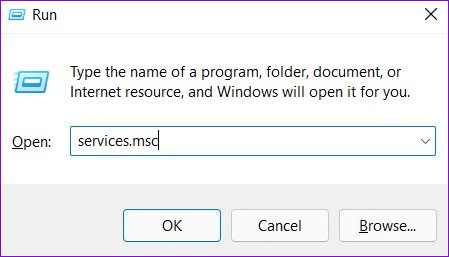
Windows Services run in the background to enable specific core features of the operating system. Ideally, you wouldn’t need to fiddle with these services as they tend to run automatically. But if you’re having issues while streaming audio on Windows, then restarting audio services will help. Step 1: Press Windows + R to launch the Run command, type in services.msc, and press Enter.
Step 2: In the following window, locate Windows Audio service. Right-click on it and select Restart.
Similarly, you’ll also need to restart ‘Remote Procedure Call’ and ‘Windows Audio Endpoint Builder’ services as the Windows Audio service depends on these two services to function properly.
5. Disable Sound Enhancements
Enabling audio enhancements on Windows can help you achieve the best possible audio output while streaming. However, depending on the audio device you’re using and the sound card on your PC, these enhancements may not work as pleasantly as you’d expect. Hence, you should disable them entirely if you’re having audio issues. Step 1: Press Windows key + I to launch the Settings app. Step 2: Open Sound settings.
Step 3: Scroll down to the Advanced section and click on All sound devices.
Step 4: Select your output device.
Step 5: Use the drop-down menu next to Audio enhancements and select Off.
6. Change Bit Rate Quality
It’s possible that the audio distortion issue is only occurring because of the set Bit rate quality. If that’s the case then switching to a different should do the trick. Step 1: Right-click on the speaker icon on the Taskbar and select Sound settings.
Step 2: Select the audio output device that you’re using.
Step 3: Under Output settings, use the dropdown next to Format and select a different format.
Step 4: Click on the Test button to check the audio.
You may have to test out different formats until you find the one that works with your audio device.
Enjoy Crystal Clear Audio
Audio issues on Windows computer while streaming a movie or listening to musc can easily ruin your experience. Luckily, it’s nothing you can’t troubleshoot yourself with the solutions mentioned above. If you’ve found another novel solution that worked for you, share it in the comments below.


