When you experience this problem while streaming or watching a video offline, follow the troubleshooting steps below to resolve the problem for good.
1. Run the Video Playback Troubleshooter
Windows 11 includes a dedicated Video Playback troubleshooter that’s handy when videos aren’t playing correctly. It scans your system for any common issues and attempts to fix them. Here’s how you can run it. Step 1: Open the Start menu and click the gear-shaped icon to launch the Settings app.
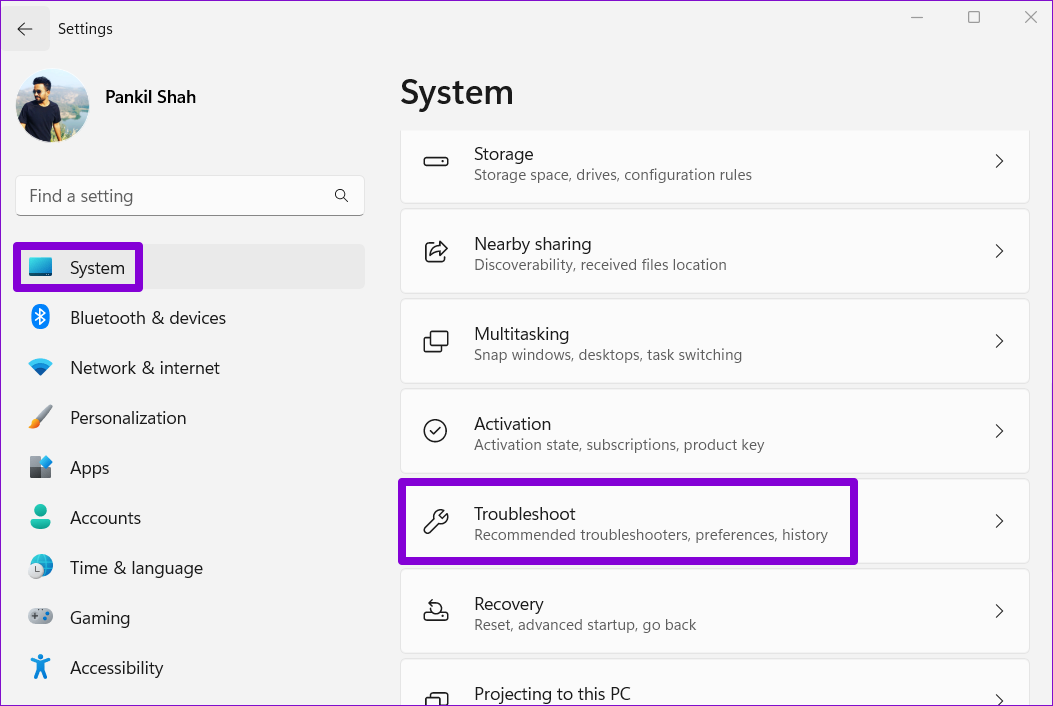
Step 2: In the System tab, select Troubleshoot.
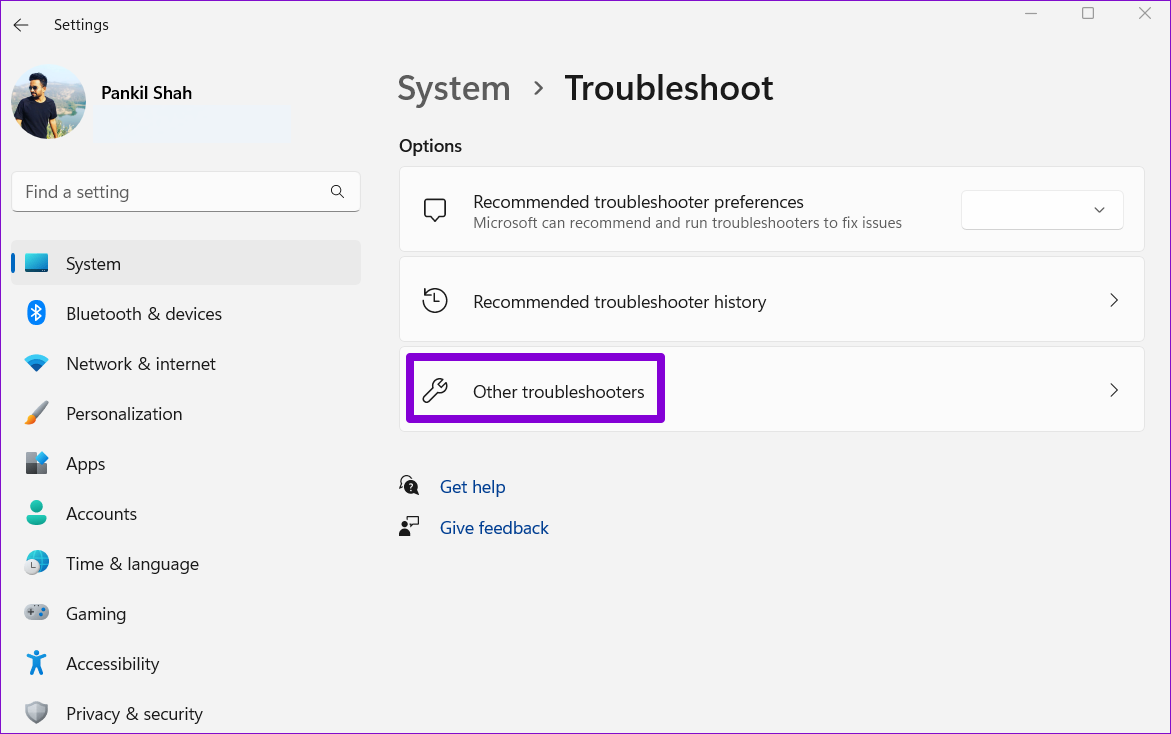
Step 3: Click on Other troubleshooters.
Step 4: Click the Run button next to Video Playback. Then, follow the on-screen prompts to run the troubleshooter.
2. Modify Video Playback Settings
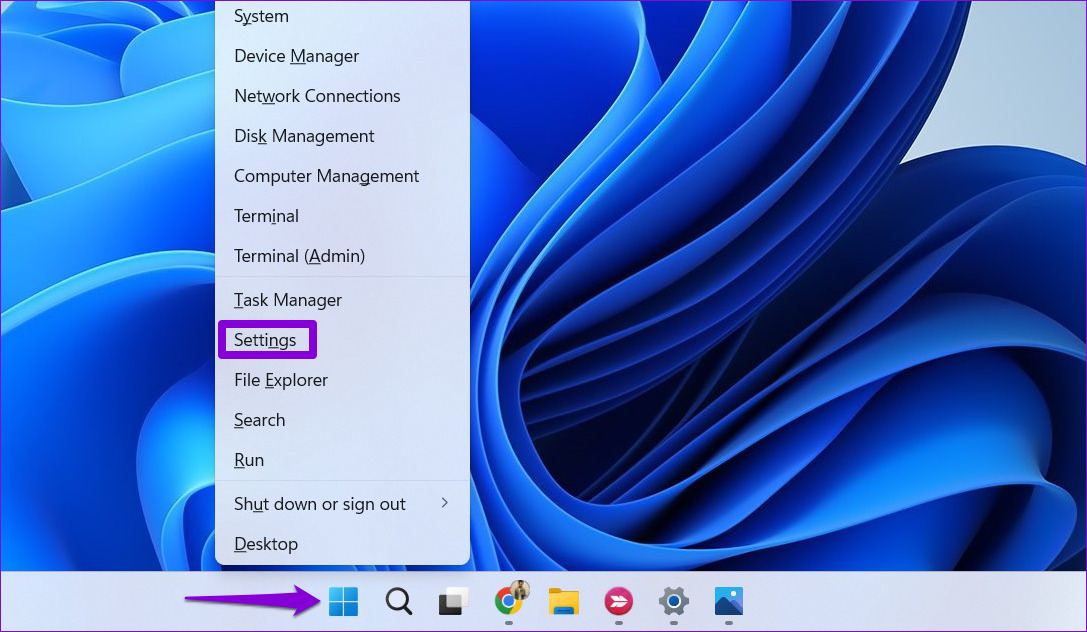
If the Windows troubleshooter fails to find any issues, you can alter some video playback settings to fix the lag manually. To modify video playback settings in Windows 11, here’s what you need to do: Step 1: Right-click on the Start icon and select Settings from the list.
Step 2: Navigate to the Apps tab on your left. Then, click on Video playback.
Step 3: Disable the switch next to ‘Process video automatically to enhance it.’ Then, toggle off the ‘Save network bandwidth by playing video at a lower resolution’ option.
Step 4: Lastly, use the drop-down menu next to Battery options to select ‘Optimize for video quality.’
After tweaking the above options, check if videos still lag or stutter on your computer.
3. Switch to High-Performance Mode
Windows 11 lets you switch between various power modes to prioritize performance or power efficiency. If you select a stricter power profile, you may experience performance issues while playing high-quality videos. You can set Windows 11 to favor performance if videos are still lagging on Windows 11. Step 1: Click the search icon on the Taskbar, type in control panel, and press Enter.
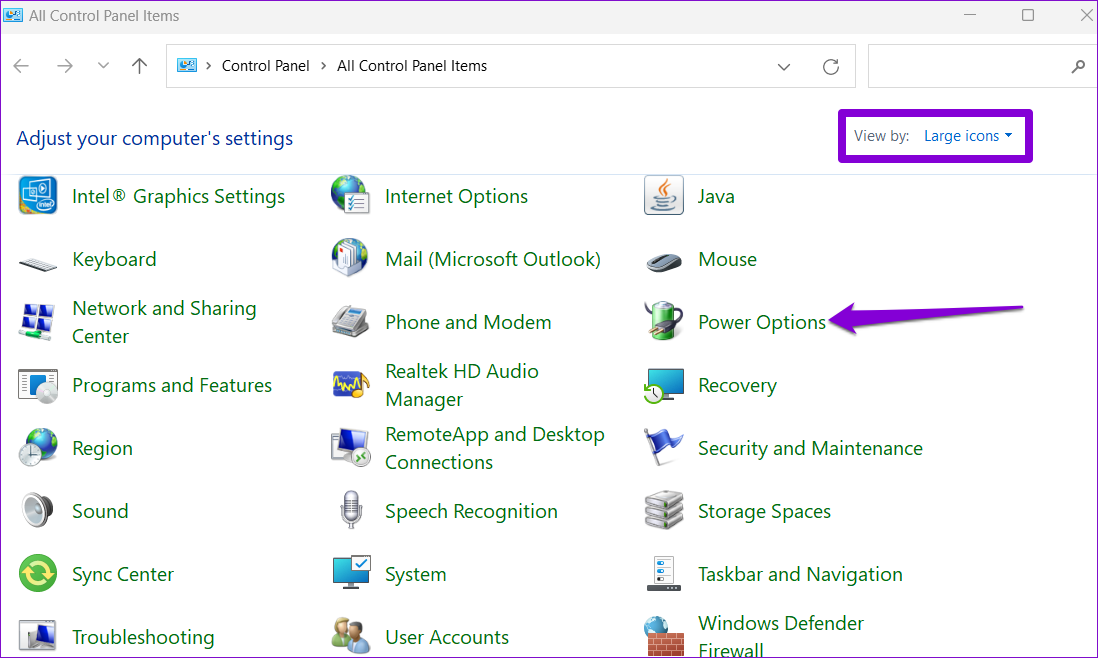
Step 2: Use the drop-down menu in the top-right corner to change the view type to Large icons. Then, go to Power Options.
Step 3: Select High performance.
Choosing option may drain your laptop’s battery relatively faster but it’ll provide better video watching experience.
4. Change the Graphics Preference for the Media Player App
On Windows 11, you can configure graphics preferences for each app and program separately. You can configure your media player app to use the dedicated GPU to deliver better video playback experience on Windows 11. Of course, this only works when you computer has a dedicated GPU chip inside. Step 1: Press the Windows key + I to launch the Settings app. In the System tab, click on Display.
Step 2: Under Related settings, click on Graphics.
Step 3: Locate your media player app on the list. Click on it and select Options.
If you can’t find your app on the list, click the Browse button and locate your app’s EXE file on your PC to add it.
Step 4: Choose the ‘High performance’ option and click on Save.
Likewise, if you’re using a streaming app like Netflix or Prime Video, you can change the preferred GPU for those apps.
5. Update or Reinstall the Graphics Driver
Changing the preferred GPU for the video player app may have little effect if the graphics driver on your PC is outdated. This can result in a slew of other display issues as well. To fix this, you’ll need to update your graphics drivers with the steps below. Step 1: Press the Windows key + X and select Device Manager from the resulting menu.
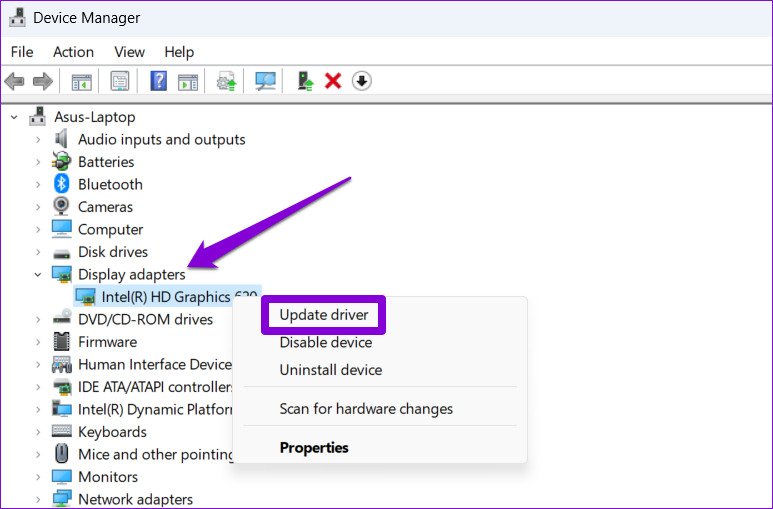
Step 2: Expand the Display adapter, right-click on your graphics driver, and select Update driver.
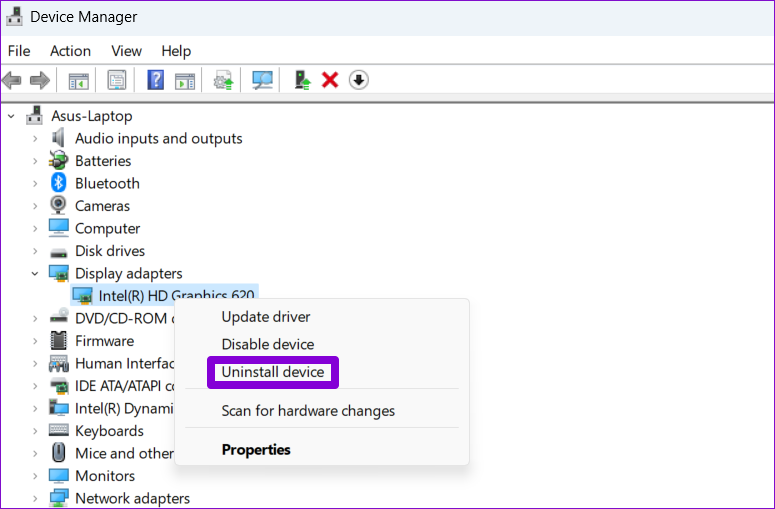
From there, follow the on-screen instructions to finish updating the driver. If updating the driver does not help, you need to uninstall the driver using Device Manager and restart your PC. After that, you’ll need to let Windows Update to search and install a stable version of the graphics driver on your computer.
6. Disable Hardware Acceleration (For Browsers)
When you enable hardware acceleration on your browser, it assigns some of the graphics-intensive tasks to your GPU instead of the CPU to improve visual output. However, this may not work well. If you experience a video lag while streaming content from YouTube or Netflix on your browser, you may disable the hardware acceleration feature. To disable hardware acceleration in Chrome, type chrome://settings/system in the URL bar at the top and press Enter. Then, toggle off the ‘Use hardware acceleration when available’ option.
If you’re using Edge, type edge://settings/system in the address bar and press Enter. Then, turn off the ‘Use hardware acceleration when available’ option.
Restart your browser after this and try to stream videos again.
No More Lagging
Few things are more irritating than watching a video that constantly lags or stutters. Fortunately, it’s easy to fix the issue with a little bit of troubleshooting. That said, if you feel that the overall performance of your PC is not up to the mark after a recent Windows 11 update, you may want to fix that too.


