Corrupted drivers, bad system updates, and memory issues are among the top reasons behind the ‘critical process died’ error on Windows 11. We’ve outlined a few troubleshooting tips that should help end such repeated crashes. So, let’s check them out.
1. Boot in Safe Mode
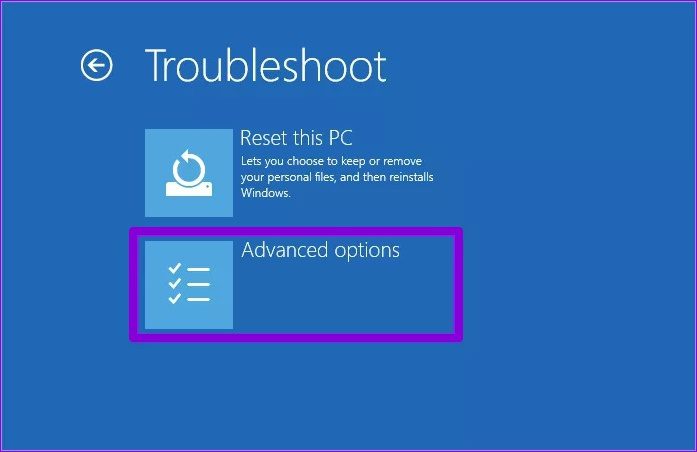
If you can boot your PC normally after the BSoD error, skip this step. However, if Windows is failing to boot, then you may get the ‘critical process died’ error. So you can try booting into Safe Mode to investigate this further and troubleshoot the issue. Step 1: While your PC is booting, press and hold the physical power button for a few seconds until your PC restarts. Interrupt the boot process three consecutive times and Windows will greet you with the startup repair screen. Select Advanced options from here.
Step 2: Next, click on Troubleshoot.
Step 3: Then go to Advanced Options.
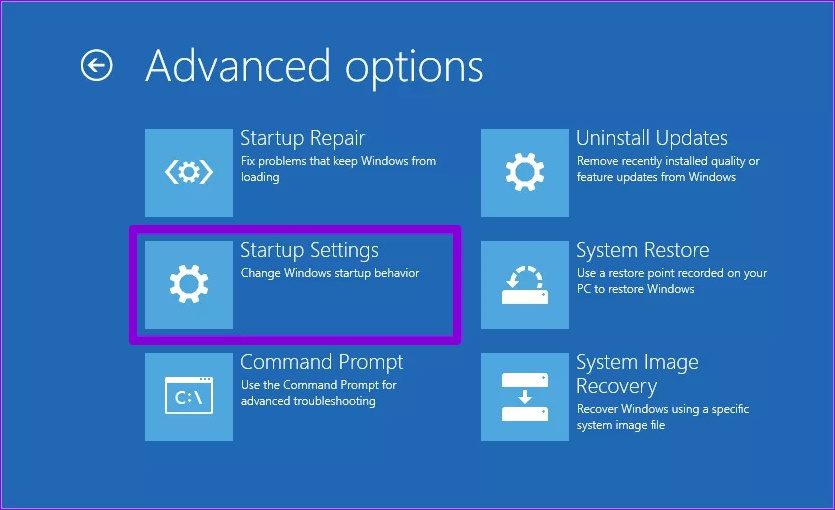
Step 4: On the Advanced Options screen, click Startup Settings.
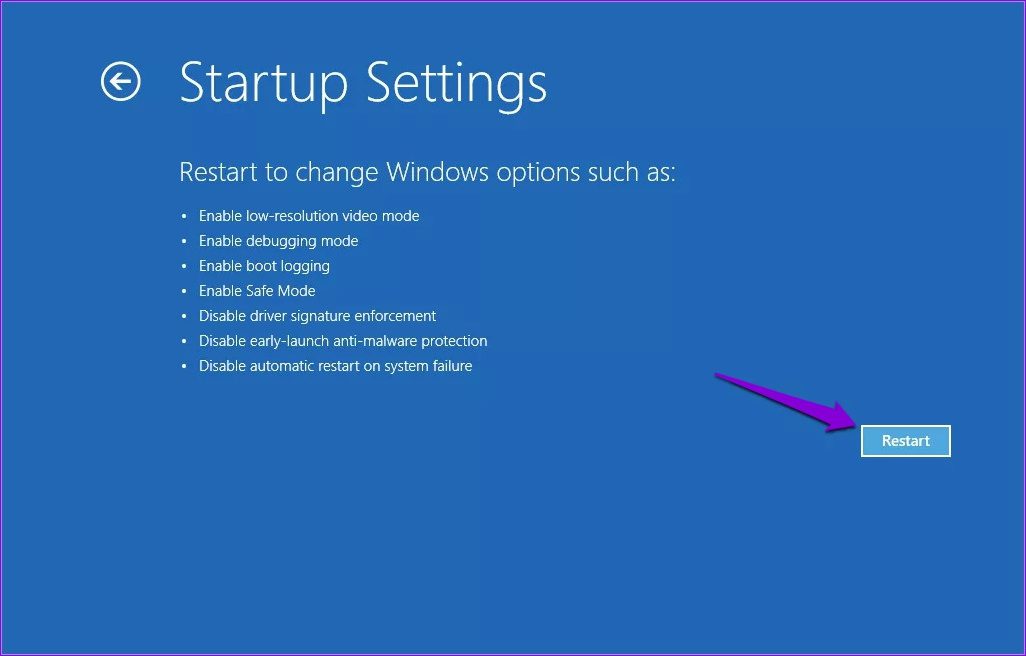
Step 5: Click on the Restart button to visit the Startup Settings menu.
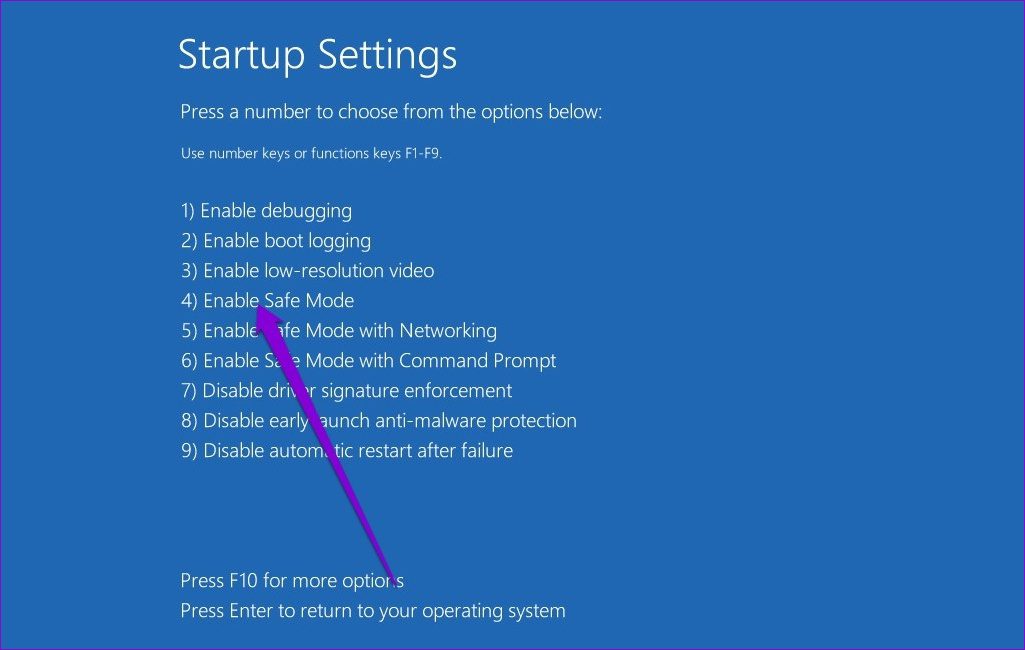
Step 6: Finally, press 4 or F4 on your keyboard to restart your PC in Safe Mode.
After booting into Safe Mode, use the methods below to troubleshoot the error.
2. Run Troubleshooter
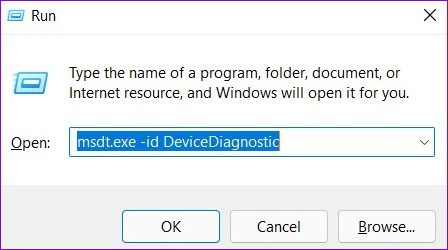
Windows 11 includes a range of troubleshooters that can be useful in such situations. You can run those troubleshooters and see if that makes any difference. Start by running the hardware troubleshooter first. Press Windows key + R to launch the Run command, type in msdt.exe -id DeviceDiagnostic and press Enter.
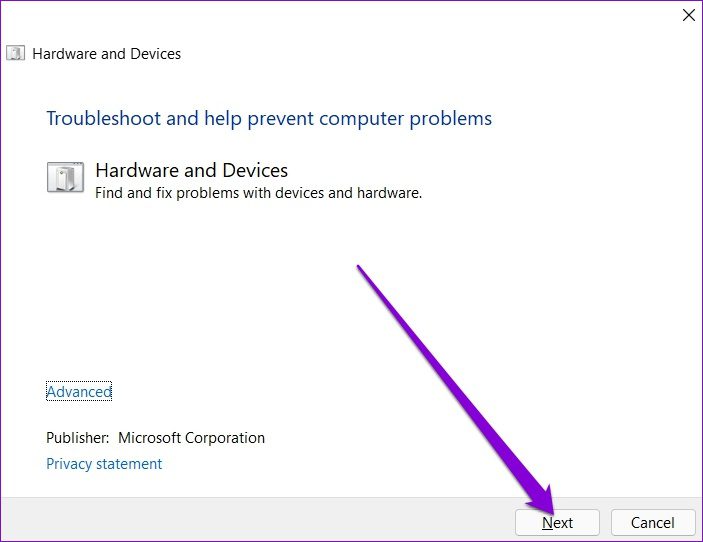
Then hit Next to begin the process.
If the problem persists, you can run other troubleshooters on Windows. Step 1: Open the Start menu, type troubleshoot settings, and press Enter.
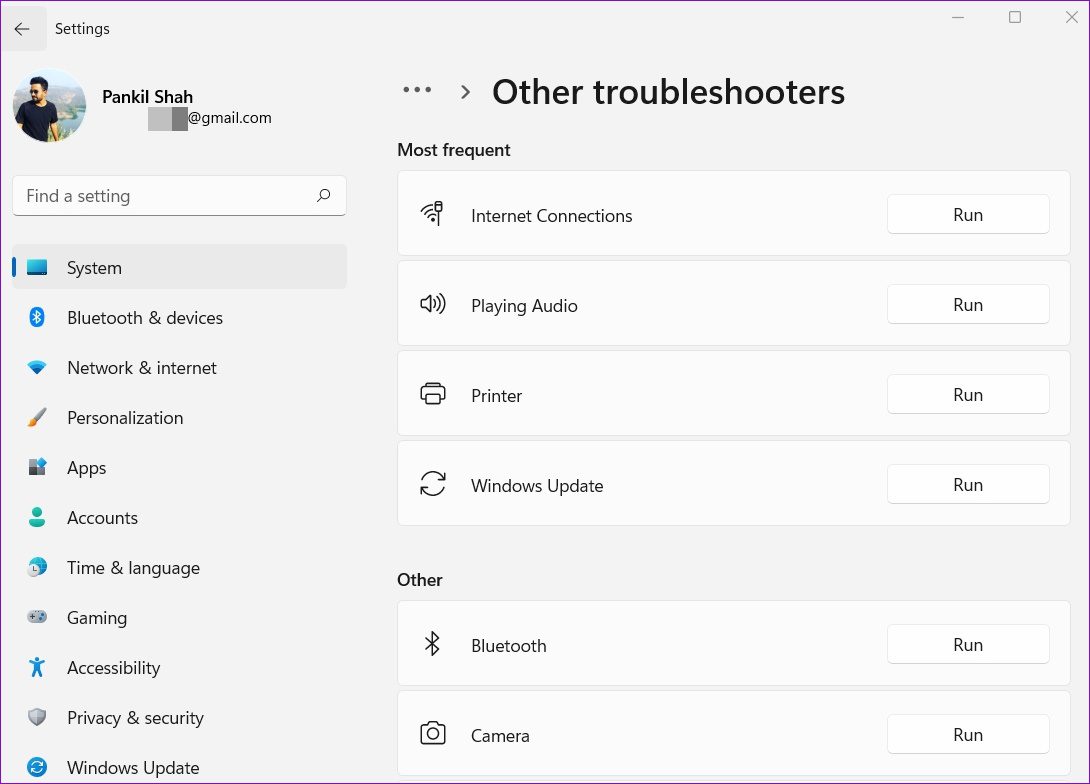
Step 2: Go to Other troubleshooters.
Step 3: You’ll find a list of troubleshooters available. Run all the relevant troubleshooters that might help in this situation.
Restart your PC to see if that has resolved the error.
3. Run SFC & DISM Scan
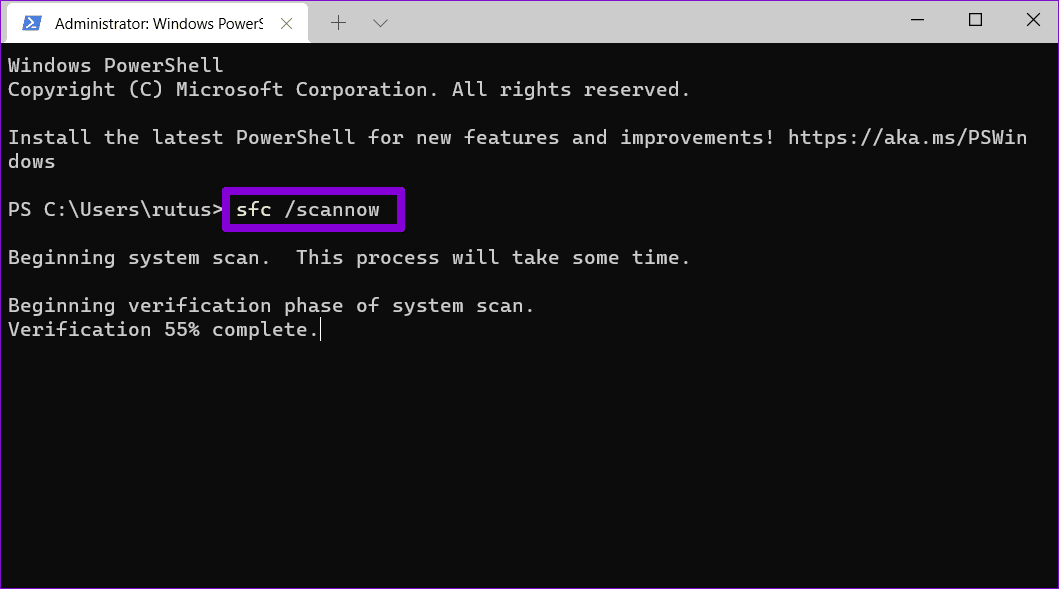
Corrupted or missing system files can also hamper the Windows processes and lead to the ‘critical process died’ error. You can try running an SFC (System File Checker) scan to replace those system files with their cached versions. Step 1: Right-click on the Start menu icon and select the Windows Terminal (Admin) option from the resulting menu.
Step 2: Type the command mentioned below and press Enter.
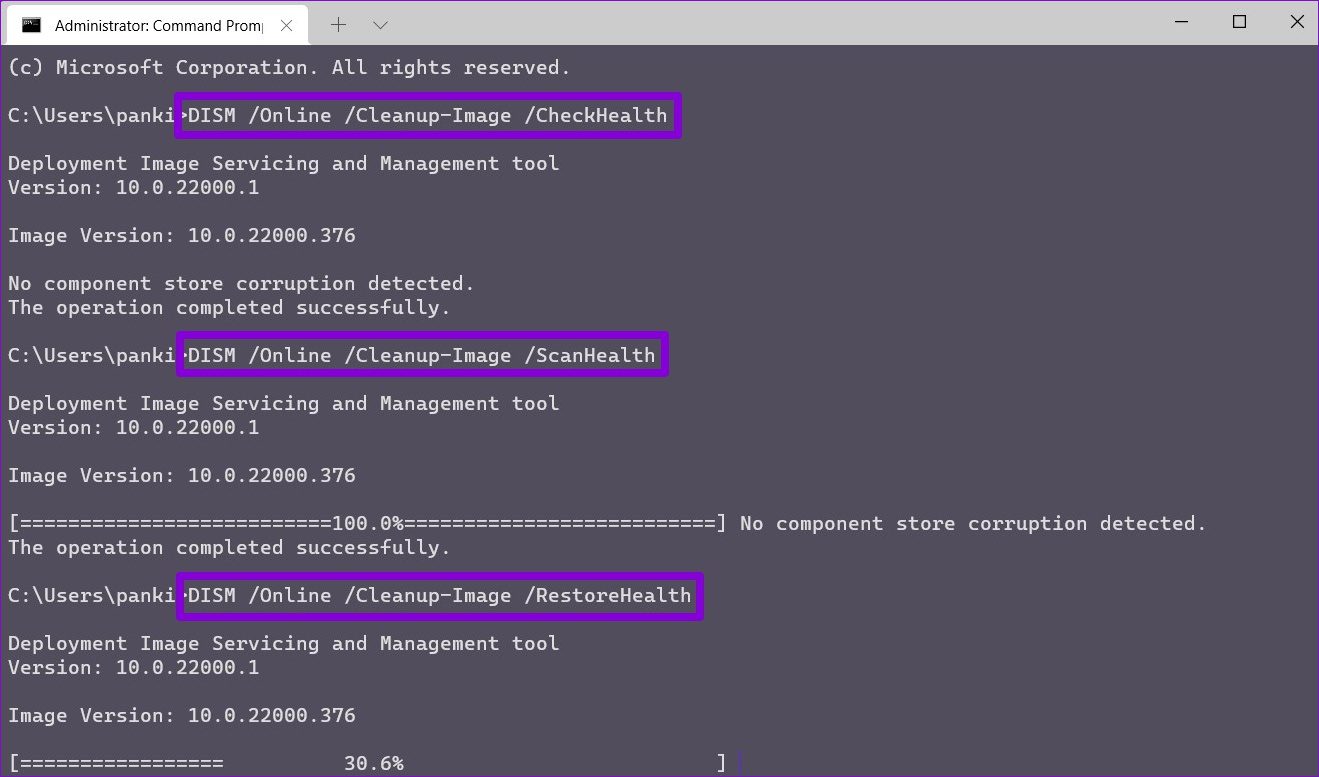
Next, run the DISM (Deployment Image Servicing and Management) scan. Besides scanning system files, it will also download any missing internal system files from Microsoft’s server if required. Open the Windows Terminal with admin rights and type the following commands.
Restart your PC afterward and see if the error is fixed.
4. Update Drivers
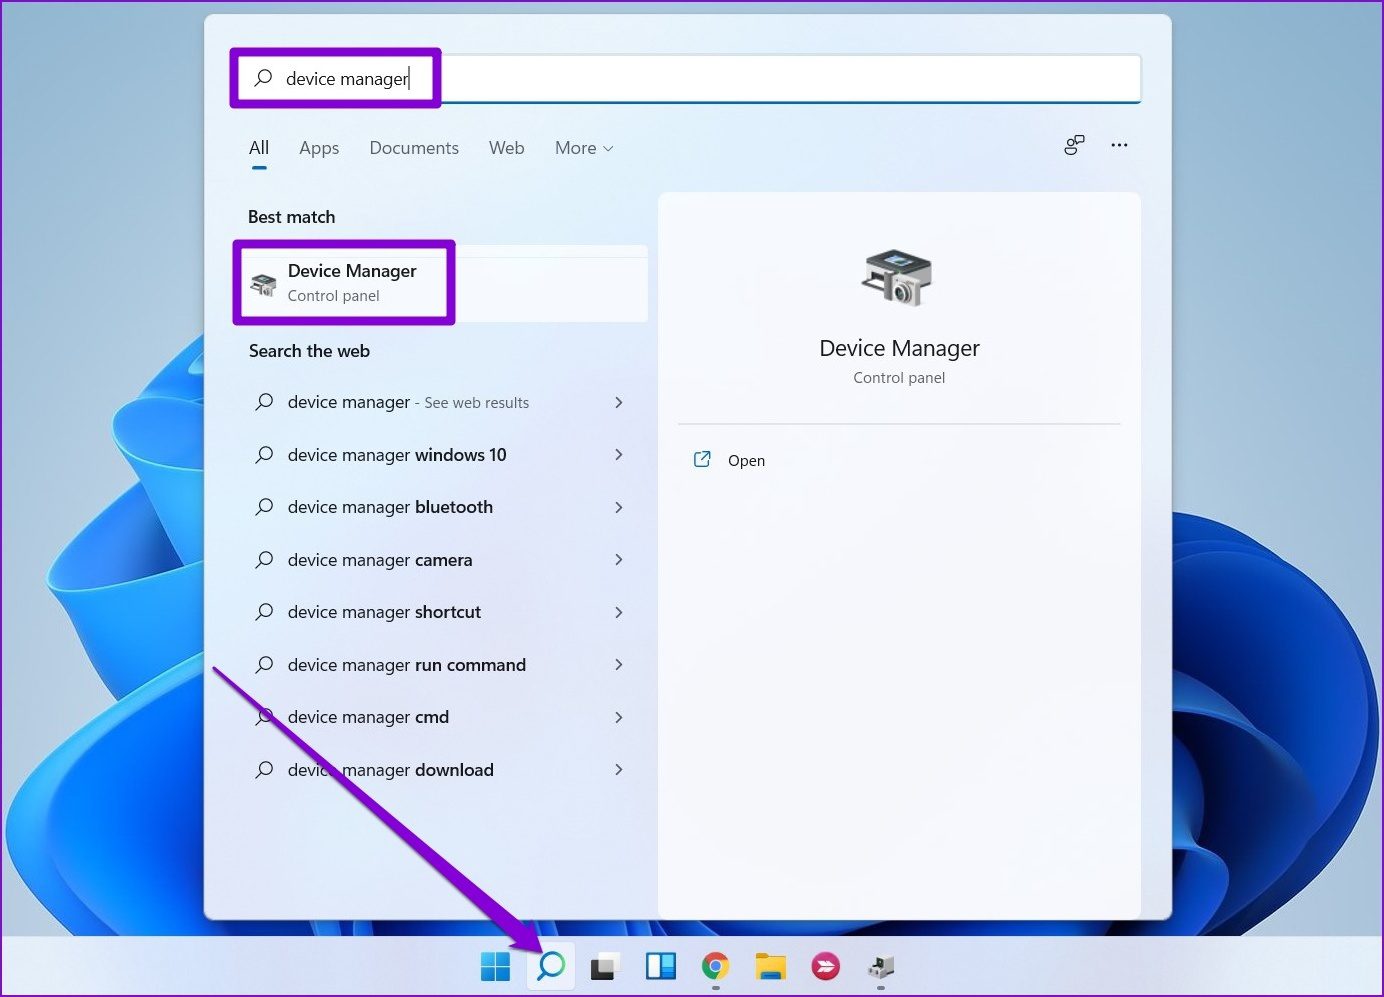
Malfunctioning drivers is yet another likely cause of a stop code ‘critical process died’. It’s worth checking if any of those drivers need an update or repair. Step 1: Click on the Search icon on the Taskbar, type in device manager, and press Enter.
Step 2: Scroll through the list and see if any drivers have a yellow exclamation sign. If found, right-click on it and select the Update Driver option.
5. Scan PC for Malware
If your PC has been affected by malware or virus then you witness such errors. You can try running a full system scan of your PC with Windows Defender. Alternatively, you can also use any of your preferred antivirus programs for this purpose.
6. Uninstall Recent Windows Updates
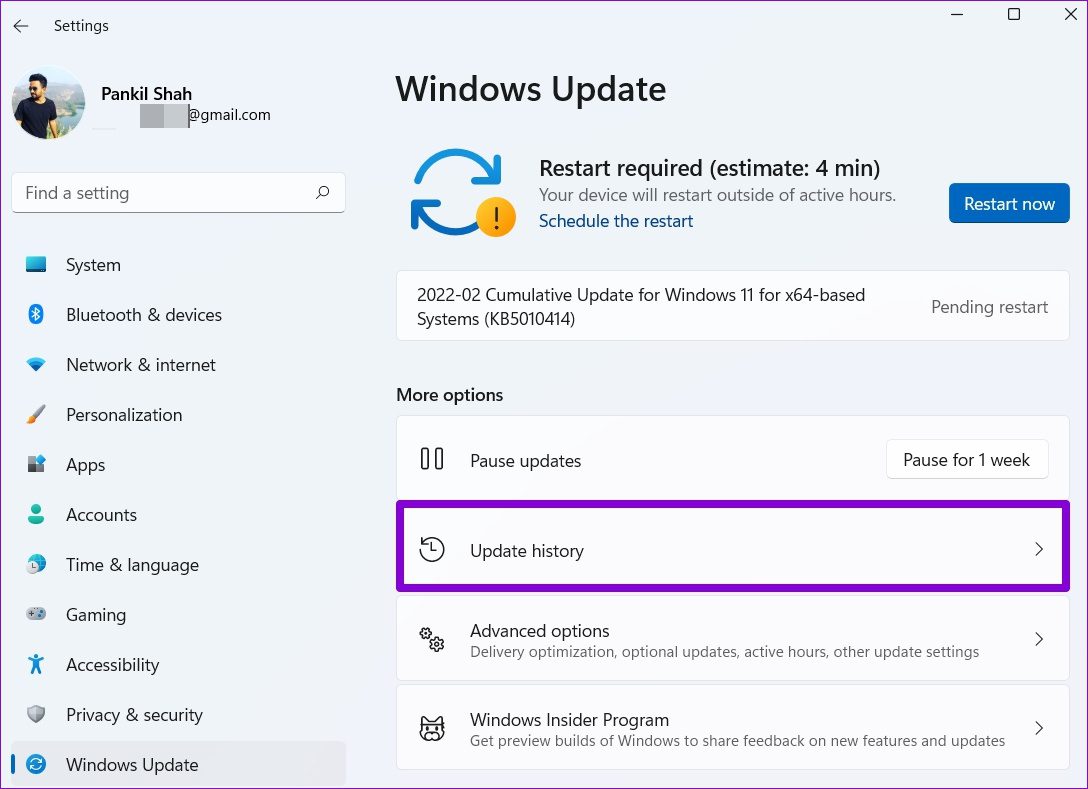
At times, software updates can also go wrong. If the error has only occurred after installing a software update, then you can try uninstalling any recently installed Windows updates. Here’s how. Step 1: Press Windows key + I to launch the Settings app. Navigate to the Windows Update tab and click on Update history.
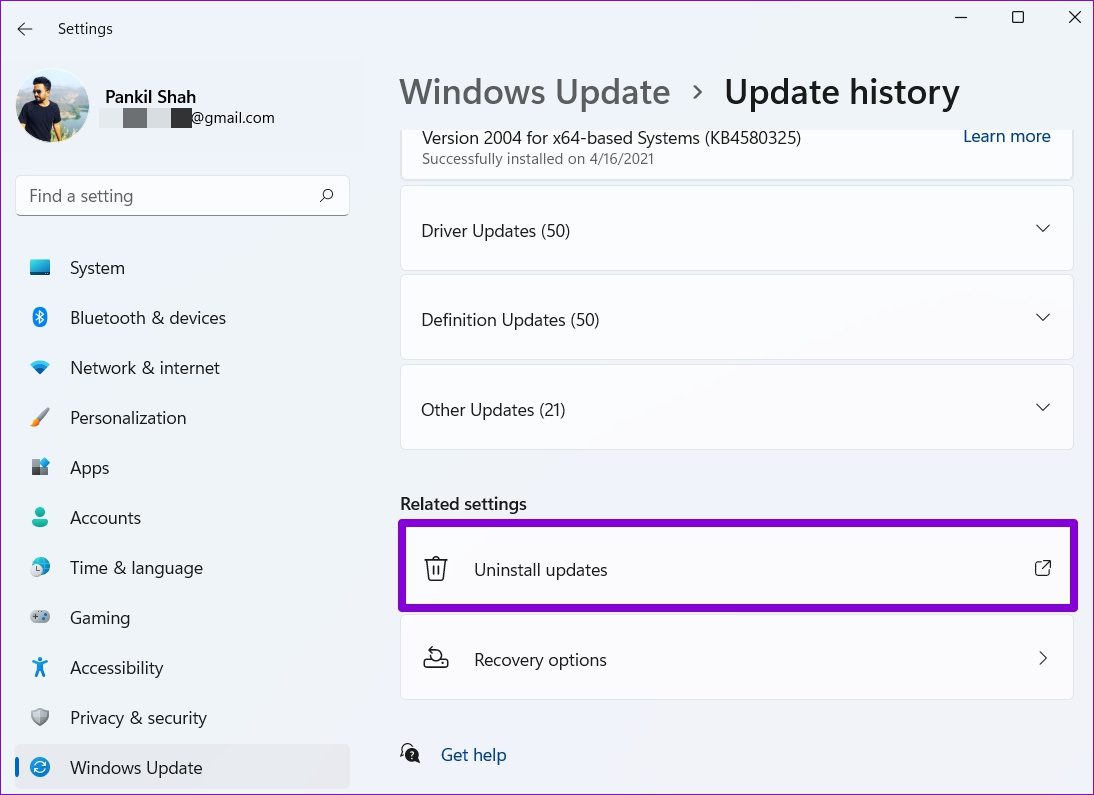
Step 2: Scroll all the way down to Related settings and click on Uninstall updates option.
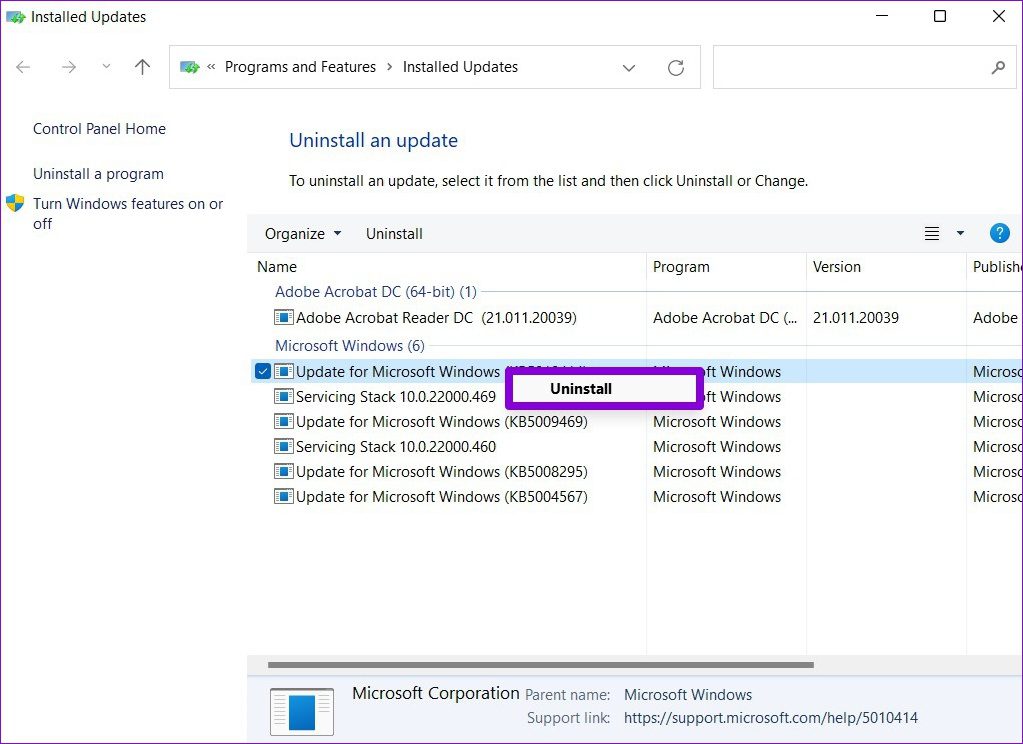
Step 3: Select the recently installed update and click on Uninstall.
7. Try System Restore
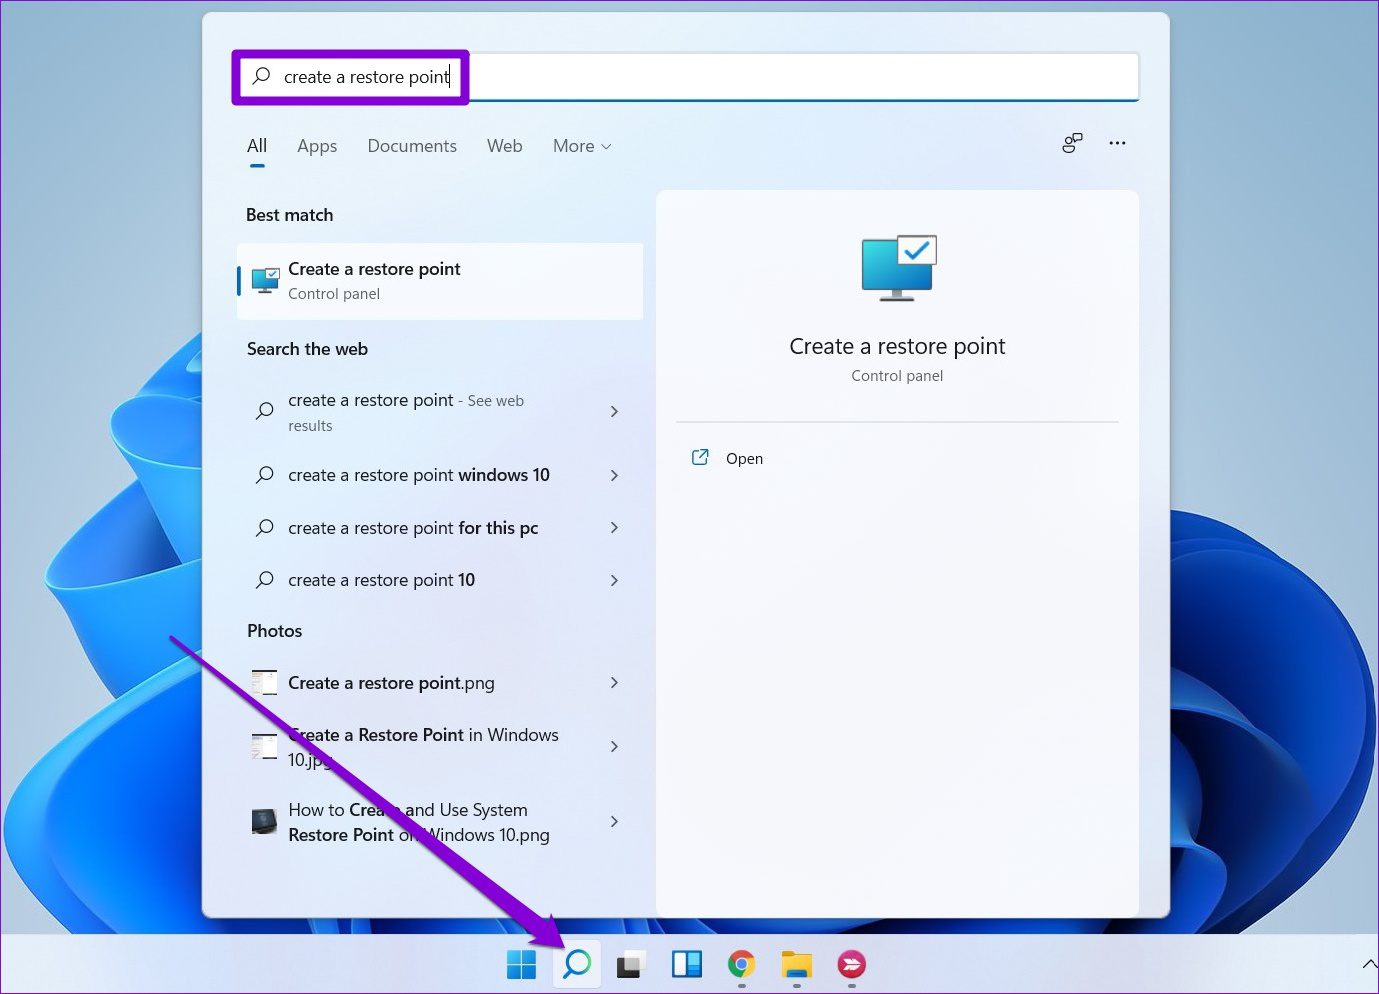
System Restore on Windows periodically takes a backup of the entire system. So, if the above solutions don’t help, you can use the system restore to revert to a point before the error first started appearing. Here’s how. Step 1: Click on the Search icon on the Taskbar. Type in create a restore point and press Enter.
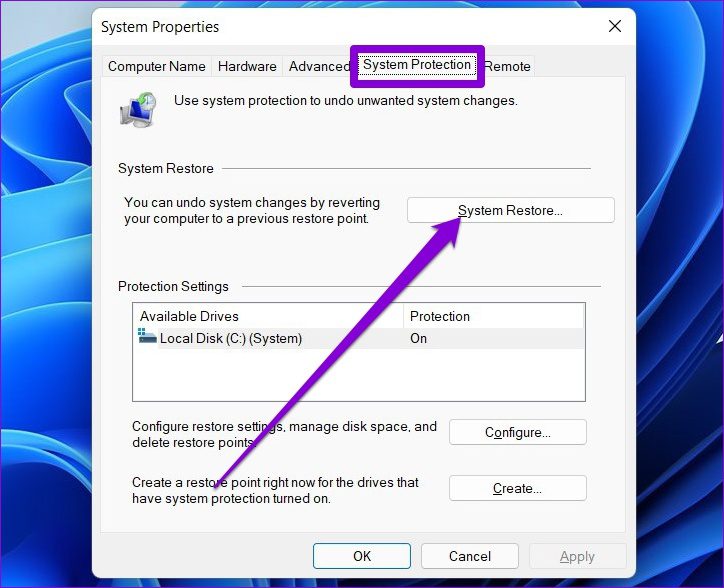
Step 2: Under the System Protection tab, click on the System Restore button.
Step 3: Here, you can either go with the recommended restore point or pick one yourself by choosing the second option.
Pick a relevant restore point and hit Next. Then follow the on-screen instructions to perform the system restore.
Trust the Process
Such system errors can be frustrating as they keep you from using your PC for an extensive amount of time or even lead to loss of unsaved work at times. We’re confident that one of the solutions mentioned above has helped you deal with the error, and you’re back to enjoying the Windows 11.
